A sudden plumbing leak causes instant panic. Water is spraying everywhere, and your first thought is how to make it stop—fast. Here’s the good news: you have more control than you think. The key to stopping the chaos is a small, often-overlooked device called the shut-off valve under sink. Knowing where to find this valve and how to turn it is the difference between a small cleanup and a catastrophic flood. It’s your first line of defense, giving you the power to stop a problem in its tracks before you even call for help.
Key Takeaways
- Locate Your Valves Before You Need Them: The shut-off valve under each sink and behind every toilet is your first line of defense against a leak. Knowing exactly where they are and how to turn them (a lever perpendicular to the pipe is ‘off’) lets you control a plumbing issue instantly.
- Exercise Your Valves to Prevent Seizing: Valves that sit unused can get stuck from mineral buildup, making them useless in an emergency. Twice a year, gently turn each valve completely off and then back on again to keep the internal parts moving freely.
- Recognize the Signs of a Failing Valve: A valve that drips, shows rust, is too hard to turn, or won’t fully stop the water has reached the end of its life. These are clear indicators that it’s time to call a professional for a replacement before it causes a major flood.
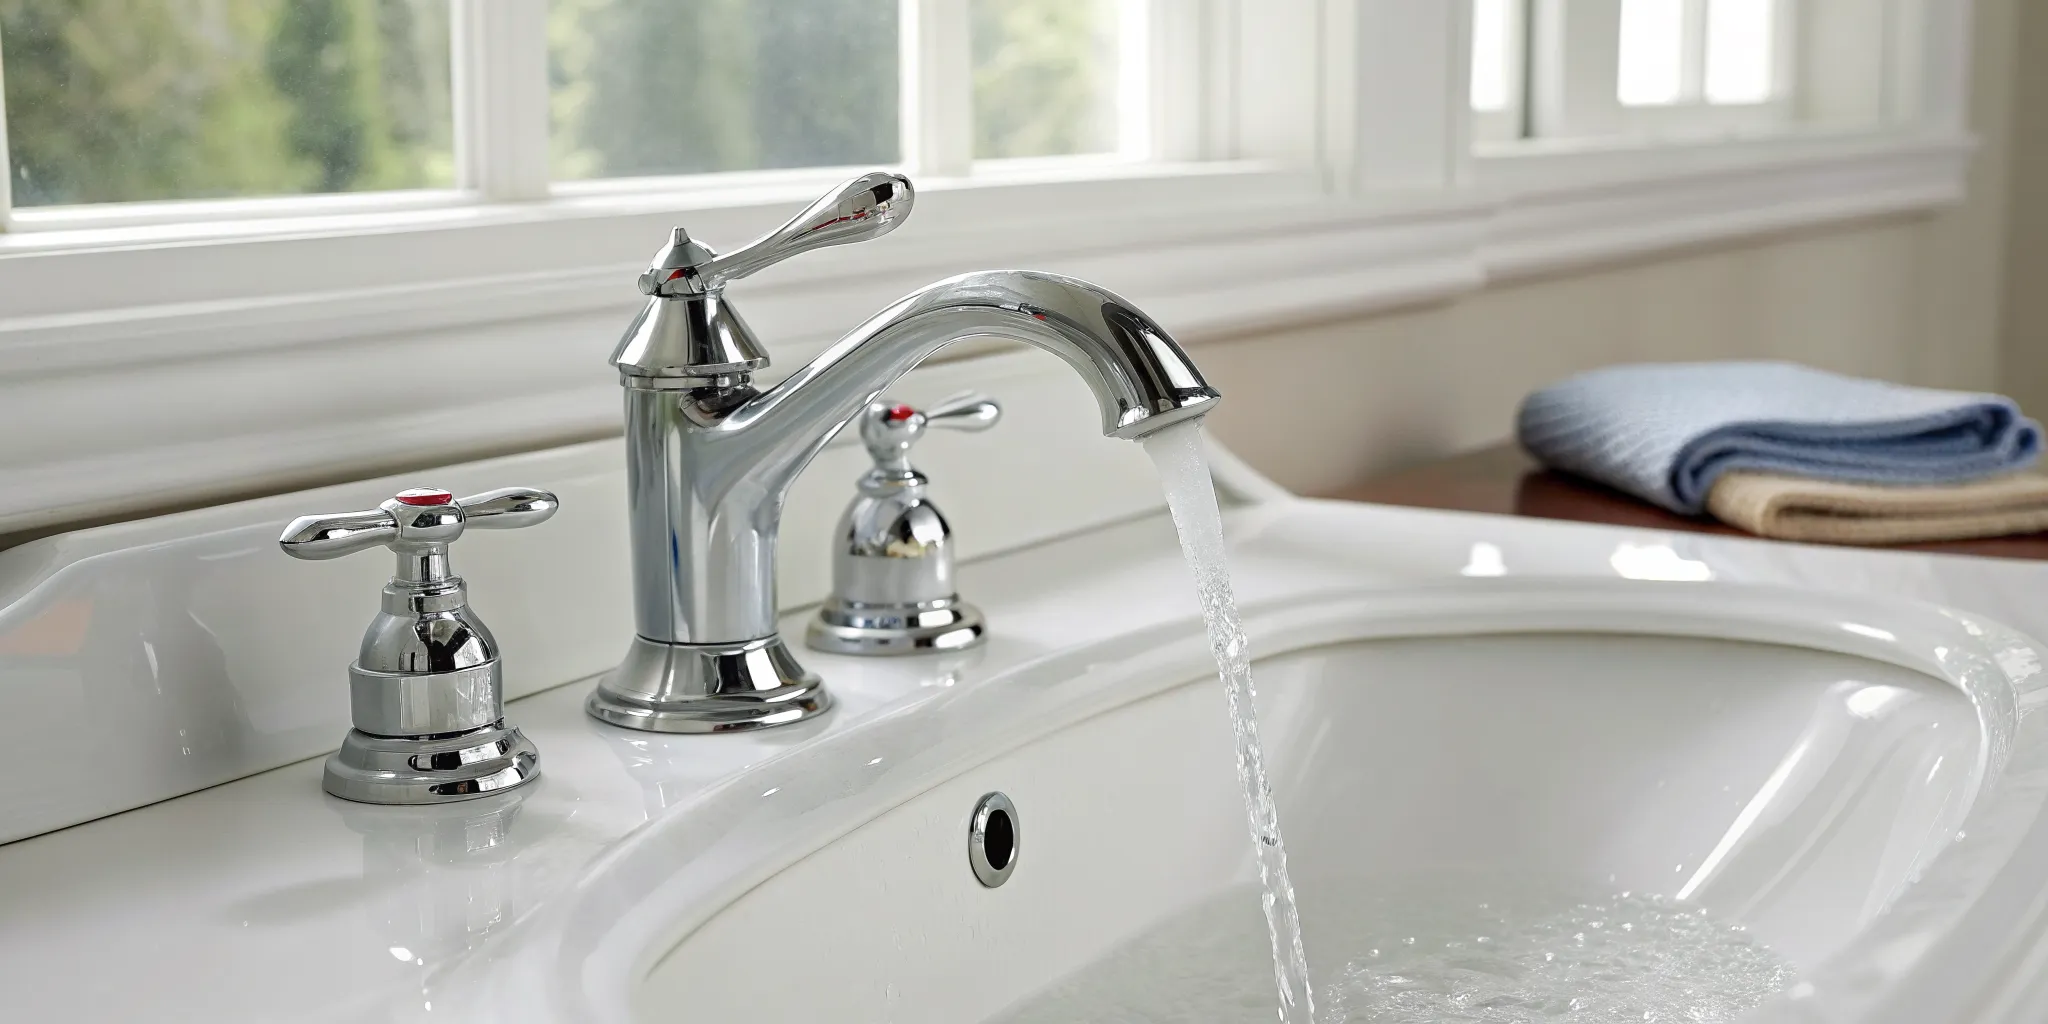
What’s That Little Knob Under Your Sink?
If you’ve ever peeked into the cabinet under your kitchen or bathroom sink, you’ve probably noticed a small, unassuming knob or lever on the pipes leading to the faucet. That little component is a shut-off valve, and it’s one of the most important parts of your home’s plumbing. Also known as a stop valve or fixture shutoff, its job is simple but crucial: it allows you to stop the flow of water to that specific fixture without having to turn off the water to your entire house.
This is incredibly useful for everything from fixing a leaky faucet to installing a new dishwasher. Instead of causing a major disruption for the whole household, you can isolate the water supply right where you need to work. Think of it as a local control switch for your water. Every sink, toilet, and washing machine in your home should have one. Understanding what it is and how it works is the first step in handling minor plumbing tasks and preventing major water-related headaches. Knowing your way around these small but mighty valves gives you a sense of control and is a key part of being a confident homeowner.
How Shut-Off Valves Protect Your Home
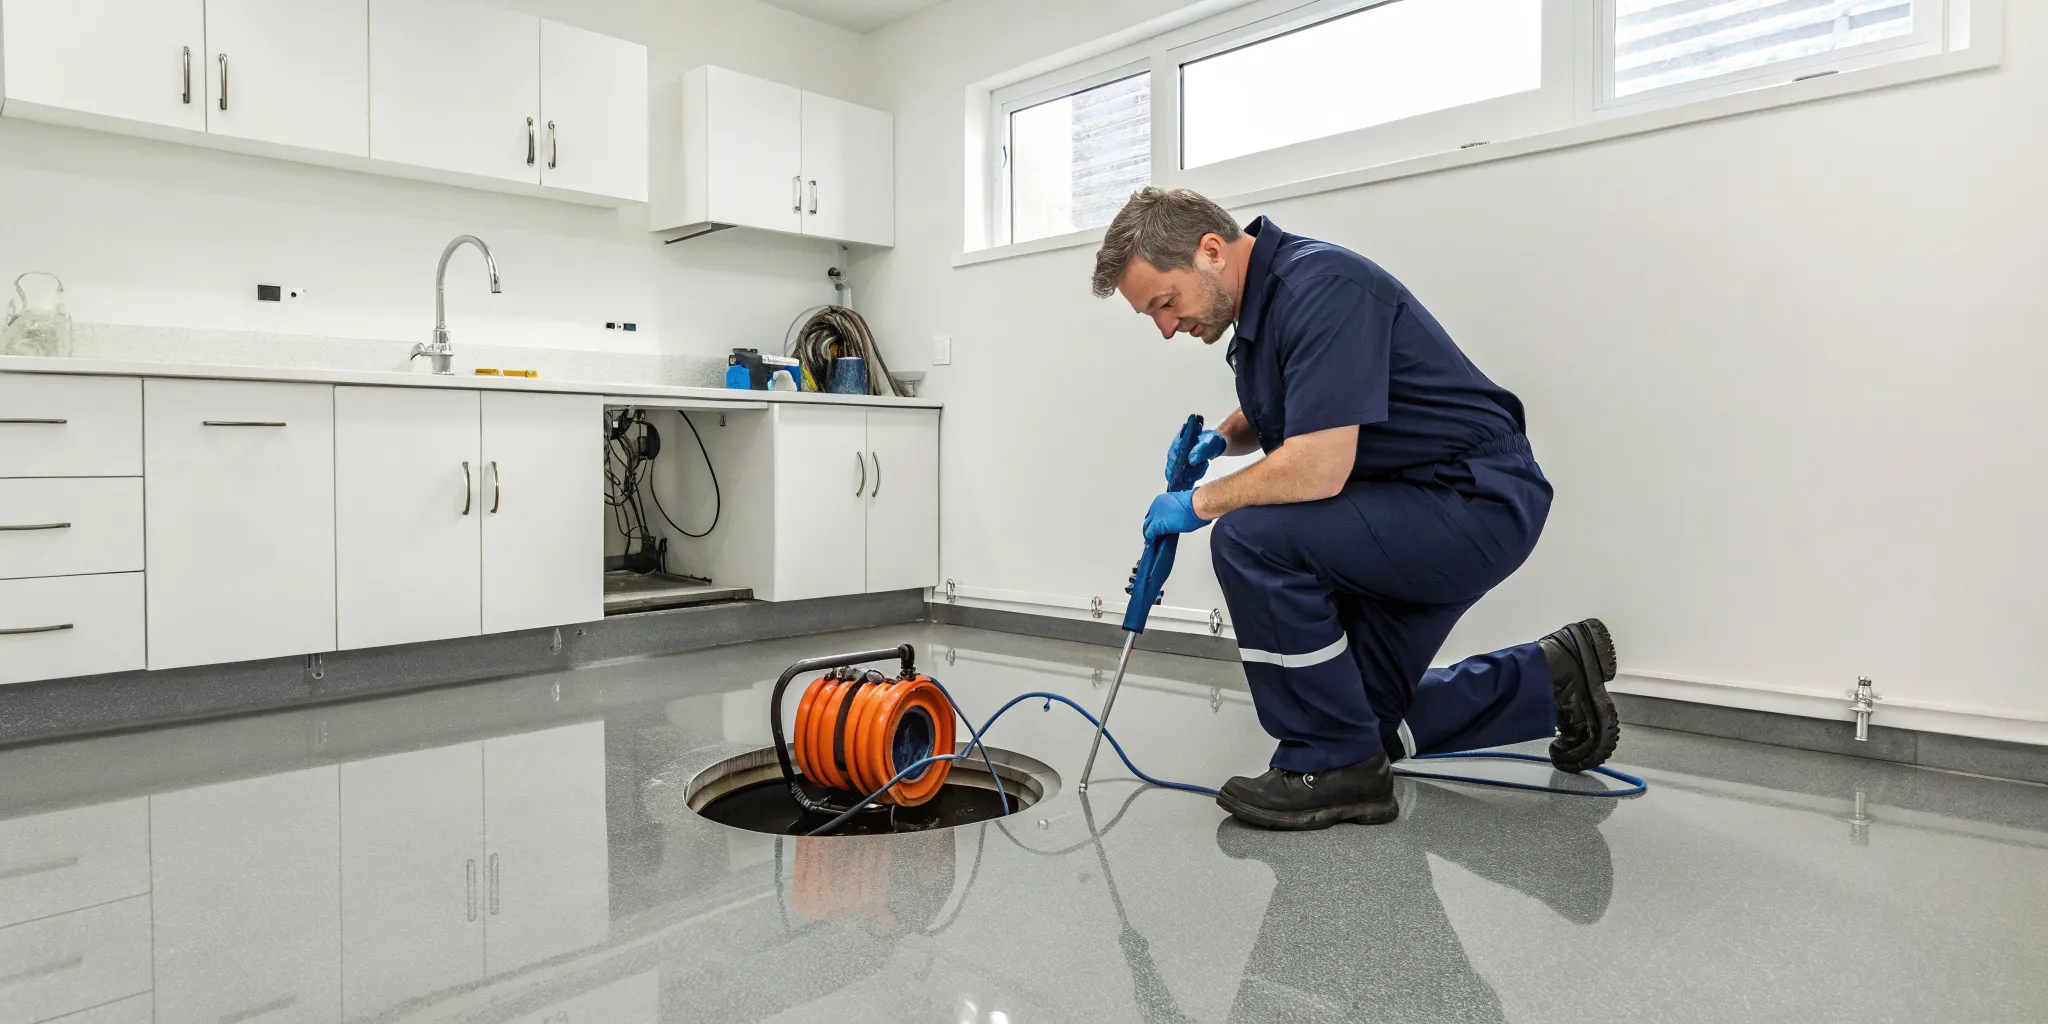
When a plumbing issue strikes, things can get messy fast. A burst pipe under the sink or a toilet that won’t stop running can quickly turn into a serious problem. This is where your shut-off valve becomes your best friend. Knowing exactly where it is and how to use it can save you from significant water damage. In a panic, being able to quickly stop the water flow gives you the time you need to assess the situation and call for help without the house flooding around you.
Think of it as the emergency brake for your plumbing. It’s the immediate action you can take to control a crisis before it gets worse. Whether you’re dealing with a small drip or a major leak, shutting off the water at the source is always the first step. If you ever face a situation you can’t handle, stopping the water flow first makes it much easier for a professional to take over when they arrive for an emergency plumbing repair.
How Does a Shut-Off Valve Actually Work?
While all shut-off valves do the same job, they don’t all work the same way. They generally fall into two categories: multi-turn and quarter-turn valves. A multi-turn valve has an oval or round handle that you have to twist several times to completely stop the water, much like a garden hose spigot. Inside, it uses a rubber washer to press down and seal off the flow.
A quarter-turn valve, on the other hand, has a small, straight lever. As its name suggests, you only need to turn the handle 90 degrees (a quarter turn) to go from on to off. These use a metal ball with a hole through it to control the water. While they can be a bit more expensive, quarter-turn valves are generally considered more reliable and less likely to get stuck or fail over time, making them a great choice for any plumbing updates you might be planning.
What Kind of Shut-Off Valve Do You Have?
Before you can tackle a repair or replacement, you need to know what you’re working with. Shut-off valves, also called “stops,” come in a few different styles, and identifying yours is usually a simple visual check. Knowing the type helps you understand how it works and what you’ll need if you ever decide to replace it. Most plumbing setups use a combination of the types below, and understanding them is the first step in any under-sink project. Let’s walk through the common valves you’ll find in most homes.
The 3 Main Types: Ball, Compression, and Gate
The three main players in the shut-off valve world are ball, compression, and gate valves. Ball valves are the modern standard, common in newer homes. You can spot them by their straight lever handle—when it’s parallel to the pipe, the water is on; perpendicular, it’s off. Gate valves have a round, wheel-like handle that you turn multiple times to open or close an internal “gate.” They’re more common in older homes and can be prone to sticking. Finally, compression valves are designed to be installed on rigid copper pipes without any soldering, making them a popular choice for DIY fixes.
Expert Insights: Choosing the Most Reliable Valve
When it’s time to replace a shut-off valve, you want to choose one that will stand the test of time. Not all valves are built the same, and picking a reliable one can save you from a world of trouble down the road. A cheap, poorly made valve might seem like a good deal initially, but if it fails, the cost of water damage will be far greater than the few dollars you saved. Making a smart choice here is about investing in peace of mind. Whether you’re updating the plumbing during a bathroom remodel or simply replacing a leaky stop, understanding what makes a valve dependable is key to protecting your home from unexpected plumbing emergencies.
Quarter-Turn vs. Multi-Turn Valves: The Plumber’s Choice
Professionals almost universally agree that quarter-turn valves are the superior choice. Unlike older multi-turn models that rely on a rubber washer to slowly pinch off water flow, quarter-turn valves use a durable metal ball. A quick 90-degree turn of the lever is all it takes to completely stop the water. This design is not only faster and easier to operate in a hurry, but it’s also far more reliable. The internal components are less prone to corrosion and seizing, which is a common problem with multi-turn valves that sit unused for years. If you’re upgrading your fixtures, switching to a quarter-turn valve is one of the smartest, most effective improvements you can make.
A Note on Push-Fit Valve Reliability
You may have seen push-fit valves at the hardware store, often marketed as a quick, tool-free solution for DIY projects. While they offer undeniable convenience and can work with several types of pipe, there are some long-term reliability concerns. These valves simply push onto the pipe, using an internal ring to create a seal. Some homeowners and plumbers worry that high water pressure or water hammer could potentially cause these fittings to loosen or fail over time. For a critical connection point like a shut-off valve, many prefer the security of a more permanent, professionally installed connection to ensure it holds strong for years to come.
Trusted Brands Professionals Recommend
When it comes to plumbing parts, brand reputation matters. For shut-off valves, professionals often turn to trusted names known for quality manufacturing. BrassCraft is a brand that is consistently recommended for its durable and reliable quarter-turn angle stop valves. Investing in a high-quality valve from a reputable brand is a small but crucial step in ensuring your plumbing system is secure. When you hire a professional service like Mr. Pipey for a toilet replacement or sink installation, you can rest assured that we use only time-tested, professional-grade parts to protect your home and give you lasting results.
Does Your Valve Come from the Wall or the Floor?
This distinction is pretty simple and comes down to the direction your pipes are running. Take a look under your sink. If the water supply pipe comes out horizontally from the wall, you’ll have an angle valve. This valve makes a 90-degree turn to connect to the faucet supply line, directing the water flow upward. It’s the most common setup in modern homes. If your water pipe comes up vertically from the floor, you’ll have a straight valve. It doesn’t need to make a turn and connects straight up to the faucet line. Choosing the right one is all about matching the layout of your existing plumbing.
Understanding Valve Materials, Sizes, and Connections
Once you’ve identified the type of valve you have, the next step is to understand its specific characteristics. Not all valves are created equal, and getting the right replacement involves matching the material, size, and connection type to your existing plumbing. Choosing the wrong part can lead to leaks and frustration, turning a simple fix into a much bigger problem. Knowing these details will make any trip to the hardware store more efficient and ensure your repair is secure and long-lasting.
Common Valve Materials
Shut-off valves are typically made from one of three materials: brass, stainless steel, or plastic. Brass is a very common choice because it’s durable and resists corrosion well, making it a reliable option for most homes. Stainless steel is another excellent, long-lasting choice known for its superior strength and resistance to rust. You’ll often find plastic valves in budget-friendly applications or with certain types of plastic piping. While they are functional and inexpensive, they generally aren’t as durable as their metal counterparts. For a dependable, long-term solution, most professionals recommend sticking with high-quality brass or stainless steel.
Standard Valve Sizes and Connection Types
Valves have two connection points: one that attaches to the water supply pipe and another that connects to the flexible line running to your faucet or toilet. Getting these sizes right is critical. A common configuration you might see is “1/2-inch F.I.P. by 3/8-inch compression.” This means the valve connects to a 1/2-inch threaded pipe coming from the wall and has a 3/8-inch compression fitting for the faucet line. Before you buy a replacement, check the sizes on your current valve. If you’re unsure, taking a clear photo or bringing the old part with you can save a lot of guesswork. If you find yourself overwhelmed by the options, our team at Mr. Pipey can handle the toilet and faucet repairs for you, ensuring the perfect fit every time.
What About Three-Way Shut-Off Valves?
In some situations, you might find a valve that looks a little different. If you have a fixture that needs to send water to two different places, you likely have a three-way shut-off valve, also known as a dual-outlet stop valve. The most common place to find one is under the kitchen sink, where a single cold water line often needs to supply both the main faucet and an appliance like a dishwasher or an ice maker. This valve has one inlet that connects to the water supply pipe and two outlets that allow you to run separate lines to each destination.
The primary benefit of this setup is convenience. It simplifies the plumbing by allowing two devices to draw from a single water source. Most dual-outlet valves have a single handle that controls the water flow to both outlets at the same time. This is perfect for most kitchen setups. If you’re planning a kitchen upgrade or adding a new appliance that requires a water line, you might need to switch from a standard valve to a three-way valve. While it’s a straightforward concept, ensuring a leak-free installation is key. For a job like this, it’s often best to call in a professional to make sure everything is connected correctly and securely. You can always contact us for expert help with all your plumbing needs.
Choosing the Right Valve for Your Pipes
It’s crucial that your shut-off valve is compatible with your plumbing pipes. Different valves are made for specific materials, like copper, PEX, or CPVC. Using the wrong type can lead to leaks and a poor connection. If you’re replacing a valve, the easiest way to get it right is to bring the old one with you to the hardware store. But if you’re feeling even a little unsure, it’s always best to get a professional opinion. A quick call for expert plumbing solutions can save you from a major headache and a potential water damage situation down the road.
For Copper Pipes: Sweat Stop Valves
If your home has rigid copper pipes, you’ll likely find sweat stop valves connected to them. The term “sweat” refers to the soldering process used to install them. A plumber uses a torch to heat the valve and pipe, applying solder to create a permanent, watertight seal. Because this requires specialized tools and a good amount of skill to do correctly without damaging the pipes, it’s not a typical DIY project. Once a sweat valve is on, it’s not easy to remove, making it a durable but inflexible option. If you have this setup and need a replacement, it’s best to call in a professional to handle the job safely and ensure a leak-free connection.
For Galvanized or Brass Pipes: Iron Pipe Stop Valves
In many older homes throughout Metro Detroit, you might find galvanized steel or brass pipes. These pipes have threaded ends, which call for a specific type of valve: the iron pipe stop. Unlike sweat valves that require soldering, these valves simply screw onto the threads of the pipe. While it sounds straightforward, it’s important to ensure the threads are clean and properly sealed with plumber’s tape or pipe dope to prevent leaks. Getting a tight, secure fit without cross-threading is key. If you’re dealing with old, corroded pipes, this seemingly simple task can become complicated, so don’t hesitate to seek expert plumbing solutions.
For CPVC Pipes: Glued Shutoff Valves
CPVC is a type of rigid plastic pipe, often light tan or off-white in color. The shut-off valves designed for this material are installed using a special solvent cement. The process involves applying a primer and then the cement to both the pipe and the inside of the valve before pushing them together. This creates a chemical bond that essentially fuses the two pieces into one. The connection is permanent—once it’s glued, the only way to remove the valve is to cut the pipe. This makes precision crucial, as there are no do-overs. It’s a reliable method, but one that leaves no room for error.
For PEX Tubing: Crimped Shutoff Valves
PEX tubing is a flexible plastic pipe that has become very popular in modern plumbing for its versatility and durability. Shut-off valves for PEX have a ribbed end, called a barb, that is inserted into the tubing. A special metal ring—either a crimp ring or a clamp ring—is then placed over the connection and tightened with a specific crimping tool. This tool compresses the ring, creating a secure, watertight seal around the barb. While it’s a very effective system, it does require a dedicated PEX crimper, which isn’t something most homeowners have in their toolbox. If you need a PEX valve replaced, contacting a professional ensures it’s done with the right equipment.
How to Find and Identify Your Shut-Off Valve
Knowing where your shut-off valve is and what it looks like is a fundamental piece of homeownership. It’s the first thing you’ll reach for when you have a leaky faucet or a more serious plumbing issue. Don’t wait for an emergency to get acquainted with these crucial little devices. Let’s walk through how to find and identify the shut-off valves under your sink so you can act quickly and confidently when you need to.
Finding the Shut-Off Valve Under Your Sink
Okay, time for a little exploration. Open the cabinet doors beneath your kitchen or bathroom sink. You’re looking for two small valves connected to the pipes coming out of the wall, leading up to the faucet. These are your fixture shut-off valves, also known as “stops.” Their job is to let you turn off the water to just that one sink without cutting off the water to your entire house—super handy for minor repairs. They usually have a small, oval, or round handle that’s either silver-toned or brass. You’ll see one on the hot water line and one on the cold.
Hot vs. Cold: How to Tell Your Water Lines Apart
You’ve found the valves—great! Now, which one is which? In most modern homes, you’ll find a helpful color code: blue for cold and red for hot. If there are no color indicators, don’t worry. The hot water line is almost always on the left, and the cold water line is on the right. You can also carefully touch the pipes (if the hot water has been running recently) to feel a temperature difference. Each fixture, from your toilet to your washing machine, will have its own set of these smaller valves. Knowing which is which is key for any toilet repair or faucet fix.
How to Identify Your Valve Type by Sight
Now, let’s get a closer look at the valve itself. Most under-sink valves are “angle stop” valves, meaning the water enters from the wall and makes a 90-degree turn up toward the faucet. The handle style can tell you what kind of valve you have. A small, football-shaped or round handle usually indicates a multi-turn valve, which you have to turn several times to shut off. A small lever-style handle typically means you have a quarter-turn ball valve, which only needs a simple 90-degree turn. If your valve looks old, corroded, or you’re dealing with a leak you can’t stop, it might be time for a professional look. Our team handles all kinds of plumbing services and can get you sorted out.
How to Use Your Shut-Off Valve (The Right Way)
Knowing how to use the shut-off valve under your sink is one of the most empowering skills a homeowner can have. It’s your first move when you’re installing a new faucet, fixing a running toilet, or dealing with a sudden leak. Acting quickly can be the difference between a small cleanup and a major water damage headache. The good news is that it’s incredibly simple. Once you know how to find the valve and which way to turn it, you’ll be prepared to handle minor plumbing tasks and emergencies with confidence.
How to Turn Off the Water Supply
First things first, locate the valve. You’ll find it on the water supply line running from the wall to your faucet or toilet. Most modern valves have a small, lever-style handle. The rule of thumb is simple: if the handle is parallel to the pipe, the water is on. To turn it off, give the handle a quarter-turn so it’s perpendicular to the pipe. Think of it as creating a roadblock for the water. For older, round handles, remember “righty-tighty, lefty-loosey”—turn it clockwise to close it. Don’t force it, but give it a firm turn until it stops. This simple action stops water flow instantly, letting you work on a toilet repair without any unwanted drips.
What to Do in a Plumbing Emergency
If you’re facing a serious leak or a burst pipe, don’t panic. Your first and most important step is to shut off the water. If the leak is coming from a specific fixture, use its local shut-off valve. But if you can’t, or if it’s a major issue, go straight for your home’s main water shut-off valve. This will stop all water from entering your house and prevent catastrophic flooding. Once the water is off, open a faucet at the lowest level of your home, like in the basement or a first-floor sink, to drain any remaining water from the pipes. This minimizes pressure and further damage while you call for emergency plumbing help.
How to Safely Turn the Water Back On
After you’ve finished your repair or a professional has fixed the problem, it’s time to restore the water flow. The key here is to do it slowly. Turning the valve back on too quickly can cause a “water hammer”—a loud banging sound that sends a damaging shockwave through your pipes. Gently turn the handle counter-clockwise (or back to its parallel position) to gradually let water back into the lines. Once it’s fully open, check around the valve and the fixture for any drips or leaks. Let a faucet run for a minute to push any air out of the pipes. If you spot any new leaks, shut the water off again and contact a professional to take a look.
Is It Time to Replace Your Shut-Off Valve? 4 Telltale Signs
Your shut-off valves are the unsung heroes of your plumbing system, sitting quietly under sinks and behind toilets, ready for action. But like any component, they don’t last forever. Mineral buildup, corrosion, and simple wear and tear can cause them to fail, often when you need them most. Ignoring a faulty valve can turn a small leak into a major flood, causing damage to your cabinets, floors, and everything in between.
That’s why it’s so important to give them a quick check every so often. You don’t need to be a plumbing expert to spot the warning signs. A simple visual inspection can tell you a lot about the health of your valves and help you catch a small issue before it becomes a catastrophe. So, how do you know when it’s time for a replacement? Look out for these four clear signs that your shut-off valve is on its last legs and needs to be replaced before it causes a serious headache.
Sign #1: You Spot Leaks, Drips, or Puddles
The most obvious sign of a problem is, of course, water where it shouldn’t be. If you see a puddle in the cabinet under your sink or a slow drip coming from the valve itself, pay attention. A leak around the handle can sometimes be fixed by gently tightening the packing nut right behind it, but be careful not to overtighten it. If the drip is coming from the valve body or where the pipes connect, the valve’s internal seals have likely failed. Any persistent leak is a clear signal that the valve is compromised and can’t be trusted to hold back water. It’s best to address these drips before they become a serious emergency plumbing situation.
Sign #2: The Handle Is Stuck or Hard to Turn
You should be able to turn your shut-off valve with relative ease. If the handle is completely stuck or requires a lot of force to budge, it’s a sign of internal corrosion or mineral buildup. While you can try a lubricant like WD-40, be very careful. Applying too much force with a wrench or pliers can snap the valve stem, causing an uncontrolled gush of water. A valve that won’t turn is useless in an emergency. If you can’t get it to move with gentle pressure, it’s safer to plan for a replacement than to risk breaking it and creating a much bigger problem.
Sign #3: The Water Won’t Completely Shut Off
The entire job of a shut-off valve is to stop the flow of water to a fixture. If you turn the handle all the way to the “off” position and water is still running from the faucet, the valve has failed internally. The washer or seal inside is worn out and can no longer create a proper seal. This is a critical failure because it means you have no way to isolate that fixture if you need to make a repair or stop a leak. Before attempting any fix, you’ll need to shut off the main water supply to your house to prevent a flood. This is a definite sign that a replacement is needed right away.
Sign #4: You See Rust, Corrosion, or Mineral Buildup
Take a close look at the valve itself. Do you see any rust spots, flaking metal, or a crusty, greenish-white buildup? These are all signs of corrosion, which is slowly eating away at the metal and weakening the valve body. This damage compromises the integrity of the valve, making it prone to cracking and leaking under pressure. Think of it as a ticking time bomb waiting to go off. Replacing a visibly corroded valve is a smart, proactive move that can prevent a catastrophic failure and ensure you have reliable plumbing services when you need them most.
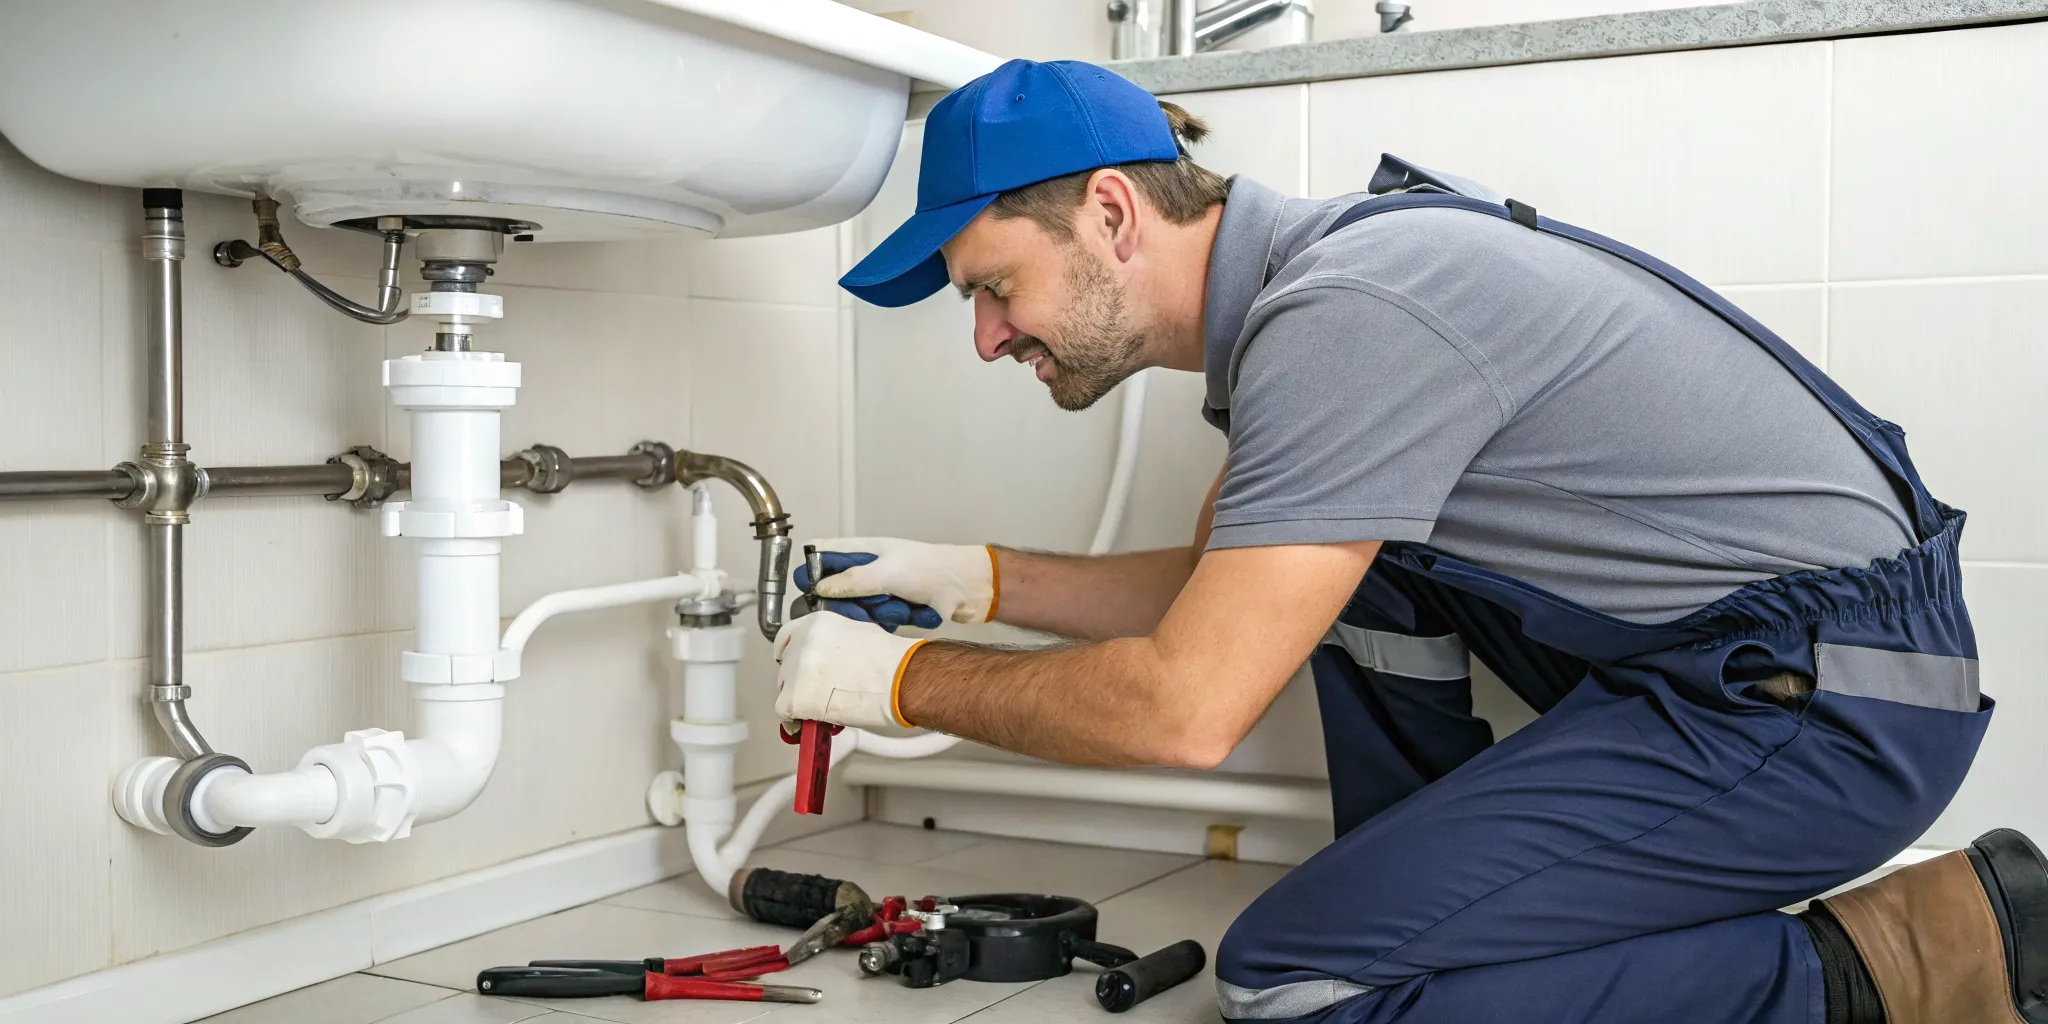
How to Replace a Shut-Off Valve Yourself
Feeling ambitious? Replacing a shut-off valve is one of those home plumbing tasks that feels incredibly rewarding when you get it right. It’s a common project that can save you a service call and give you a better understanding of how your home’s plumbing works. Whether you’re dealing with a persistent drip under the kitchen sink or a valve that’s completely frozen in place, swapping it out for a new one can solve the problem for good. Before you start, it’s important to know that while this is a manageable DIY job for many, it does require the right tools and a bit of patience. The goal is to fix a problem, not accidentally create a bigger one, like a leak inside your cabinet.
This guide will walk you through the entire process, from gathering your supplies to turning the water back on with confidence. We’ll cover the safest way to prep your space, the step-by-step process for the replacement, and—most importantly—how to recognize when a seemingly simple job might be better left to the pros. We’ll focus on using modern, user-friendly fittings that don’t require complex skills like soldering, making the project accessible even if you’re not a seasoned DIYer. Taking the time to prepare properly is the key to success and will prevent a simple repair from turning into a major headache. By the end, you’ll be ready to decide if this is a project you want to tackle yourself.
What Tools and Materials Do You Need?
First things first, let’s get your toolkit ready. Having everything on hand before you start makes the job go much smoother. You’ll need a pipe cutter to get a clean cut on the pipe when you remove the old valve. You’ll also need two adjustable wrenches—one to hold the pipe and one to turn the valve fittings. For the new valve, many DIYers recommend a push-to-connect fitting, like a SharkBite valve. They are incredibly user-friendly because they don’t require any soldering. Just make sure you buy the correct size for your pipe! A small bucket and some old towels are also essential for catching any leftover water.
Prepping Your Workspace for Safety
Safety is always the most important step in any plumbing project. Before you even think about touching that old valve, you need to shut off the main water supply to your house. Once the main is off, open a faucet on the lowest level of your home (like a basement sink) to drain any remaining water from the pipes. This will minimize mess and prevent a surprise shower. Place your bucket and towels under the sink where you’ll be working. If you ever find yourself in a situation that feels out of control, don’t hesitate to call for emergency plumbing help. It’s always better to be safe than sorry.
How to Remove the Old Valve and Install the New
With your space prepped, it’s time for the main event. Start by using your pipe cutter to make a clean, straight cut on the pipe to remove the old valve. Once it’s off, wipe the end of the pipe clean. Now, grab your new push-to-connect valve. These fittings are designed for a simple installation—just push the valve firmly onto the end of the pipe until it clicks or stops. It should feel secure. That’s it! Once the new valve is in place, you can slowly turn the main water supply back on and check carefully for any leaks around the new connection.
What If Your Connections Are Soldered?
As you inspect your old valve, you might notice it doesn’t have a threaded nut. If it looks like the valve is seamlessly fused to the pipe, you’re likely dealing with a soldered connection. These cannot simply be unscrewed or cut off easily. Removing a soldered valve requires cutting the pipe itself and can be tricky if you don’t have much pipe to work with. This is often the point where a straightforward DIY job can become more complex. If you see a soldered valve and don’t feel confident cutting and fitting a new pipe, it’s a good time to contact a professional. We can handle it safely and ensure a leak-free result.
Easy Maintenance to Keep Your Valves Working Smoothly
Your shut-off valves are the unsung heroes of your plumbing system, waiting patiently to save the day when a leak springs. But like any hero, they need a little support to stay in fighting shape. The good news is that keeping them ready for action doesn’t require any special skills or tools—just a few minutes of your time twice a year. A little preventative care goes a long way in making sure your valves work perfectly when you need them most, helping you avoid a frantic call for emergency plumbing services. Think of it as a small investment that protects your home from major water damage down the road.
Your Simple Twice-a-Year Inspection
Set a reminder on your phone or mark your calendar to give your shut-off valves a quick visual check-up every six months. A great time to do this is when you change your smoke detector batteries. Simply peek under your sinks and behind your toilets. You’re looking for any signs of trouble, like moisture, active drips, rust, or white, crusty mineral buildup on the valve or the pipe connections. The area should be completely dry. Catching a tiny bit of corrosion or a slow drip early can prevent a much bigger, messier problem. If you spot anything that concerns you, it’s better to address it sooner rather than later.
How to “Exercise” Your Valves to Prevent Sticking
Just like our own joints, shut-off valves can get stiff if they sit in one position for too long. Mineral deposits in the water can cause the internal parts to seize up, making the handle nearly impossible to turn in an emergency. To prevent this, you should “exercise” your valves during your twice-yearly inspection. Gently turn the handle all the way to the “off” position, then turn it all the way back to the “on” position. This simple motion breaks up any potential buildup and keeps the mechanism lubricated and moving freely. It ensures that when you need to stop a toilet from overflowing, the valve will cooperate without a fight.
Quick Cleaning and Care Tips
Keeping the area around your shut-off valves clean and accessible is another easy maintenance win. During your inspection, take a dry cloth and wipe down the valve and the pipes connected to it. This removes dust and cobwebs that can hide the first signs of a slow leak. It’s also a good practice to keep the cabinet under your sink organized and clutter-free. You don’t want to be frantically digging through cleaning supplies and old plastic bags just to reach the valve during a water emergency. A clear, clean space ensures you can see and access your shut-off valves instantly. If you notice a persistent issue during your cleaning, our team can handle it with our wide range of plumbing solutions.
Troubleshooting Common Shut-Off Valve Issues
Even the most straightforward plumbing parts can act up now and then. If you’re facing a stubborn or leaky shut-off valve, don’t panic. Many common issues have simple fixes you can try yourself before calling for backup. Here’s how to handle a few of the most frequent problems you might encounter under your sink.
What to Do When the Handle Won’t Budge
It’s a classic scenario: you go to turn the valve, and the handle won’t move. This usually happens because the valve hasn’t been turned in years, causing mineral deposits to build up. Your first move is to apply a spray lubricant like WD-40 around the handle’s stem. Let it sit, then gently try to wiggle the handle back and forth. If it’s still stuck, you can use pliers for more leverage, but be careful. Applying too much force can snap the stem, turning a small problem into a big one. If it still refuses to cooperate, it’s best to stop and call for emergency plumbing help.
Why Is Water Still Running After You Turn the Valve?
You’ve turned the handle all the way off, but water is still trickling from the faucet. This is a sure sign that the valve’s internal components are failing. Inside, a rubber washer or seal is responsible for stopping the water flow, and over time, this part can degrade or crack. You might also notice a slow drip from the valve’s handle. While sometimes tightening the packing nut behind the handle can help, it’s usually a temporary fix. When a valve no longer does its one job, it’s time for a replacement. This is a frequent issue with older fixtures and a clear sign to call for a professional.
How to Fix a Minor Leak Yourself
A small, persistent drip from the valve’s connections can often be fixed with a little DIY effort. First, shut off your home’s main water supply. Once the water is off, place a bucket under the valve to catch any drips. Use a wrench to loosen the compression nut connecting the valve to the water supply pipe. Wrap the pipe’s threads with plumber’s tape (Teflon tape) three or four times in a clockwise direction. This helps create a better seal. Then, re-tighten the nut until it’s snug. Turn the main water back on and check for leaks. If the drip is gone, you’re all set! If it persists, it’s time to contact a pro.
DIY or Call a Pro: What’s the Right Move?
Tackling a home repair project yourself can be incredibly rewarding. There’s a real sense of accomplishment in fixing something with your own two hands. But when it comes to plumbing, a small mistake can quickly turn into a very big, very wet problem. Knowing when to grab your wrench and when to pick up the phone is key to protecting your home and your wallet. The line between a simple fix and a potential disaster isn’t always clear, so let’s walk through how to make the right call for your shut-off valve issues.
Assessing the Job: Is This a DIY Fix?
Some shut-off valve problems are perfect for a confident DIYer. If you notice a slow drip from around the valve handle, you might just need to tighten the packing nut with a wrench. In some cases, you can even rebuild the valve’s inner components to stop a leak without replacing the whole unit. These smaller fixes can be a great way to build your home repair skills. However, if the valve is soldered onto copper pipes, completely frozen in place, or if you’re unsure what type of valve you need, it’s best to pause. A professional has the specialized tools and experience to handle these tricky situations without causing damage to your pipes.
Breaking Down the Costs: DIY vs. Professional Replacement
When you’re deciding whether to replace a shut-off valve yourself or call in a pro, the bottom line often comes down to cost. Let’s talk numbers. The replacement valve itself is surprisingly affordable, typically costing between $10 and $20 at a hardware store. If you go the DIY route, that part and a few tools might be your only expense. However, the cost changes significantly when you factor in professional labor. Hiring a plumber can range from $45 to over $200 per hour, and a complete valve replacement service often starts around $375. That price covers the part, the plumber’s time, and the expertise to get the job done right the first time, giving you a clear picture of the investment involved.
Opting for a DIY replacement can be a great way to save on labor costs and get more familiar with your home’s plumbing. With the right tools—like a pipe cutter and a couple of adjustable wrenches—and a bit of patience, it’s a manageable project for many homeowners. To make the job even simpler, consider using a push-to-connect valve, which doesn’t require any complicated soldering. Successfully fixing a plumbing issue on your own is incredibly empowering. However, it’s important to weigh the savings against the potential risks. A small mistake can lead to a leak that damages your cabinets and floors, turning a simple fix into a much more expensive problem and a need for emergency plumbing services.
While saving money is always a plus, there are times when calling a professional is the smartest and safest move. If your valve is soldered onto copper pipes or if you run into any unexpected issues, a licensed plumber has the specialized tools and experience to handle it correctly. Paying for a professional service isn’t just about getting the valve replaced; it’s an investment in peace of mind. With a trusted company, you get the assurance that the job is done to code with quality parts, backed by a guarantee. This prevents future leaks and costly water damage, ensuring your home’s plumbing solutions are reliable for years to come.
The Importance of Safety and Building Codes
Before you even think about starting a plumbing repair, your first step is always to shut off the main water supply to your house. This single action is crucial to prevent a flood. If you’re not 100% sure where your main shut-off is or how to use it, that’s a sign to call for help. A professional plumber not only knows exactly how to manage your water supply safely but also understands local building codes. A DIY repair that isn’t up to code can cause problems down the line, especially when you sell your home. A failed DIY attempt can also quickly become a crisis, which is why having a trusted expert for emergency plumbing is so important.
Need a Trusted Plumber in Metro Detroit?
When you’re standing in the hardware store aisle feeling overwhelmed by options or staring at a valve that just won’t budge, remember you don’t have to figure it out alone. If you’re dealing with a stuck handle, a persistent leak, or you simply can’t locate the valve, calling a professional is the smartest move. At Mr. Pipey, we treat your home like our own. We can quickly diagnose the problem, recommend the right parts, and perform a lasting repair, whether it’s a simple valve replacement or a more complex pipe insulation job to prevent future issues. For peace of mind and a job done right the first time, contact us today.
Frequently Asked Questions
Why are there two valves under my sink instead of just one? You have two valves because your faucet uses both hot and cold water. Each valve controls a separate line, allowing you to shut off one without affecting the other. The hot water line is typically on the left, and the cold is on the right. This setup is incredibly helpful if you’re only working on one of the lines or need to fix a leak specific to either the hot or cold supply.
I tried to “exercise” my valve like you suggested, and now it’s dripping from the handle. What should I do? Don’t worry, this is a common issue, especially with older valves. The movement likely disturbed a worn-out packing washer inside. Your first step is to take a wrench and gently tighten the nut located right behind the handle—this is called the packing nut. A small, quarter-turn clockwise is often all it takes. If the dripping continues or gets worse, the valve’s internal seals are probably failing, and it’s time to call a professional for a replacement.
Is it okay to leave a shut-off valve partially open to reduce the water flow to my faucet? It’s best to avoid doing this. These valves are designed to be either fully open or fully closed. Using one to throttle water flow can cause the internal washer or seal to wear out much faster. It can also create a vibrating or humming noise in your pipes. If you want to reduce water pressure at a specific faucet, there are other solutions a plumber can help you with.
My house is pretty old. Is it possible I don’t have shut-off valves under my sinks? Yes, that’s entirely possible. In some older homes, the plumbing was installed to run directly from the pipes in the wall or floor straight to the faucet, with no local shut-off point. If you don’t see any valves, it means you’ll have to shut off the main water supply to the entire house for any faucet or toilet repair. Having modern shut-off valves installed is a worthwhile upgrade that makes future plumbing work much easier.
How can I tell if my valve is a quarter-turn or multi-turn just by looking at it? You can usually identify the valve type by its handle. If you see a small, straight lever, you almost certainly have a quarter-turn ball valve. These are the modern standard and only require a 90-degree turn to shut off the water. If the handle is round or has an oval, wheel-like shape, it’s a multi-turn valve that you’ll need to twist several times to close completely.