That small drip from a leaking pipe joint isn’t just an annoyance—it’s a serious threat to your home. Ignoring it can lead to rotted wood, damaged drywall, and even dangerous mold. This guide is about more than a quick fix. We’ll get to the root of the problem, whether it’s old age, a bad installation, or just stress on the pipes. I’ll walk you through how to properly fix a leaking PVC pipe joint and show you how to spot trouble early. This is about protecting your home and avoiding the headache of major water damage.
Key Takeaways
- A Lasting Repair Requires a Process: The only way to permanently fix a leaking PVC joint is to replace it. This involves cutting out the old section, cleaning the pipe ends, and using both primer and cement to create a strong chemical weld before letting it fully cure.
- Know the Signs and Your Temporary Fixes: Most leaks are caused by improper installation, age, or high water pressure. For minor drips, temporary solutions like repair clamps, epoxy putty, or silicone tape can effectively stop the water until you can perform a permanent fix.
- Recognize When to Call a Pro and How to Prevent Future Issues: If a leak is behind a wall, the pipe is severely damaged, or you see signs of water damage, it’s time to call a professional. You can prevent future leaks by insulating pipes in cold areas and performing regular visual inspections.
Why Is Your PVC Pipe Joint Leaking?
A leaking PVC pipe joint is a common headache, but the cause is rarely a mystery. Most drips trace back to one of three main issues. Understanding why a joint is failing is the first step toward a lasting repair and preventing future problems. From the initial installation to daily wear and tear, let’s break down the primary reasons your PVC pipe joint might be leaking.
Corrosion in Metal Pipes
While we’re focusing on PVC, it’s helpful to know that metal pipes face their own unique challenges. Over time, metal pipes, especially older galvanized steel or copper ones, can begin to corrode. Think of it as the pipe slowly wearing out from the inside due to constant exposure to water and minerals. This gradual breakdown weakens the pipe wall, and the joints are often the first place you’ll see a leak. The threads and fittings can become thin and brittle, making them unable to maintain a watertight seal. If you live in an older home and suspect corrosion is the culprit behind a leak, it’s usually best to call in a professional. Corroded pipes can be fragile, and a simple DIY attempt can sometimes turn a small drip into a major problem requiring emergency plumbing services.
Loose Connections in Drain Pipes
Drain pipes, like the ones under your kitchen or bathroom sink, often use a different type of connection called a slip joint. These joints rely on a compression nut and a rubber washer to create a seal, and they aren’t glued together like PVC pressure pipes. Over time, everyday vibrations, temperature fluctuations, or even just settling can cause these nuts to loosen slightly, creating a path for water to escape. Sometimes, the fix is as simple as hand-tightening the connection. However, if the rubber washer inside has become old, cracked, or was installed incorrectly in the first place, it won’t seal properly no matter how tight the nut is. Replacing that small washer is often all it takes to stop the leak for good.
Common Installation Mistakes
More often than not, a leaky joint is the result of a poor connection from the start. PVC cement isn’t glue; it’s a solvent that chemically welds the plastic pieces together to form a seamless bond. If the surfaces weren’t properly cleaned and primed, or if the cement was applied unevenly, the weld will be weak and incomplete. This leaves tiny channels for water to escape, leading to a persistent drip. A secure, leak-free connection depends on careful technique, which is why our team provides reliable workmanship on every job. A joint that was installed correctly from the beginning is one that won’t cause you trouble down the road.
Wear and Tear from Age and Temperature
While PVC pipes are durable, they aren’t invincible. Over time, exposure to the elements and temperature swings can make the plastic brittle. As the material expands and contracts with heat and cold, it puts stress on the joints. Here in Metro Detroit, freezing temperatures are a major threat. When water freezes inside a pipe, it expands with enough force to crack a weakened joint. Shifting soil can also strain underground pipes, causing connections to fail. Protecting your system with proper pipe insulation is one of the best ways to prevent these age-related failures and avoid the disaster of a frozen pipe.
Could High Water Pressure Be the Cause?
Your home’s water pressure might be the silent culprit behind a leaking joint. While your plumbing is built to handle standard pressure, anything too high puts constant strain on the entire system, especially the joints. This excessive force can push water through the smallest imperfection in a solvent weld, turning a once-secure joint into a slow drip. This is a serious warning sign, as that constant stress can cause the joint to fail completely, leading to a burst pipe and significant water damage. A sudden leak could signal a bigger issue that requires emergency plumbing attention before it gets worse.
Gather Your Tools and Materials
Before you even think about turning off the water, let’s talk about preparation. Walking into a plumbing repair with the right tools and materials is half the battle. It turns a potentially stressful situation into a manageable project and helps you get a professional-quality seal that lasts. A quick trip to the hardware store is likely all you’ll need to get set up for success. Having everything you need within arm’s reach means you can work efficiently without making extra trips once the water is off and a pipe is cut open.
Think of it like cooking a new recipe; you wouldn’t start without getting all your ingredients out first. For this project, you’ll need a few things for cutting and cleaning the pipe, the right adhesives and fittings to make the new connection, and some basic safety gear to protect yourself. Let’s break down exactly what you should have on hand.
Tools for Cutting and Cleaning
A clean, square cut is the foundation of a leak-proof joint. You can use a dedicated PVC pipe cutter for the cleanest result, but a simple hacksaw will also work in a pinch. After cutting, you’ll need to smooth the edges with a deburring tool or a piece of sandpaper. To ensure the new adhesive bonds properly, you must remove any old cement or residue from the fitting. A clean cloth and some PVC cleaner are perfect for this. For stubborn bits, you may need to lightly sand the inside of the fitting to create a fresh surface for the new connection.
Essential Adhesives and Fittings
The adhesives are what create the permanent, watertight seal, so you can’t cut corners here. You will need both PVC primer and PVC cement. The primer cleans and softens the plastic, preparing it to fuse with the cement. When you apply them, it’s important to follow all the manufacturer’s safety precautions to ensure a leak-free joint. You’ll also need the correct replacement fittings. Double-check the pipe diameter and grab a new coupling or the specific joint you’re replacing. Having an extra fitting on hand is never a bad idea, just in case.
Your Must-Have Safety Gear
Working with plumbing often involves chemicals that you don’t want on your skin or in your eyes. PVC primer and cement can irritate skin and produce strong fumes, so safety is key. At a minimum, you should wear a pair of safety glasses to protect your eyes from splashes and chemical-resistant gloves to protect your hands. Because repairing PVC pipes can involve working with hazardous chemicals, it’s also a good idea to ensure your workspace has good airflow. If you’re in a cramped or enclosed area, wearing a respirator is a smart move.
Important Cautions for Repair Products
In the world of home improvement, it’s easy to be tempted by products that promise a quick and simple fix. When you’re staring at a drip, a tube of putty or a roll of tape can seem like the perfect solution to make the problem disappear. However, when it comes to your home’s plumbing, especially PVC pipes, some of these so-called solutions can create much bigger headaches down the road. Using the wrong product won’t just fail to stop the leak permanently; it can make the final, correct repair more difficult and expensive. Knowing what to avoid is just as crucial as knowing which tools to use, ensuring your fix is a lasting one, not a temporary patch that hides a growing problem.
When Not to Use Epoxy Putty
Epoxy putty, that moldable, two-part substance that hardens into a rock-solid patch, seems like a miracle worker for leaks. While it has its uses, applying it to a leaking PVC joint is a mistake. The putty rarely creates a permanent seal on the smooth plastic surface and is unlikely to hold up against consistent water pressure. The real issue arises when this temporary patch inevitably fails. The hardened epoxy makes a proper repair impossible without cutting out the entire section of pipe it covers. This turns what could have been a straightforward joint replacement into a more complex and costly job, a situation we see all too often in emergency plumbing calls.
When Not to Use Plumber’s Tape
Plumber’s tape, also known as Teflon tape, is a staple in any toolbox, and for good reason. It’s excellent for sealing the threads on metal pipe fittings to create a watertight connection. However, it has no place in PVC pipe repair. PVC joints are fused together with a chemical solvent weld, not sealed at the threads. Applying tape to PVC threads can prevent the fittings from seating properly, interfering with the chemical bond. Worse, it can give you a false sense of tightness, leading you to overtighten the fitting and cause a crack. For a reliable, leak-free PVC connection, stick to the proven method of primer and cement, and save the tape for your metal pipes.
How to Spot a PVC Joint Leak
Before you can fix a leak, you have to find it. Spotting a leak in a PVC pipe joint isn’t always as dramatic as a burst pipe spraying water everywhere. Often, it’s a slow, sneaky drip that can cause serious water damage over time if you don’t catch it early. The key is to know what you’re looking for. A thorough visual inspection is your best first step.
Pay close attention to the joints where two pipes connect, as this is where leaks most commonly occur. Look for obvious signs like dripping water, but also keep an eye out for more subtle clues. Puddles on the floor, water stains on walls or ceilings, or a musty smell in the area are all red flags that point to a hidden leak. By regularly checking your exposed pipes, especially in basements, under sinks, and in utility rooms, you can catch these issues before they become major headaches. We’ll cover the three most common signs of a failing PVC joint: hairline cracks, loose fittings, and failed connections.
Look for Tiny Hairline Cracks
Even the smallest crack can be a big problem. Hairline cracks are tiny fractures that can appear on the surface of a PVC pipe or fitting. They can be tough to see, so you might need to wipe the pipe dry and use a flashlight to inspect it closely. Sometimes, you can feel a crack with your fingertip before you can see it. These cracks often form because pipes get old, are exposed to harsh weather, or weren’t installed correctly. Here in Michigan, our freezing winters can be especially tough on pipes, leading to cracks and leaks. If you suspect a crack, it’s a sign that the pipe’s integrity is compromised and needs immediate attention.
Check for Loose Fittings
A PVC joint should be completely rigid. If you can wiggle or twist a fitting, even slightly, you have a problem. Leaks in plastic pipe joints usually happen because the pipes weren’t glued or “welded” together properly during installation. The solvent cement that creates the seal can fail over time, or maybe not enough was used in the first place. You might notice persistent dampness or mineral deposits around the edge of the fitting, which indicates a slow leak has been happening for a while. A loose fitting will never fix itself; it will only get worse as water pressure continues to stress the weak connection.
Inspect for Failed Connections
A failed connection is when the seal at the joint is broken. A small leak in a PVC water pipe, especially at a connection, means the joint is failing and needs to be fixed soon. This can happen for any of the reasons we’ve already covered, like age, pressure, or improper installation. Signs of a failed connection include constant moisture, discoloration of the pipe or the surrounding area, and sometimes even mold growth. Don’t ignore a slow drip. It’s a clear warning that the joint is compromised. For persistent leaks that you can’t easily trace or fix, it’s always a good idea to call in a professional for an expert opinion on your plumbing services.
Quick Fixes for a Leaking PVC Joint
When you spot a leak in a PVC pipe joint, your first thought might be to panic. But for small drips and minor leaks, a quick fix can often hold you over until you can schedule a permanent repair. These temporary solutions are designed to be fast, easy, and effective enough to stop the water and prevent immediate damage. They are perfect for those moments when you need to get the situation under control right away.
Keep in mind that these are stopgap measures. While they can be surprisingly durable, they aren’t meant to last forever. A permanent fix will ensure the joint is secure for the long haul. If you’re dealing with a significant leak or feel unsure about tackling it yourself, it’s always best to call for emergency plumbing services to prevent further water damage.
Try a Pipe Repair Clamp
A pipe repair clamp is one of the most reliable temporary fixes you can find. Think of it as a strong, secure bandage for your leaking pipe joint. These clamps consist of a sturdy metal sleeve with a rubber gasket on the inside. To use one, you simply open the clamp, position the rubber lining directly over the leak, and then tighten the bolts to secure it in place. The pressure from the clamp creates a tight seal that effectively stops the leak. You can find these at most hardware or plumbing supply stores, and they are a great item to have in your home repair kit for unexpected drips.
Patch It with Epoxy Putty
For small, pesky leaks, epoxy putty is a fantastic solution. This two-part adhesive comes in a small tube that you knead together to activate. Once mixed, it has a clay-like consistency that you can mold directly over the leaking PVC joint, filling in any small cracks or gaps. The putty starts to harden within minutes and typically cures completely in about an hour, forming a rock-hard, waterproof seal that can withstand water pressure. It’s an excellent, durable fix for minor issues. If you find the damage is more extensive than a small drip, it might be time to explore professional plumbing services.
Wrap It with Rubber Tape
Another incredibly simple and fast fix is rubber or silicone repair tape. This isn’t your average electrical tape; it’s a special self-fusing tape that bonds to itself when stretched. To use it, you wrap it tightly around the leaking joint, stretching it as you go and overlapping each layer. The tape creates a seamless, waterproof pressure seal that can stop a drip in its tracks. For the best results, make sure to extend the wrap a few inches on either side of the leak. This method is perfect for tiny pinhole leaks and can help prevent future issues caused by temperature fluctuations, which is why proper pipe insulation is also so important.
Use a Homemade Rubber Patch
If you’re in a pinch and don’t have a repair clamp, you can create a similar fix with a piece of rubber and a hose clamp. This is a classic DIY trick that can stop a slow drip on a low-pressure pipe. Find a scrap piece of rubber—an old bicycle inner tube or a rubber gasket works perfectly—and cut a patch that’s large enough to cover the entire leak with some overlap. Wrap the rubber tightly around the leaking joint, making sure it’s smooth and flat. Then, secure it in place with one or two adjustable hose clamps, positioning them directly over the leak and tightening them until the dripping stops. This is a temporary solution, but it can prevent water damage until you can schedule a proper repair from a list of plumbing services.
Apply a Compound Stick
For the tiniest pinhole leaks, a compound stick can be a surprisingly effective and simple fix. Think of it as a crayon for your pipes. These sticks are made of a special sealing compound that you can rub directly over a very small hole to plug it up. One of the biggest advantages is that some formulas are designed to work even while water is still seeping out, making them ideal for a quick, on-the-spot repair without needing to shut off the water completely. Just be sure to clean and dry the area as much as possible before applying it. Remember, this is only for minor drips; it won’t hold up against a crack or a significant leak, which would require immediate emergency plumbing attention.
Try a Self-Tapping Plug
A self-tapping plug, sometimes called a self-tapping screw, is another option for stopping a small leak in a pipe. This method involves drilling a small pilot hole directly into the leak and then inserting the plug, which has a rubber gasket at its head. As you tighten the screw, the gasket compresses against the pipe, creating a seal that stops the water flow. While this can be an effective fix, it requires a bit of caution. You are intentionally creating a new hole in your pipe, and if the PVC is old or brittle, you risk causing a larger crack. This solution is best reserved for specific situations where you’re confident in the pipe’s integrity and need a quick mechanical seal.
Use a Fiberglass Wrap Kit
When you need a temporary fix that’s a step above basic tape or putty, a fiberglass wrap kit is an excellent choice. These kits provide a much stronger and more durable patch. They typically include a roll of fiberglass tape saturated with a water-activated resin. After putting on the included gloves, you simply soak the tape in water and then wrap it tightly around the leaking joint, extending several inches on either side. The resin quickly begins to cure, hardening into a rock-solid, waterproof shell around the pipe. This creates a very strong seal that can hold up well under pressure, buying you plenty of time to contact a professional for a permanent replacement.
How to Permanently Fix a Leaking PVC Joint
While a quick patch can stop a drip in a pinch, a permanent fix is the only way to ensure a lasting, worry-free repair. Replacing the faulty joint is the best solution for a leak that just won’t quit. This process involves cutting out the old joint and cementing a new one in its place. It might sound intimidating, but with the right tools and a bit of patience, it’s a project many homeowners can handle. The key is to work carefully and give the materials proper time to set.
Before you start, make sure you have everything you need, including a new PVC coupling or fitting, a PVC pipe cutter or hacksaw, and the correct PVC primer and cement for your pipe type. Taking the time to do it right the first time will save you from future headaches and potential water damage. Of course, not every leak is in an easy-to-reach spot, and some repairs are more complex than others. If you find yourself dealing with a major leak or feel unsure about the repair, don’t hesitate to call for emergency plumbing assistance. A professional can get the job done quickly and correctly.
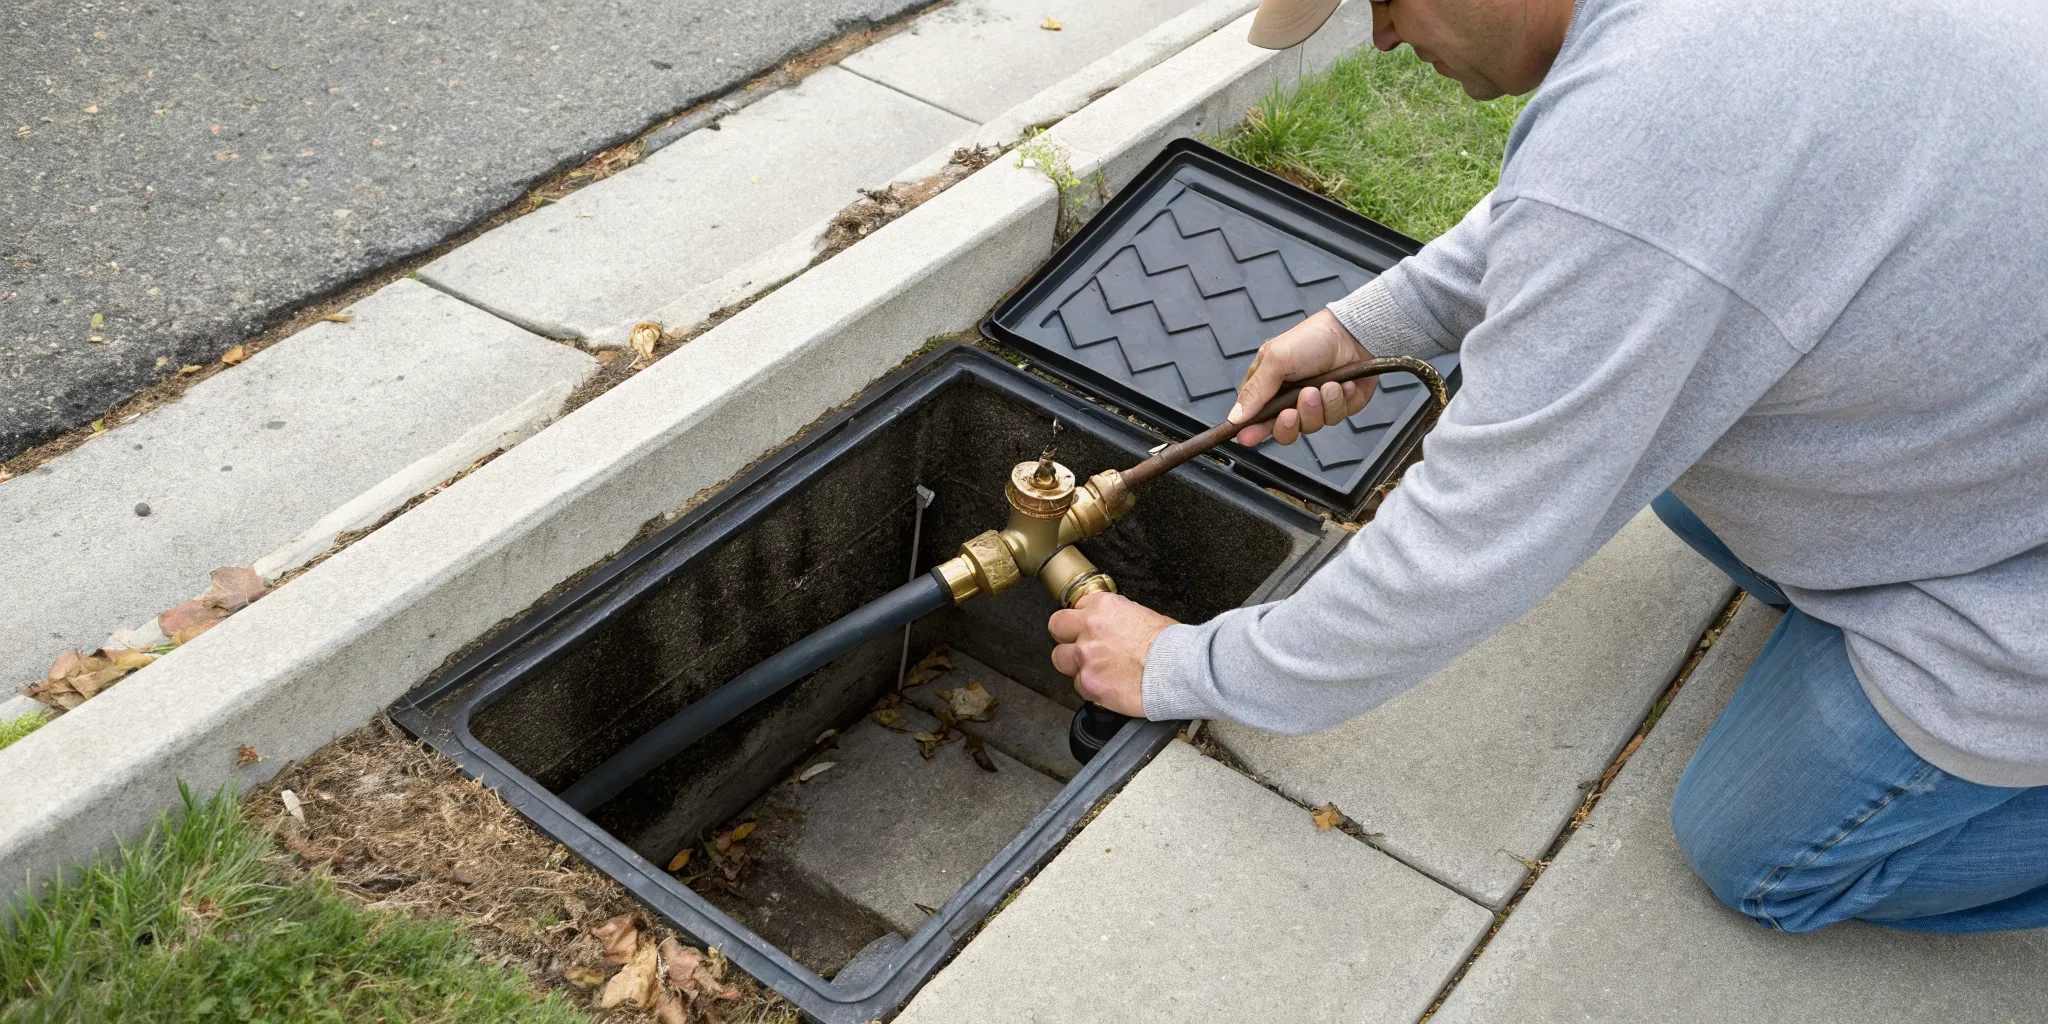
Step 1: Turn Off the Water Supply
First things first: you can’t fix a pipe with water flowing through it. Before you make a single cut, you need to shut off the water supply to the area. The easiest way to do this is by locating your home’s main water shut-off valve, which is often in the basement, a crawl space, or near the water heater. Turn the valve clockwise until it’s completely closed. To make sure the line is empty, open a faucet at the lowest point in your house (like a basement sink) and another one on a higher floor to let air in. This will drain any remaining water from the pipes, preventing a surprise shower when you start working.
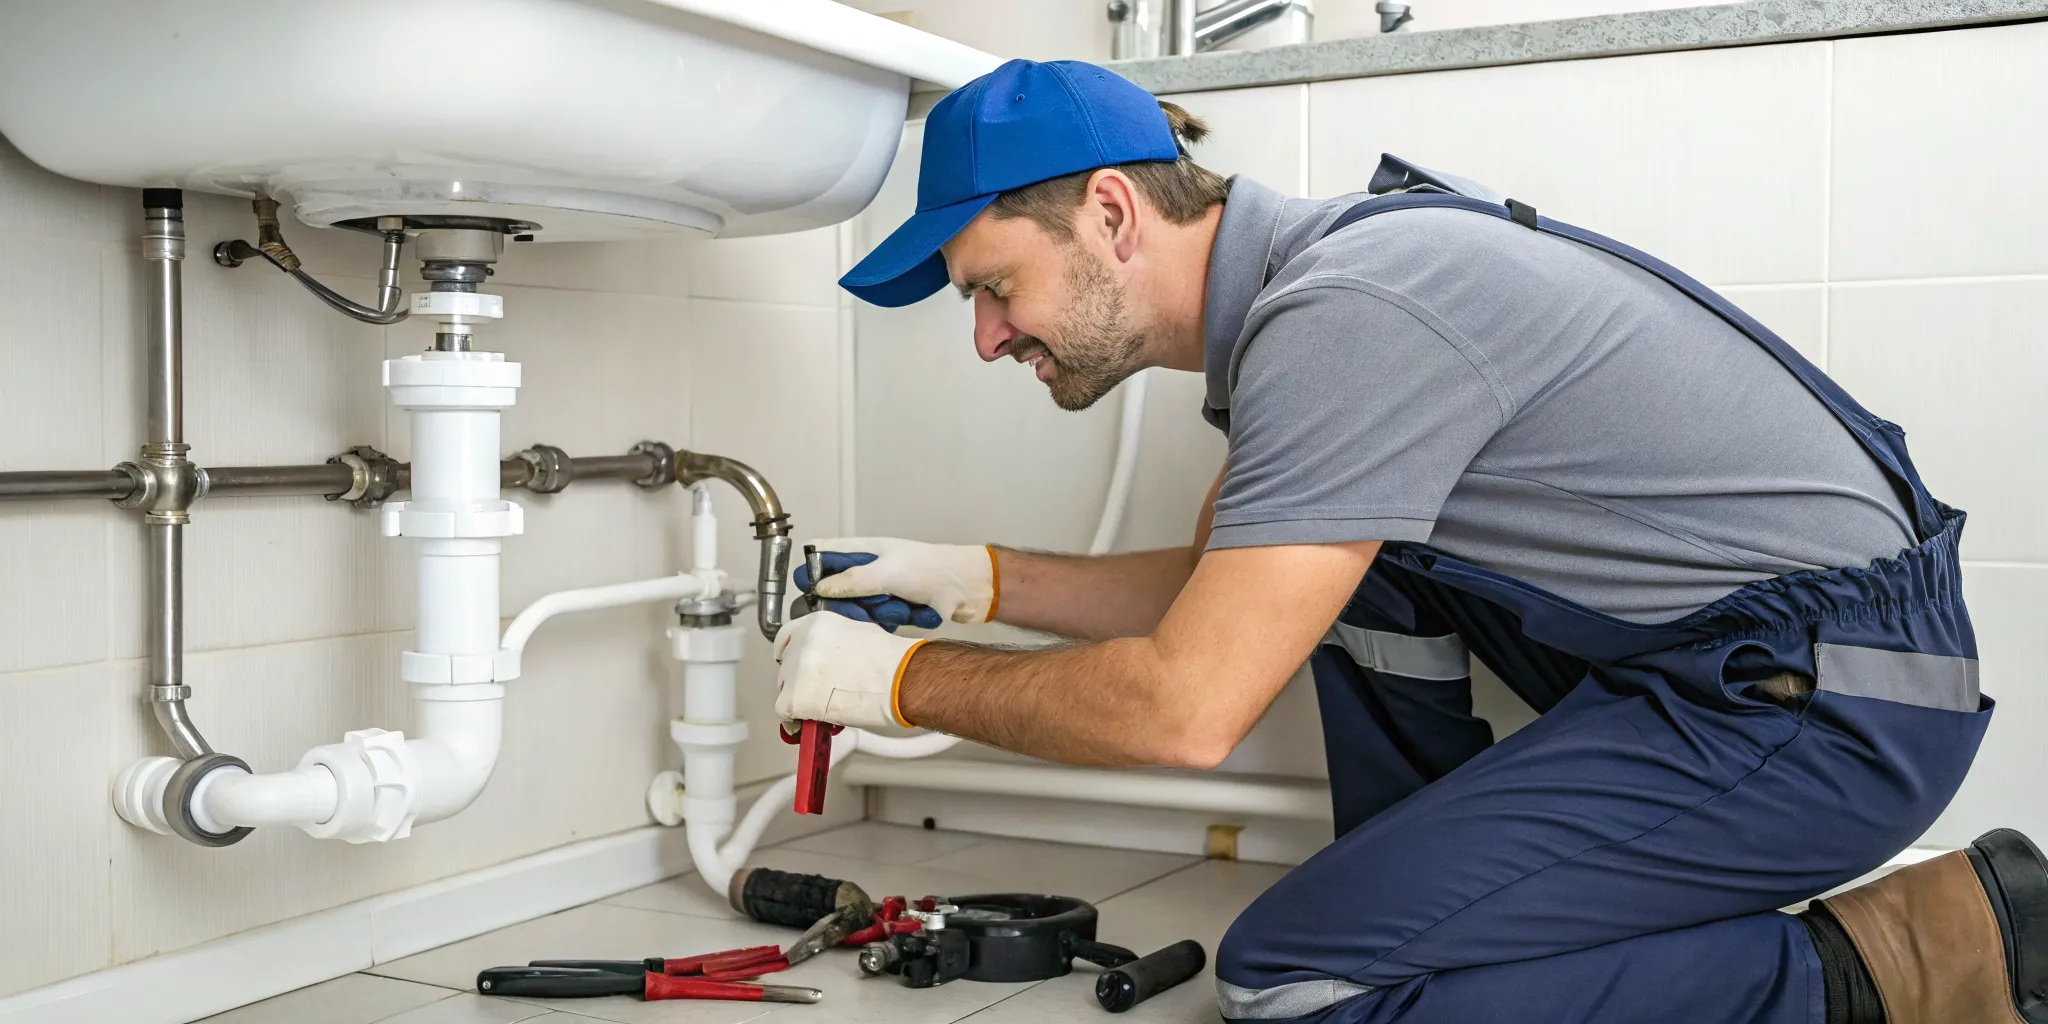
Step 2: Remove the Damaged Pipe Section
With the water off and the pipe drained, it’s time for a little surgery. Using a PVC pipe cutter or a hacksaw, carefully cut out the leaking joint. A dedicated PVC cutter will give you the cleanest, straightest cut, which is ideal for getting a good seal later. Make your cuts on both sides of the faulty fitting, leaving enough straight pipe on either end to attach your new coupling. Measure twice and cut once. You want to remove the entire damaged section while ensuring the remaining pipe ends are smooth and squared off. A crooked cut can make it difficult to create a watertight seal with the new fitting.
Step 3: Clean and Prepare the Pipe Ends
This step is crucial for creating a strong, permanent bond. Any dirt, dust, or moisture can compromise the PVC cement and lead to another leak down the road. Start by removing any burrs or rough edges from the inside and outside of the cut pipe ends using a deburring tool or a piece of sandpaper. Once the edges are smooth, use a clean, dry cloth to wipe down the outside of the pipe ends and the inside of your new fitting. The surfaces must be completely clean and dry before you move on to applying the primer and cement. Don’t skip this prep work; it’s the foundation of a successful repair.
Step 4: Apply PVC Primer and Cement
Now it’s time to make the connection. Start with the PVC primer, which cleans and softens the plastic to allow for a stronger weld. Using the dauber attached to the can’s lid, apply a liberal coat of primer to the outside of the pipe ends and the inside of the new fitting. The primer is often purple so you can easily see your coverage. While the primer is still wet, follow up immediately with the PVC cement. Apply a smooth, even layer to the same surfaces. Quickly push the pipe into the fitting, giving it a quarter-turn as you do. This twisting motion helps spread the cement evenly and ensures a solid connection.
Step 5: Install the New Fitting and Let It Cure
Once you’ve twisted the fitting into place, hold it firmly for about 30 seconds. The chemical reaction can sometimes cause the pipe to push back out of the fitting, so applying pressure is key to keeping it secure while the initial bond forms. After that, you need to let it cure. This is where patience pays off. The PVC cement needs time to fully harden and create a permanent, waterproof seal. Check the instructions on the cement can for specific cure times, as they can vary based on temperature and humidity. Don’t turn the water back on until the recommended time has passed. Rushing this final step will ruin all your hard work.
Repairing Other Common Types of Pipe Joints
While PVC is incredibly common in modern homes, you’ll likely find a mix of different pipe materials throughout your plumbing system, especially in older houses. From the threaded metal pipes that might run to your water heater to the copper lines supplying your faucets, each type of joint has its own unique way of being sealed—and its own way of failing. Understanding how to approach these different connections is key to a successful repair. Whether you’re dealing with a stubborn drip from a metal fitting or a loose connection under the sink, the basic principles of shutting off the water, cleaning the area, and creating a new seal still apply.
Fixing Threaded Metal Pipes
Threaded metal pipes are tough, but their joints can be tricky to fix. A leak here usually means the seal has failed. To repair it properly, you often have to disassemble the connection, which can sometimes mean cutting the pipe to get it apart. Once you have access, the old sealing material, like plumber’s tape, needs to be completely removed from the threads. Then, you can create a new seal using fresh Teflon tape or a pipe joint compound. Because this repair can be complex and requires specific tools, it’s often a job best left to a professional. If you’re not comfortable cutting into your plumbing, our team at Mr. Pipey has the expertise to handle all types of plumbing repairs safely and effectively.
Sealing Compression Fittings
Compression fittings are common on the water supply lines under your sinks and toilets. They create a seal by squeezing a small ring, called a ferrule, between a nut and the fitting. If you spot a leak, the first thing to try is gently tightening the compression nut with a wrench. Be careful not to overtighten, as this can damage the ferrule. If the leak persists, you’ll need to turn off the water, unscrew the nut, and inspect the ferrule. If it looks cracked or worn out, replace it. When reassembling, applying a little pipe joint compound to the ferrule can help create a better seal. Always use two wrenches—one to hold the fitting steady and one to turn the nut—to avoid twisting and damaging the pipe.
Stopping Leaks in Slip Joints
Slip joints are what you’ll find connecting the drain pipes under your kitchen and bathroom sinks, including the P-trap. These joints are designed to be taken apart by hand, which makes them easy to fix. A leak is almost always caused by a loose connection or a failed rubber washer inside. First, try hand-tightening the large nuts on either side of the joint. If the drip continues, place a bucket underneath, unscrew the nuts, and pull the joint apart. The problem is likely a worn-out or improperly seated washer. The best practice is to always replace the slip joint washers whenever you reassemble a drain. They’re inexpensive and are the key to a leak-free seal.
Repairing Copper Pipe Joints
Copper pipes are joined together with solder, which creates a very strong, permanent bond. Repairing a leaking soldered joint is a job that requires a blowtorch and experience, making it a risky DIY project due to the fire hazard. A much safer and more accessible option for a homeowner is to use a compression coupling. This involves cutting out the leaking section of the pipe with a pipe cutter and then installing the new fitting, which tightens down to create a waterproof seal without any heat. However, if you’re dealing with a leak in a tight space or aren’t confident in making a clean cut, it’s wise to call for professional emergency plumbing services to ensure the job is done right.
How to Fix Leaking Gutter Joints
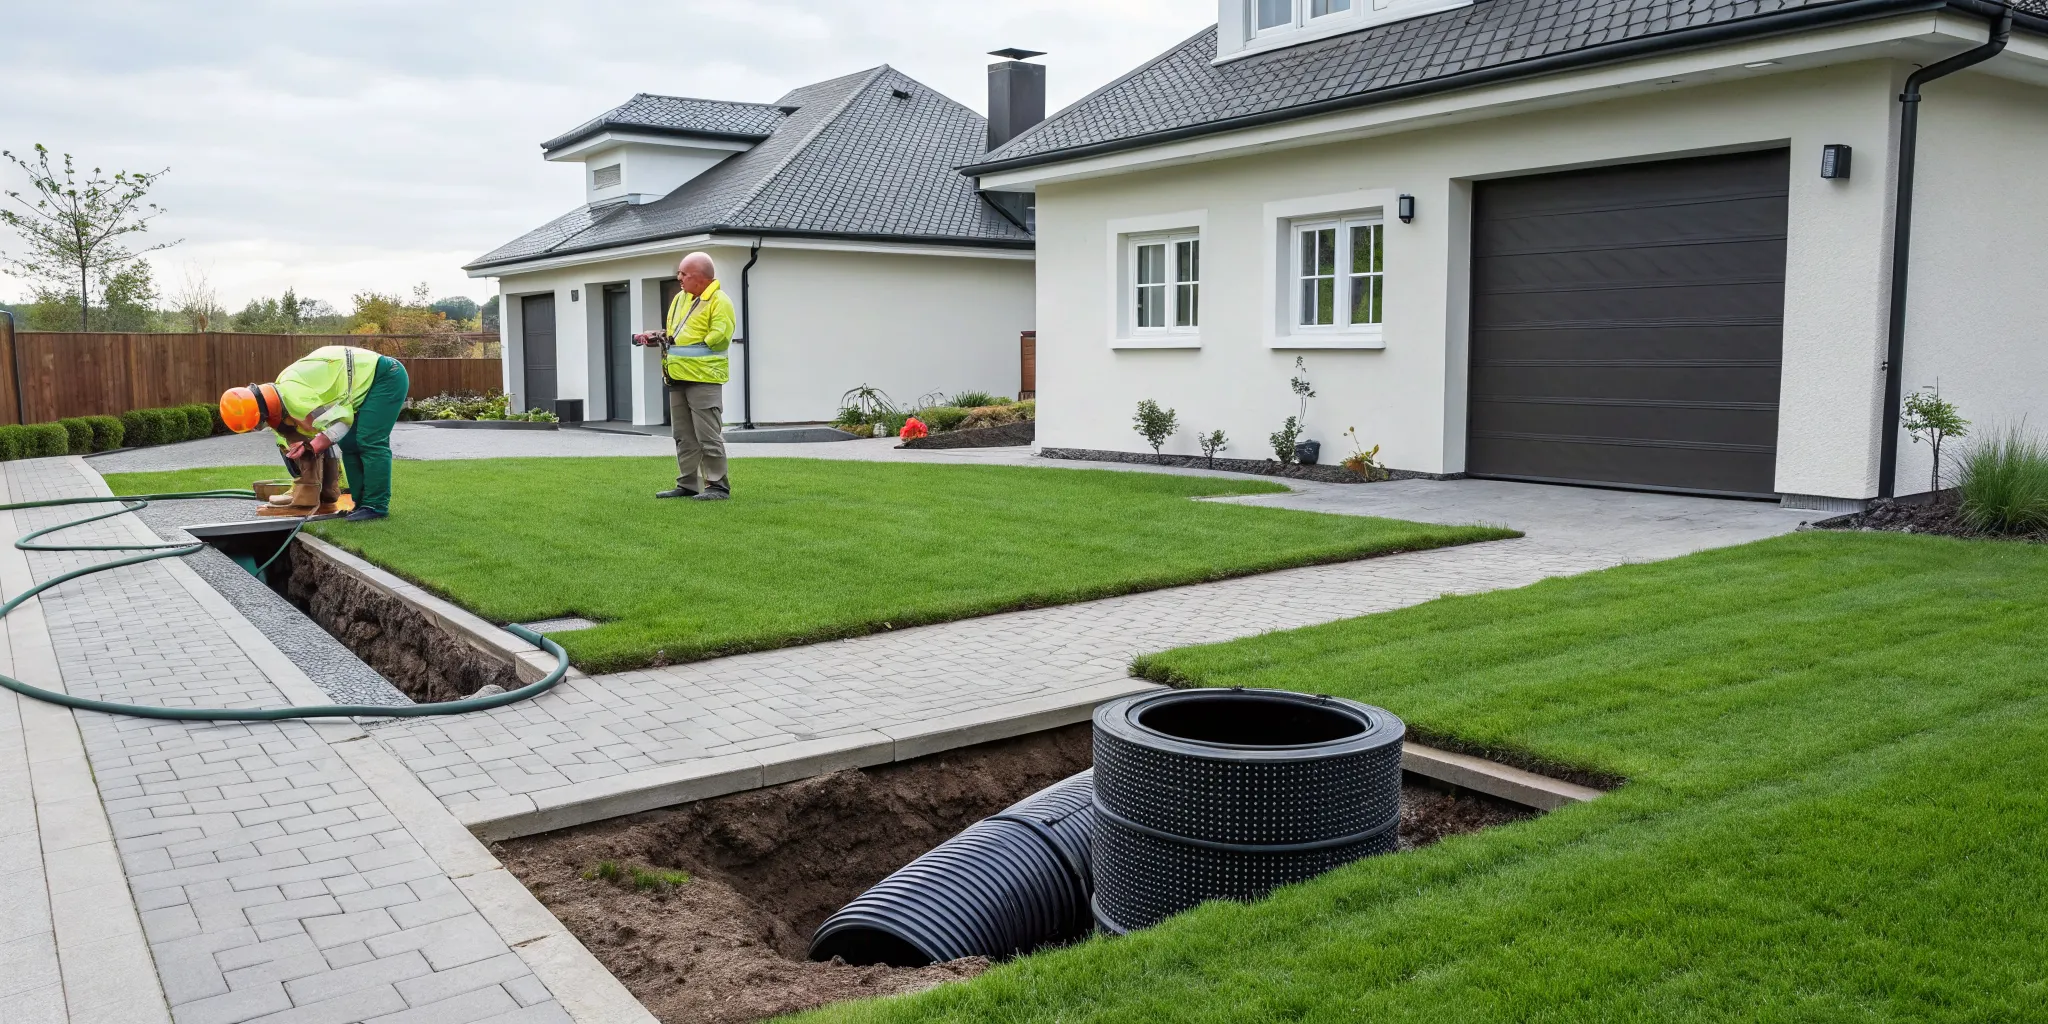
Your home’s gutters might not be part of your indoor plumbing, but they play a critical role in protecting your house from water damage. When a gutter joint leaks, it allows water to run down the side of your house and pool around the foundation, which can lead to serious and expensive problems over time. A small drip from a gutter seam might seem minor, but it’s a sign that your water management system isn’t working as it should. Luckily, fixing a leaking gutter joint is a straightforward project that you can usually tackle in an afternoon with a few basic supplies from the hardware store.
Common Causes of Gutter Joint Leaks
Gutter leaks almost always happen at the seams where two sections connect or at the joint with the downspout. The most frequent cause is simple: blockages. When gutters get clogged with leaves, twigs, and other debris, water backs up and puts constant pressure on the seals, eventually forcing its way through. Over time, the sealant used at the joints can also degrade from exposure to the elements. Here in Michigan, the cycle of freezing and thawing during winter can be especially hard on gutters, causing them to expand and contract, which weakens the joints. Physical damage from a ladder or a fallen branch can also knock a joint loose, creating a gap for water to escape.
Steps to Seal a Leaking Gutter
Fixing a leaking gutter joint is all about preparation. First, you need to thoroughly clean the area around the leak. Scoop out any debris and use a stiff brush and water to scrub away any dirt or grime. The surface must be completely clean and dry for the new sealant to adhere properly. Once it’s prepped, apply a generous bead of gutter sealant or caulk directly over the inside of the joint. Use a putty knife or your finger to smooth the sealant, making sure it fills the entire gap. For larger gaps, you can also use a special repair tape designed for gutters. After applying the fix, let it cure according to the manufacturer’s instructions before testing it with a hose to ensure the leak is sealed.
How to Stay Safe During Your Repair
Before you jump into any DIY project, safety should always be your top priority. Fixing a leaky PVC pipe joint might seem like a straightforward task, but it involves working with chemicals and tools that require respect and caution. Taking a few extra minutes to prepare can make the difference between a successful repair and an unexpected trip to the emergency room. It’s not about being overly cautious; it’s about being smart and protecting yourself from preventable accidents. Think of it as setting yourself up for success. When you have the right safety measures in place, you can focus completely on the task at hand without worrying about accidental splashes or harmful fumes. We’ll walk through the essential safety measures to keep in mind, from ensuring proper airflow to handling your materials correctly. These steps are simple but crucial for any plumbing project, big or small. Remember, a job done safely is a job done right. If at any point you feel unsure or the situation seems unsafe, don’t hesitate to pause. Professional help is always just a call away, and it’s better to be safe than to risk injury or further damage to your home. Your well-being is more important than finishing a repair quickly.
Make Sure You Have Good Ventilation
The primer and cement used for PVC pipes release strong chemical fumes. Working in a poorly ventilated space, like a small bathroom with no windows or a cramped crawlspace, means you’ll be breathing in those fumes directly. This can lead to dizziness, headaches, and other health issues. To stay safe, make sure your work area has plenty of fresh air. Open any nearby windows and doors to create a cross-breeze. If that’s not possible, set up a fan to help circulate the air and direct the fumes away from you. Your health is worth the extra step.
Always Wear Protective Gear
This is a non-negotiable step. Always wear the right protective gear to shield yourself from chemicals and debris. Start with a pair of safety goggles. They protect your eyes from accidental splashes of PVC primer or cement, which can cause serious irritation or damage. Next, put on a pair of chemical-resistant gloves to keep those same substances off your skin. If you’re particularly sensitive to strong smells or working in a tight space, wearing a respirator mask is also a great idea. It might feel like a hassle, but these simple items are your best defense against preventable injuries.
Handle Chemicals and Tools with Care
The products you use for PVC repair are effective because they contain powerful chemicals, so you need to handle them with care. Always read the manufacturer’s safety instructions on the primer and cement containers before you begin. These labels provide crucial information on proper application and curing times. Keep in mind that these chemicals are often flammable, so keep them far away from any open flames or heat sources, like a water heater pilot light. When you’re done, seal the containers tightly and store them properly. Safe handling ensures both a secure, leak-free joint and your personal well-being during any plumbing repair.
Common PVC Repair Mistakes to Avoid
Fixing a leaky PVC pipe can feel like a straightforward DIY project, but a few common missteps can quickly turn a small drip into a major headache. Even if you’re handy around the house, it’s easy to overlook a crucial step that compromises your repair. Taking a moment to understand these frequent mistakes will help you get the job done right the first time, saving you from a repeat performance and potential water damage down the road. Let’s walk through what not to do, so your fix is strong, secure, and permanent.
Choosing the Wrong Type of Adhesive
One of the most common errors is grabbing the wrong product for the job. It’s important to know that PVC cement isn’t a gap-filling glue. Its real purpose is to act as a solvent, slightly melting the surfaces of the pipe and fitting so they can fuse together into one solid piece. If you try to simply smear it over a crack or a leaky joint, it won’t create a proper seal. You need to use a two-part system: a primer to clean and soften the PVC, followed by the correct cement to create a chemical weld. Always read the labels to make sure you have the right products for your pipe size and application (like for pressure or non-pressure lines).
Not Giving It Enough Time to Cure
Patience is a virtue, especially when it comes to plumbing repairs. After applying the primer and cement and fitting the pieces together, you might be tempted to turn the water back on right away to check your work. This is a critical mistake. The solvent cement needs time to cure, which means it must fully harden to create a durable, watertight bond. Curing times can vary based on the product, pipe size, and even the air temperature. Some fast-setting cements might be ready in under an hour, while others need several hours. Rushing this process almost guarantees a weak joint that will fail under pressure, leaving you with another emergency plumbing situation.
Forgetting to Prep the Pipe Surface
A strong, lasting bond starts with a clean surface. Any dirt, grease, or even moisture on the pipe or inside the fitting can prevent the solvent cement from working correctly. Before you even think about applying primer, make sure your pipe ends are cut straight and are free of any burrs (those little plastic shavings left after cutting). Use a clean cloth and a designated PVC cleaner or primer to wipe down both the outside of the pipe and the inside of the fitting. This step removes any residue and properly prepares the plastic for the chemical welding process, ensuring your new joint is as strong as possible. If you’re ever unsure about your repair, our team offers a wide range of plumbing services to help.
When to Call a Professional Plumber
While tackling a PVC pipe repair yourself can feel empowering, some situations are best left to the professionals. Knowing when to put down the tools and pick up the phone is key to protecting your home from further damage and ensuring the job is done right the first time. A quick DIY fix might seem like a win, but if it fails, you could be facing a much bigger, more expensive problem. If you’re feeling out of your depth or the leak seems more complicated than a simple drip, it’s always a smart move to call for backup.
Certain red flags indicate a problem that requires an expert eye. A leak hidden behind a wall, a pipe with significant visible damage, or any sign of water damage spreading through your home are all signs that it’s time to call in a pro. At Mr. Pipey, we’ve seen it all, and our team has the experience and equipment to handle complex plumbing issues safely and efficiently. When in doubt, a professional assessment can provide peace of mind and a reliable, long-lasting solution. If you’re facing a sudden pipe burst or major leak, our emergency plumbing services are available to help you get the situation under control quickly.
If the Leak Is Hard to Reach
If you can’t easily see and access the leaking joint, it’s time to call a professional. Leaks located behind walls, under floors, or tucked away in a tight crawlspace require more than just a bit of epoxy putty. Attempting to get to these leaks without the right tools can lead to unnecessary damage to your drywall, flooring, or cabinetry, turning a small plumbing issue into a major renovation project. A professional plumber has the specialized equipment to locate the exact source of the leak with minimal disruption. They can then access and repair it efficiently, saving you the headache and cost of extensive cosmetic repairs afterward.
When You’re Facing Major Pipe Damage
Take a close look at the pipe itself. If you see large cracks, multiple fractures, or signs of widespread corrosion, this isn’t a simple joint failure. This kind of significant damage often points to a bigger underlying problem, such as aging pipes that have become brittle or extreme water pressure stressing your entire system. Simply patching the leak won’t solve the root cause, and you’ll likely face another failure soon. A professional can assess the health of your plumbing system and determine if a section of the pipe needs to be replaced entirely. This ensures a durable, long-term fix rather than a temporary patch. You can explore all of our plumbing solutions to see how we can help.
If You’re Concerned About Water Damage
Never underestimate the damage a seemingly small leak can do. If you notice water stains on your ceiling or walls, peeling paint, warped floorboards, or a persistent musty smell, you need to act fast. These are classic signs that water has been seeping into your home’s structure, creating the perfect environment for mold growth and rot. This can compromise your home’s structural integrity and air quality. A professional plumber will not only fix the leak but can also help you understand the extent of the water damage. Getting an expert involved immediately is crucial to mitigating the damage and protecting your property. If you see any of these signs, contact us right away.
How to Prevent Future PVC Joint Leaks
After you’ve fixed a leak, the last thing you want is a repeat performance. The good news is that a few preventative measures can keep your PVC pipe joints secure and dry for years. It all comes down to proper installation, regular check-ups, and protecting your pipes from the elements. Taking these steps saves you from the headache of future repairs and protects your home from potential water damage. Think of it as a little plumbing TLC that pays off big time.
Focus on Proper Installation from the Start
Many plumbing problems start right at the beginning. A shoddy installation is a leak waiting to happen. If you’re tackling a DIY project, use the correct type and size of PVC pipe for the job. Every joint needs to be perfectly aligned and fully seated before applying adhesive. When it’s time for the glue, apply both primer and cement according to the manufacturer’s instructions. A clean, properly prepped surface creates a much stronger bond. If you’re not 100% confident, it’s always smarter to have a professional handle the plumbing installation to ensure it’s done right from the start.
Perform Regular Pipe Inspections
You don’t have to wait for a puddle to appear to know something’s wrong. Regularly checking your pipes can help you catch small issues before they become major disasters. Every few months, take a look at the visible PVC pipes in your basement, under sinks, and in utility rooms. Look for any signs of moisture, drips, or mineral deposits around the joints. Check that fittings feel secure and haven’t loosened. Finding a small problem early can save you from a much bigger, more expensive repair. If you spot something that doesn’t look right, it’s best to get it checked out by a professional plumber.
Protect Your Pipes from Extreme Weather
Here in Metro Detroit, we know all about extreme temperatures, and those fluctuations can be tough on your plumbing. PVC pipes can become brittle in the cold and weak from sun exposure, which leads to cracks and leaks over time. For pipes in unheated areas like basements, crawl spaces, or garages, consider adding insulation. This simple step is one of the most effective ways to prevent frozen and burst pipes during our harsh winters. For any outdoor PVC pipes, make sure they are protected from direct sunlight where possible. A little protection goes a long way in extending the life of your plumbing.
Upgrade Your Faucet and Toilet Supply Lines
Think about those small water lines running to your faucets and toilets. If they are made of gray plastic or rigid chrome, they are a ticking time bomb. These older supply lines become brittle over time and are notorious for cracking or bursting without warning, often leading to major flooding. Upgrading them to modern, braided stainless steel lines is one of the smartest and most affordable preventative measures you can take. These flexible lines are far more durable and resistant to bursting, giving you incredible peace of mind. This is a simple project you can do yourself, or it’s an easy add-on next time you schedule a toilet repair, ensuring every part of your system is secure.
Related Articles
- Using PVC Pipe Leak Sealant: A Complete Guide
- Repair a Copper Pipe Leak: A Step-by-Step Guide
- DIY Pipe Leak Repair: Your Step-by-Step Guide
Frequently Asked Questions
How long should I let the PVC cement cure before turning the water back on? This is a great question, and the answer is: it depends. You should always follow the specific instructions on the cement container, as cure times can vary based on the brand, pipe size, and even the temperature and humidity in your work area. While it can be tempting to test your work right away, turning the water on too soon is the fastest way to ruin a perfectly good repair. Giving the joint the proper time to fully harden is essential for creating a strong, permanent seal.
Are temporary fixes like epoxy putty or repair tape a good long-term solution? While epoxy putty and repair tape are fantastic for stopping a leak in an emergency, they are not permanent solutions. Think of them as a reliable bandage, not a cure. These fixes are designed to get you out of a jam and prevent immediate water damage, but they don’t address the underlying reason the joint failed. For a secure, worry-free repair that will last for years, you will eventually need to replace the faulty joint.
Is it okay to skip the purple primer and just use the cement? I would strongly advise against it. The primer does more than just clean the pipe; it chemically softens the surface of the PVC. This softening process allows the cement to create a true solvent weld, fusing the pipe and fitting into a single, solid piece of plastic. Skipping the primer results in a much weaker bond that is far more likely to leak under pressure, meaning you’ll probably have to do the repair all over again.
My leak is just a very slow drip. How urgent is it to fix it? Even the smallest drip should be taken seriously. While it might not seem like an emergency, that constant moisture can lead to serious problems over time, including water damage to your floors and walls, structural rot, and mold growth. A slow drip is a clear sign that a joint is compromised, and it will only get worse. It’s always best to address it as soon as you can to prevent a small issue from becoming a major, expensive headache.
What should I do if I can’t find my main water shut-off valve? Not being able to find the shut-off valve can be stressful, but don’t panic. They are typically located where the main water line enters your house, so check in your basement, crawl space, or a utility closet near the front of your home. It will usually be a wheel-style handle or a lever. If you’ve looked in all the likely spots and still can’t find it, your best bet is to call a professional plumber. It’s much safer than attempting a repair on a pipe that you can’t be sure is fully drained.