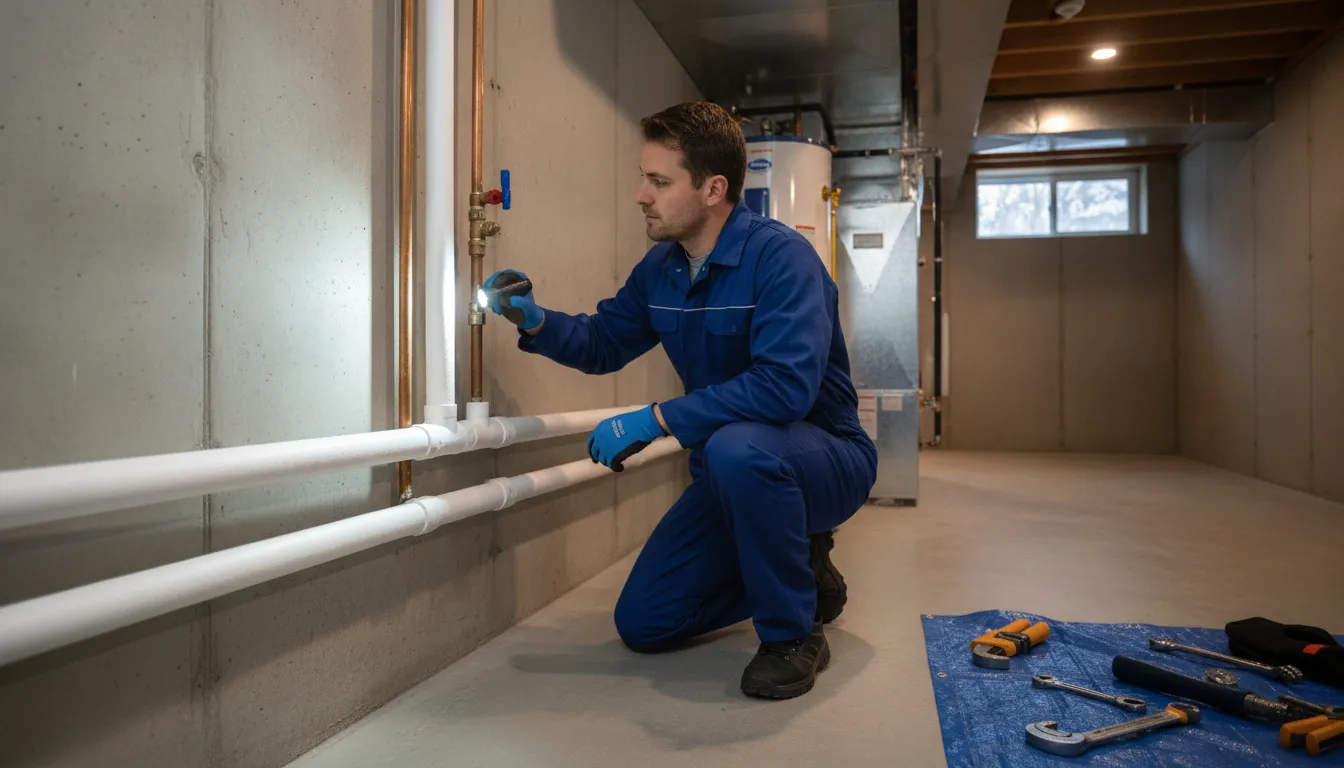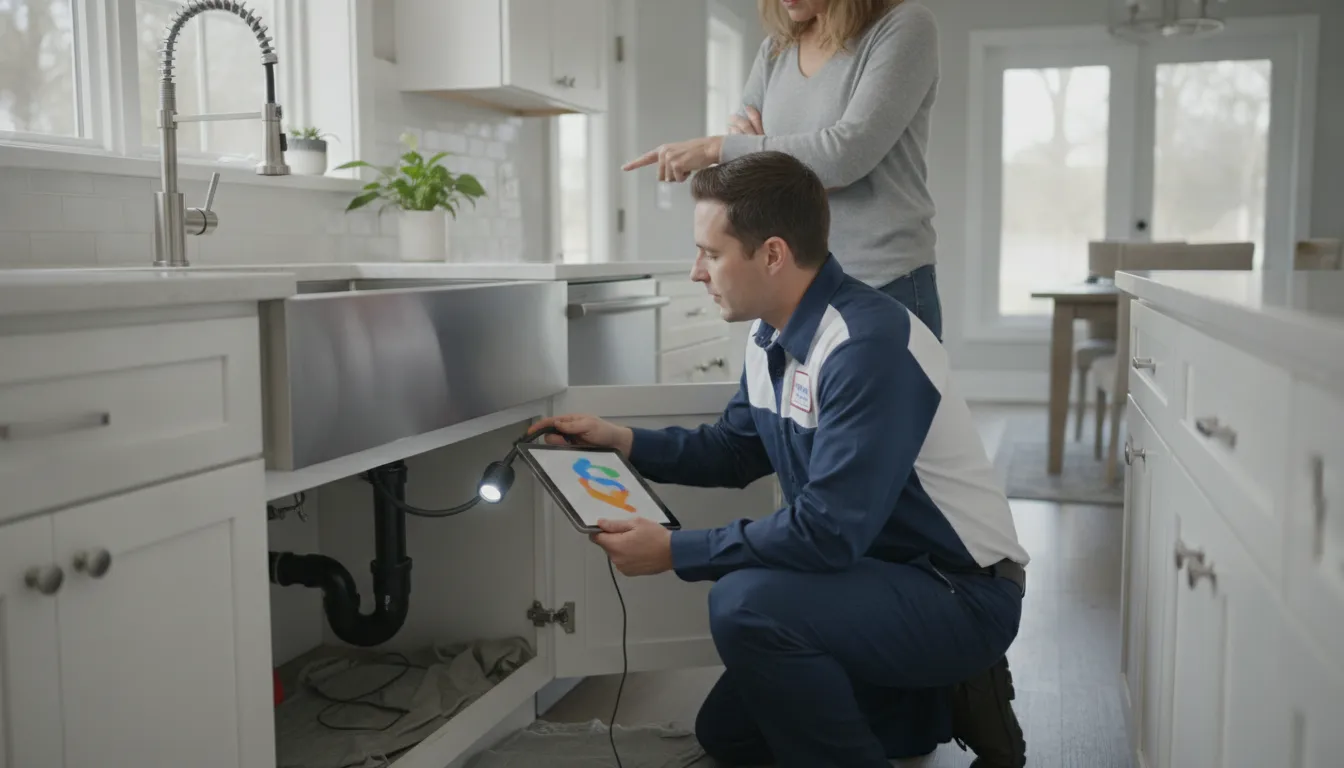


The most dangerous part of a sewer backup isn’t the visible mess or the awful smell. It’s the invisible threat that lingers long after the water is gone. That black water flooding your home is a toxic soup of bacteria and viruses that can make your family seriously sick. Just mopping up the water and wiping things down won’t cut it. A proper sewer backup cleanup is a detailed process. It involves cleaning, sanitizing, and drying everything correctly to get rid of those hidden dangers and stop future problems like mold. I’ll walk you through the steps to make your home not just look clean, but be truly safe again.
Key Takeaways
- Prioritize safety over cleanup: Before you do anything, make sure the area is safe. Shut off utilities (only if you can do so without walking through water), keep family and pets away, and wear full protective gear like waterproof boots, gloves, and a mask.
- Sanitize correctly and know what to toss: Removing the water is just the first step. You must wash and then disinfect all hard surfaces. Be prepared to throw away any porous items like carpets, mattresses, and upholstered furniture, as they cannot be made safe again.
- Focus on prevention to avoid a repeat: Once the crisis is over, take steps to stop it from happening again with sewer line repair services. Schedule annual plumbing inspections to clear clogs and consider installing a backflow preventer to protect your home from issues in the main sewer line.
What Is a Sewer Backup?
A sewer backup is one of the most stressful and unpleasant problems a homeowner can face. In simple terms, it’s when wastewater from the main sewer line flows backward into your home instead of away from it. This isn’t just water; it’s raw sewage, full of bacteria, viruses, and other contaminants. When this dirty water comes up through your floor drains, toilets, and sinks, it creates a serious health hazard and can cause extensive, costly damage to your property.
It’s important to understand the difference between a simple clog and a main line backup. If only one sink or toilet is blocked, the issue is likely isolated to that specific fixture. However, if you notice water backing up in multiple drains, especially on the lowest level of your home, you’re probably dealing with a main sewer line problem. This is more than a simple DIY fix; it’s a true plumbing crisis. A sewer backup requires immediate attention to protect your family’s health and your home’s structure, often calling for emergency plumbing services to resolve the issue safely and effectively.
Understanding Water Contamination Levels
When you’re facing a flood in your home, it’s easy to think all water is the same. But in the world of plumbing and restoration, water is classified into three distinct categories based on its contamination level. Knowing the difference is critical because it determines the health risks involved and the specific steps needed to safely clean and restore your space. Each category requires a different approach, from a simple dry-out to a full-scale professional sanitization. Understanding what you’re up against is the first step in protecting your home and your family’s health from the aftermath of water damage.
Category 1: Clean Water
Category 1 water is the least hazardous type you might encounter. It comes from a sanitary source, like an overflowing sink, a leaky faucet, or a broken water supply line. While it’s considered “clean,” that doesn’t mean it’s harmless. Once this water leaves its source and touches other surfaces like flooring and drywall, it starts collecting bacteria and contaminants. If it’s not addressed within 24 to 48 hours, it can easily degrade into Category 2. A common source of this issue is a burst pipe during a cold snap, which is why taking steps to prevent frozen pipes is so important for homeowners in Metro Detroit.
Category 2: Gray Water
Category 2, or gray water, is significantly contaminated and can cause illness if you come into contact with it. This water comes from sources like an overflowing washing machine, a malfunctioning dishwasher, or even a failed sump pump that has allowed stagnant water to sit. It contains chemicals, soaps, and microbes that make it unsafe. Cleaning up gray water isn’t just about removing the moisture; it requires thorough cleaning and disinfection of all affected surfaces to eliminate potential health hazards. Letting gray water sit will only make things worse, as it can quickly turn into the most dangerous category of all.
Category 3: Black Water
Category 3 is black water, and it’s as bad as it sounds. This water is grossly contaminated and poses a severe health risk. The most common source of black water is a sewer backup, but it can also come from a toilet overflow containing feces or from natural floodwaters that have mixed with sewage and other ground contaminants. Black water is teeming with dangerous pathogens, viruses, and bacteria that can cause serious diseases. This is never a DIY situation. Due to the extreme health hazards, you should call for emergency plumbing services immediately and leave the cleanup to trained professionals with the right protective gear and sanitizing equipment.
Why Did My Sewer Back Up?
Sewer backups don’t just happen out of nowhere. They are usually the result of a blockage in your home’s private sewer line or the city’s main line. One of the most common culprits is tree roots, which are naturally drawn to the moisture in sewer pipes and can grow into them, causing cracks and blockages. Another major cause is improper disposal of certain items. Pouring cooking fats, grease, and oil down the drain can create solid masses that clog pipes, requiring professional drain cleaning. Similarly, flushing things that don’t dissolve, like wet wipes (even the “flushable” kind), diapers, and hygiene products, will inevitably lead to a clog. Over time, older pipes can also break down or collapse, creating a blockage that needs professional repair.
Is a Backup Coming? Watch for These Signs
Your plumbing system will often give you hints that trouble is brewing before a full-blown backup occurs. Paying attention to these early warning signs can save you from a major disaster. If you notice frequent backups in multiple drains, it’s a clear signal of a deeper issue in your sewer line. Listen for gurgling sounds coming from your drains or toilet, especially after flushing or running water. You might also see water backing up into your shower or tub when you flush the toilet. A persistent, foul odor that smells like sewage around your property is another red flag you shouldn’t ignore. If you spot any of these signs, it’s best to get in touch with a professional right away.
What to Do Immediately After a Sewer Backup
When you’re facing a sewer backup, your first instinct might be to jump into action. But before you grab a mop, it’s critical to pause and focus on safety. Sewer water isn’t just dirty; it’s a hazardous mix of contaminants, and a flooded area can hide serious dangers like electrical shock. Your immediate priority is to secure the area and protect everyone in your home. Taking a few key precautions right away will prevent a bad situation from becoming a dangerous one. Think of it as creating a safe zone before the real work of cleanup begins.
How to Keep Your Family Safe
The most significant dangers from a sewer backup aren’t always the ones you can see. While the water contains harmful bacteria and viruses, the immediate, life-threatening risks are electrocution and even explosion. If water comes into contact with your home’s electrical system or gas appliances, it creates an incredibly hazardous environment. Do not enter standing water. Your first call should be to a professional who can assess the situation safely. While you wait, stay out of the affected area and focus on keeping your family away from the contamination. An emergency plumbing situation like this requires a calm, safety-first approach above all else.
Practice Strict Personal Hygiene
Treat any contact with sewer water as a serious health risk. This water is filled with bacteria and viruses that can make you sick. If you must be near the affected area, it’s essential to keep yourself clean. After you’ve finished, or if you accidentally touch contaminated surfaces, wash your hands and any exposed skin thoroughly with soap and hot water. Use a nail brush to clean under your fingernails, and make a conscious effort to keep your hands away from your eyes, nose, and mouth. This isn’t just about feeling clean; it’s a critical step in preventing illness for yourself and your family.
Prevent Cross-Contamination
Containing the mess is just as important as cleaning it up. Be mindful not to track sewage from the affected area into clean parts of your home. If you have any cuts or open sores, keep them clean, covered with a waterproof bandage, and away from the contaminated water at all times. Do not eat, drink, or smoke in the affected area, and throw away any food that may have come into contact with the sewer water, even if it’s in packaging. Preventing the spread of contaminants is a key part of managing the situation until professional emergency plumbing help can take over and ensure your home is truly safe again.
Safely Shutting Off Water and Power
Water and electricity are a lethal combination. If the sewer backup has caused flooding, especially in a basement where your circuit breaker, furnace, or water heater are located, you must shut off your utilities. However, do not attempt to do this yourself if you have to walk through water to get to them. Instead, call your gas and electric utility companies immediately and ask them to turn off the services to your home from the outside. This is the only way to ensure the area is safe to enter later. Never use matches or lighters in a flooded area, as flammable gases could have collected.
Check Submerged Appliances and Utilities
Once the power is safely turned off and the immediate danger is managed, you’ll need to assess the damage to your home’s essential systems. Any appliances that have been touched by sewer water, like your furnace, water heater, washer, or dryer, should be considered compromised. It’s not just about the water damage; the internal electrical components and insulation have been exposed to corrosive contaminants and bacteria. Trying to turn them on, even after they seem dry, is incredibly risky and can lead to electrical shorts, fires, or further damage. These appliances cannot be safely cleaned or sanitized on your own. It’s essential to have them inspected by a qualified professional who can determine if they need to be replaced. This is a critical step in ensuring your home is safe long-term after an emergency plumbing event.
Create a Safe Zone for Kids and Pets
A flooded area is no place for kids or pets. The contaminated water poses significant health risks, and children and animals are often more susceptible to the bacteria and pathogens found in raw sewage. Their natural curiosity can also lead them into unsafe situations. Before you do anything else, make sure your children and pets are secured in a separate, clean part of the house, far from the affected area. If the backup is widespread, it may be best to have them stay with a friend or family member until your home has been professionally cleaned and sanitized. Keeping them safe allows you to focus on addressing the problem without worry.
Your Sewer Backup Cleanup Toolkit
Before you can even think about cleaning, you need to suit up. Tackling a sewer backup without the right equipment is not only ineffective, it’s a serious health risk. Think of it like preparing for a messy, hazardous project, because that’s exactly what it is. Having everything you need on hand before you start will make the process smoother and, most importantly, safer. We’ll break down your cleanup kit into three main categories: personal protective gear, tools for removing the mess, and the supplies you’ll need to disinfect everything afterward.
Must-Have Protective Gear (PPE)
Let’s be direct: sewage is hazardous. It’s filled with bacteria, viruses, and other pathogens that can make you very sick. Your top priority is creating a barrier between you and the contamination. Start with waterproof, steel-toed boots and heavy-duty rubber gloves that go up to your elbows. It’s also a good idea to wear safety goggles to protect your eyes from splashes. For respiratory protection, an N95-rated mask or a respirator is essential to avoid inhaling harmful airborne particles. Wear old clothing that you can throw away afterward or, even better, disposable coveralls. This isn’t a time to cut corners; your health comes first.
The Right Tools for Removing Contaminated Waste
Once you’re protected, it’s time to remove the standing water and solid waste. For smaller jobs, a wet/dry shop vacuum will be your best friend. Just remember that its contents will be contaminated and need to be disposed of properly. If you’re dealing with several inches of water, you may need to rent a submersible pump to speed up the process. You’ll also want sturdy buckets for carrying out sludge and solid debris, a shovel or scoop, and plenty of heavy-duty trash bags. Having these cleanup tools ready will help you clear the area efficiently so you can move on to the critical cleaning and sanitizing phase.
Essential Cleaning and Disinfecting Supplies
Removing the water is just the first step. Now, you have to assume every surface the sewage touched is contaminated. You’ll need a low-sudsing detergent to scrub down non-porous surfaces first. After cleaning, the real work of disinfecting begins. A solution of one cup of household bleach per gallon of water is effective, but be sure the area is well-ventilated. Alternatively, you can use a hospital-grade disinfectant. Look for products specifically labeled as an EPA-registered disinfectant to ensure they kill harmful germs. For stubborn organic matter, an enzyme-based cleaner can also be very helpful. Grab plenty of scrub brushes, sponges, and rags that you can toss out when you’re done.
A Critical Warning: Never Mix Cleaning Chemicals
When you’re in the middle of a messy cleanup, it’s easy to think that combining different cleaners will give you more disinfecting power. This is a dangerous myth. You must never, under any circumstances, mix cleaning chemicals, especially bleach and ammonia. When combined, these two common household products create a toxic gas called chloramine, which can cause severe respiratory issues, chest pain, and other serious health problems. Public health authorities are very clear on this point: always use cleaning products exactly as the label directs. The Illinois Department of Public Health emphasizes that while you must wash and then disinfect, mixing chemicals like bleach and ammonia creates dangerous fumes. Stick to one product at a time to keep yourself safe during this already stressful process.
Your Step-by-Step Sewer Backup Cleanup Guide
Okay, you’ve taken the initial safety precautions. Now it’s time to face the cleanup. Tackling a sewer backup is a serious job, but you can manage it by following a clear, methodical process. The key is to work carefully, from removing the initial mess to deep cleaning and sanitizing every affected surface. This guide breaks the process down into manageable steps to help you restore your space safely and effectively. Remember, your health is the top priority, so don’t cut corners. If at any point the job feels too overwhelming, our emergency plumbing team is always ready to handle these tough situations for you.
Step 1: Document the Damage for Insurance
Before you start cleaning, take a moment to assess the situation. Put on your protective gear and carefully walk through the affected area. Take plenty of photos and videos of the standing water, the source of the backup, and any damaged items. This documentation is crucial for your insurance claim. Make a note of everything that has come into contact with the sewage. If the area isn’t cleaned and dried properly, a musty odor can linger, which is a sign of continued microorganism growth. A thorough initial assessment helps you create a solid plan and ensures you don’t miss anything during the cleanup. This step is vital for both your claim and your health.
Step 2: Remove Contaminated Water and Solids
With your assessment complete, the next step is to remove the standing water and solid waste. For smaller jobs, you can start by carefully picking up larger debris with paper towels and placing it directly into heavy-duty trash bags. For significant amounts of water, you may need to rent equipment like a wet/dry vacuum or a submersible pump. These tools are essential for removing the bulk of the liquid efficiently. Work from the edges of the spill inward, removing as much of the sewage as you can before moving on to the cleaning phase. This initial removal is messy but necessary to prepare the area for deep sanitization.
Tips for Removing Solid Waste
Once the standing water is gone, you’ll be left with the solid debris. This is a tough part of the job, but you can get through it. First, make sure you’re still wearing all your protective gear, especially a respirator for breathing protection. Use paper towels to pick up any larger clumps of waste and toilet paper, placing them directly into a heavy-duty trash bag. For anything stuck to the floor, a simple putty knife can help you scrape it off. Be careful not to push any of this debris toward a floor drain, as you don’t want to create another clog. After you’ve removed the solids, you can use a wet/dry vacuum to suck up the remaining sludge and watery mess, which makes the final cleaning stage much more manageable.
Proper Sewage Disposal
Now that you have bags of contaminated waste and debris, what do you do with them? Proper disposal is critical to protect your community and the environment. First, a crucial rule: never pump or dump sewage water into street catch basins or storm drains. Those lead directly to local waterways. For the solid items, you’ll have to make some hard choices. Porous materials like carpet, padding, mattresses, drywall, and upholstered furniture are impossible to fully sanitize and must be thrown away. Seal all contaminated items and debris in tightly closed plastic bags or containers for trash pickup. Check with your local waste management provider for any specific guidelines on disposing of materials contaminated with sewage.
Step 3: Begin Cleaning All Affected Surfaces
Once the standing water and solids are gone, it’s time to clean. Use your wet/dry vacuum to suck up any remaining dirty water and loosened mess. After vacuuming, you’ll need to treat every surface the water touched as contaminated. This includes floors, walls, and any furniture that was in the area. A simple and effective cleaning solution can be made with household bleach and water (always follow the product’s safety instructions). Spray the solution over all affected hard surfaces and let it sit for a few minutes before wiping it down. For more complex situations or if you’re unsure about the process, our team can take over to ensure a professional and thorough cleanup.
Handling Contaminated Drywall and Flooring
This is the part no one wants to hear: some things just can’t be saved. When it comes to porous materials, you have to be ruthless. Any carpet, padding, or upholstered furniture touched by sewage must be thrown away. There’s simply no way to sanitize them completely. The same goes for drywall and insulation. You’ll need to cut away the affected drywall, going at least a foot or two above the highest water line to ensure you remove all contamination. Even if your flooring seems solid, like tile or vinyl, sewage can seep underneath. This means you may have to remove the flooring to clean and disinfect the subfloor beneath it. It’s a tough job, but it’s the only way to prevent mold growth and lingering health hazards.
Sanitizing Your Home After a Sewer Backup
Once the standing water and solid waste are gone, it’s time for the most critical step: sanitizing. This is about more than just wiping things down. Sewage isn’t just dirty water; it’s a hazardous mix of waste, bacteria, viruses, and other pathogens that can cause serious illness. Cleaning removes the visible dirt, but sanitizing is what kills these invisible threats left behind on your floors, walls, and belongings. Skipping this step or not doing it thoroughly can lead to lingering odors, mold growth, and potential health problems for your family long after the water is gone. Taking the time to do this properly is the only way to ensure your home is truly safe again.
This part of the cleanup can feel overwhelming, especially when you’re already dealing with the stress of a backup. Remember, if the scope of the damage is too large or you’re not comfortable handling these materials, our team is always here to help. We manage these situations with professional-grade equipment and a focus on safety, offering emergency plumbing services to get your home back to normal quickly and safely. Your family’s health is the top priority, so don’t hesitate to call for backup when you need it.
Choosing the Right Sanitizing Products
You don’t need to buy expensive, specialized products to effectively sanitize your home. A few common household cleaners can create a powerful disinfecting solution that will get the job done. A great option is to mix 8 tablespoons of standard laundry bleach into one gallon of water. Alternatively, you can combine 2 and a half tablespoons of a disinfectant cleaner like Lysol or Pine-Sol with one gallon of water. When working with these chemicals, safety is key. Always wear waterproof gloves and eye protection, and open windows and doors to ensure the area is well-ventilated, as the fumes can be strong.
How to Sanitize Different Types of Surfaces
Every surface that came into contact with the contaminated water needs a two-step cleaning and sanitizing process. First, wash all affected hard surfaces, including walls, baseboards, and non-porous flooring, with warm or hot water and a mild soap. Use a scrub brush to work the soap in and lift away any residue. After washing, rinse everything thoroughly with clean, warm water to remove leftover soap and grime. Now you’re ready for step two: applying your sanitizing solution. This two-step approach is crucial because it ensures the sanitizer can directly attack and kill any remaining microorganisms without being blocked by a layer of dirt.
Allow Proper Dwell Time for Disinfectants
After you’ve applied your sanitizing solution, you might be tempted to wipe it away immediately. But this is where a little patience makes a huge difference. For a disinfectant to actually kill the harmful bacteria and viruses left behind by sewage, it needs to remain on the surface for a specific amount of time. This is called “dwell time.” Think of it as giving the cleaner time to do its job. Most products, including a simple bleach solution, need to sit for at least 10 minutes to be fully effective. Wiping it off too soon means you’re just spreading the germs around instead of eliminating them. Always check the label on your disinfectant for the recommended dwell time and make sure the surface stays wet for that entire period. This step is what truly makes your home safe again after an emergency plumbing event.
How to Clean and Save Your Belongings
When it comes to your belongings, you’ll need to be ruthless. The rule of thumb is: when in doubt, throw it out. Porous items that absorb water easily, like carpets, rugs, upholstered furniture, mattresses, and books, are nearly impossible to fully disinfect and should be discarded for your safety. For non-porous items, you have a better chance. Hard plastic toys or sealed canned goods, for example, can often be salvaged. Scrub them with soap and water, then soak them for at least 15 minutes in a bleach solution (one ounce of bleach per gallon of water) to ensure they are safe. For valuable or sentimental items you’re unsure about, consulting a professional water damage restoration expert is your best bet.
What to Keep vs. What to Toss
After a sewer backup, one of the most difficult tasks is sorting through your belongings. It can be heartbreaking to see personal items damaged, but your family’s health has to be the top priority. Sewage contains harmful bacteria, viruses, and other contaminants that pose serious health risks. Deciding what to keep and what to throw away isn’t about an item’s monetary or sentimental value; it’s about whether it can be made completely safe again.
The main factor in this decision is the material of the item. Porous materials, which absorb water like a sponge, are nearly impossible to fully sanitize. Non-porous materials, which have hard surfaces that resist water, are much more likely to be salvageable. Before you start, remember that this entire situation is a plumbing emergency. If you feel overwhelmed or unsure about how to proceed safely, our team is always ready to help with emergency plumbing situations. Taking the right steps now will protect your home and health long after the water is gone.
What Can Be Saved? Items You Can Clean
You can salvage most items made from hard, non-porous materials. Think of things like glass, metal, solid wood furniture, and hard plastics. Because these materials don’t absorb contaminated water, you can effectively clean and sanitize their surfaces. The process involves first washing the item with soap and hot water to remove all visible dirt and grime. After it’s clean, you must apply a disinfectant to kill any remaining germs.
It’s crucial to be thorough. If an item isn’t cleaned and dried properly, a musty odor can develop, which is a clear sign that harmful microorganisms are still present. Always wear your protective gear when handling these items, even if you plan to salvage them.
What to Throw Out: When in Doubt, Toss It
This is the hard part, but it’s not worth risking your health. You should immediately discard any porous items that absorbed sewage. This includes carpets and rugs, mattresses, pillows, upholstered furniture, stuffed toys, books, and paper products. These materials soak up contaminants deep into their fibers, and it’s virtually impossible to sanitize them completely. The same goes for particleboard furniture, which will swell, warp, and trap contaminants.
Also, throw away any food, drinks, or medicine that came into contact with the sewage, even if the packaging looks sealed. In some cases, fixtures that were submerged might also be a loss. If your toilet was damaged in the backup, a simple fix might not be enough, and you may need a full toilet repair or replacement.
How to Properly Dispose of Contaminated Items
Getting rid of personal belongings is tough, but when you’re dealing with sewage contamination, safety has to win out over sentiment. To dispose of these items properly, you’ll need heavy-duty plastic trash bags. Double-bag everything to prevent leaks and, if possible, clearly label the bags as contaminated waste. This is an important step to help protect sanitation workers from accidental exposure. Before you haul anything to the curb, it’s also a smart move to check with your local waste management provider about their specific rules for handling hazardous materials. This entire process can be physically and emotionally draining. If the task feels too big, remember that professional cleanup and emergency plumbing services include the proper disposal of all contaminated materials, taking that burden off your shoulders.
Porous vs. Non-Porous: Why It Matters for Cleanup
Understanding the difference between porous and non-porous materials is key to a safe cleanup. Porous materials, like drywall, fabric, and insulation, have tiny holes that allow water and contaminants to soak in deep. Non-porous materials, like sealed concrete, metal, and glass, have a solid surface that resists absorption. While the rule of thumb is to toss anything porous, there are some exceptions for semi-porous items, like solid wood studs inside a wall. If they are structurally sound, they can sometimes be saved if they are professionally cleaned, disinfected, and thoroughly dried.
However, treat every single item the water touched as contaminated until it has been properly sanitized. When you’re faced with a tough decision, always choose the side of caution. If you can’t be 100% certain an item is clean and safe, it’s better to let it go. For complex jobs involving your home’s structure, our wide range of plumbing services can help you restore your home safely.
Dealing with Food After a Backup
The kitchen is often the heart of the home, but after a sewer backup, it can become a major source of risk. Contaminated water doesn’t just damage floors and walls; it can compromise your family’s entire food supply, turning a place of nourishment into a health hazard. The danger comes from two fronts: direct contact with sewage and the secondary effects, like power outages, that can spoil the contents of your refrigerator and freezer. Navigating this part of the cleanup requires strict rules and a non-negotiable focus on safety. Knowing exactly what to keep and what to toss is a critical step in protecting your family from foodborne illness long after the water is gone.
Contaminated Food Items
This is a situation where you absolutely cannot take chances. You must throw away any food, drinks, or medicine that came into contact with the sewage, even if the packaging looks perfectly sealed. It’s tempting to try and save a canned good or a sealed bottle, but it’s not worth the risk. Microscopic pathogens from the sewage can easily hide under screw caps, on can lids, and in the cardboard of packaging, leading to cross-contamination later. When it comes to the health of your family, the rule is simple and non-negotiable: if it touched the water, it has to go.
Food Safety During a Power Outage
A sewer backup can sometimes cause a power outage, creating a second front in your battle for safety. If your refrigerator or freezer took on any water, all the food inside must be thrown out immediately. If the appliances stayed dry but the power went out, you’re on a timer. According to food safety guidelines, a full freezer will keep its contents frozen for about two days if the door remains closed; a half-full freezer lasts about one day. Any food that has partially thawed should be cooked right away or discarded. Don’t try to refreeze it, as that can be a recipe for foodborne illness.
Drying Everything Out and Preventing Mold
Once you’ve cleaned and sanitized, the next step is absolutely critical: drying everything completely. Moisture is the number one ingredient for mold growth, and after a sewer backup, you have plenty of it. Simply wiping surfaces dry isn’t enough. You need to pull moisture out of the air, drywall, and flooring to prevent long-term damage and serious health risks. This final phase of the cleanup is all about being thorough and patient.
How to Speed Up Drying with Fans and Dehumidifiers
To effectively dry a saturated space, you’ll need more than just towels. Your goal is to create an environment that actively pulls moisture from every surface. Start by placing high-powered fans throughout the affected area to keep air circulating and speed up evaporation. Next, bring in one or more dehumidifiers to pull that moisture out of the air. For a serious backup, consider renting industrial-grade equipment. Run the fans and dehumidifiers 24/7 for several days. Even when surfaces feel dry, moisture can be trapped deep inside, so don’t rush this step. It’s a key part of any professional emergency plumbing response.
Why Good Airflow Is So Important
While fans and dehumidifiers work inside, you also need to get the damp, contaminated air out. Proper ventilation is essential for both drying and your safety. If weather permits, open windows and doors to create a cross-breeze that pushes moist air outside and brings fresh air in. This helps the area dry faster and dissipates lingering odors from the sewage or cleaning solutions. Working in a well-ventilated space is much safer and prevents you from breathing in harmful fumes or airborne contaminants. Think of it as letting your house take a deep breath after a stressful event.
How to Spot the First Signs of Mold
Mold can begin to grow in as little as 24 to 48 hours, so you need to be vigilant. After drying, keep a close eye (and nose) on the area for the next few weeks. Look for visible signs of growth, like black, green, or white spots on walls or baseboards. Even if you don’t see anything, a persistent musty or earthy smell is a major red flag that mold is growing somewhere hidden. If you notice either of these signs, it means the area wasn’t dried completely. At this point, it’s best to contact a professional to handle the situation safely.
The Health Risks of Sewage Exposure
A sewer backup is more than just a messy inconvenience; it’s a serious biohazard event happening inside your home. The water from a sewer line, often called black water, is heavily contaminated with waste, bacteria, and other dangerous materials that can pose significant risks to your family’s health. Exposure to these elements can cause illness, and the moisture itself can lead to mold growth, which creates long-term air quality problems.
Beyond the biological dangers, a major backup can also create physical hazards. Standing water introduces the risk of electrocution from submerged outlets and appliances, and in rare cases, sewer gases can build up to flammable levels. Because the stakes are so high, it’s important to treat the situation with extreme caution. Your first priority should always be safety. If you feel overwhelmed or unsure about how to proceed, the safest option is always to call for professional help. A team with experience in emergency plumbing can manage the cleanup safely and effectively, protecting both your home and your health.
Common Illnesses Caused by Raw Sewage
It’s critical to understand that sewer water is not just dirty water. It contains harmful things like viruses, bacteria, and other germs that can make people very sick. Contact with contaminated water or surfaces can lead to gastrointestinal issues and other infections. For this reason, you should treat everything the water has touched as a potential source of illness until it has been thoroughly cleaned and sanitized. Remember to also consider the less obvious dangers. Standing water near electrical outlets or appliances creates a serious risk of electric shock. It’s essential to shut off the power to the affected area before you even think about starting the cleanup process.
Know When to See a Doctor
Even if you wear protective gear, exposure can still happen. Pay close attention to your health in the days following a sewer backup cleanup. If you or anyone in your household begins to experience symptoms like nausea, vomiting, diarrhea, or fever, it’s important to seek medical attention immediately. Inform your doctor that you may have been exposed to sewage so they can provide the appropriate care. Since sewage is so dangerous for your health, the best way to protect yourself is to avoid direct contact altogether. Calling professionals to handle the cleanup is the most effective way to ensure the area is made safe without putting your well-being at risk.
When Should You Call a Professional?
Tackling a home project yourself can be incredibly rewarding, but a sewer backup is one of those times when calling for backup is the smartest move. While you might be able to handle a very minor spill, a significant sewage event poses serious risks to your health and your home’s structure. Knowing when to step back and let an expert take over is key to a safe and effective cleanup.
The decision often comes down to two things: the size of the mess and the potential costs involved. If you’re facing widespread water, contaminated materials, or you’re just not sure where to start, it’s time to call in a pro. A professional has the right equipment and training to handle the situation safely, protecting you and your family from harmful contaminants.
Is This Cleanup Too Big to Handle Yourself?
It’s tempting to try and manage a sewer backup on your own, but some situations are simply too hazardous for a DIY approach. Sewage is more than just dirty water; it contains bacteria, viruses, and other germs that can cause serious illness. If the backup is extensive, covering a large area of your basement or home, it’s a job for a professional. You should also call for help if the contaminated water has soaked into porous materials like drywall, carpeting, or insulation. These materials are nearly impossible to sanitize properly without specialized equipment and can become a breeding ground for mold.
If you’re unsure of the source of the backup or if the flow of sewage hasn’t stopped, you need an expert immediately. A professional plumber can diagnose the underlying issue and provide emergency plumbing services to prevent further damage. Choosing to call a professional isn’t admitting defeat; it’s making the responsible choice for your home and your family’s health.
The Tools Professionals Use
When you call in a professional, you’re not just paying for their time; you’re getting access to an arsenal of specialized equipment that makes the cleanup process faster, safer, and far more thorough. While a homeowner might have a shop vac, professionals arrive with industrial-grade water extraction units and powerful submersible pumps that can clear a flooded basement in a fraction of the time. They also use advanced tools like moisture meters to detect hidden dampness in walls and floors, ensuring no spot is missed. For drying, they set up high-velocity air movers and commercial dehumidifiers to pull every last bit of moisture out of the structure, which is the key to preventing mold. Finally, they apply EPA-registered, hospital-grade disinfectants, sometimes using foggers to sanitize hard-to-reach areas. This level of equipment is why a professional emergency plumbing response is so effective.
Professional Cleanup: Understanding Costs and Insurance
One of the first questions on anyone’s mind during a home emergency is, “How much will this cost?” Professional sewage cleanup can range from $2,000 to $10,000 or more, depending on the extent of the damage. While that number can be intimidating, it reflects the cost of a thorough job that includes water extraction, sanitizing, drying, and repairing damaged structures. Trying to cut corners can lead to lingering health hazards and more expensive mold problems later.
It’s also important to understand what your homeowner’s insurance covers. Most standard policies do not include coverage for sewer backups. You often need to purchase a separate rider or add-on for this type of protection. The best time to figure this out is before you need it. Review your policy or call your insurance agent to see what’s covered. If you find yourself needing a quote for repairs, you can always contact us for a clear and honest assessment.
How to Prevent Future Sewer Backups
After cleaning up a sewer backup, the last thing you want is a repeat performance. Taking a few proactive steps can save you from dealing with this messy, stressful situation again. Prevention is all about being mindful of what goes down your drains and equipping your home with the right safeguards. By combining regular professional check-ups with a few key installations, you can protect your property and your peace of mind. It’s much easier and more cost-effective to stop a problem before it starts than to clean up the aftermath.
Think of it as a two-part strategy: consistent care for your existing plumbing system and smart upgrades to fortify your home against external issues. A little bit of maintenance goes a long way in keeping your pipes clear and functional. At the same time, installing devices designed to stop sewer backflow adds a powerful layer of defense. This isn’t about waiting for disaster to strike; it’s about creating a resilient plumbing system that can handle everyday use and unexpected strain from the municipal line or severe weather. Many homeowners are surprised to learn that the responsibility for the sewer line running from their house to the street falls on them. Understanding this makes proactive care even more critical. Let’s walk through how you can put these strategies into action.
Schedule Regular Plumbing Maintenance
Your home’s plumbing is a complex system, and out of sight shouldn’t mean out of mind. The most common culprits behind sewer backups are things that should never have gone down the drain in the first place, like cooking grease, “flushable” wipes, and hygiene products. Over time, these items build up and create stubborn clogs. Tree roots are another major issue, as they can sneak into tiny cracks in your sewer line and grow, causing a complete blockage.
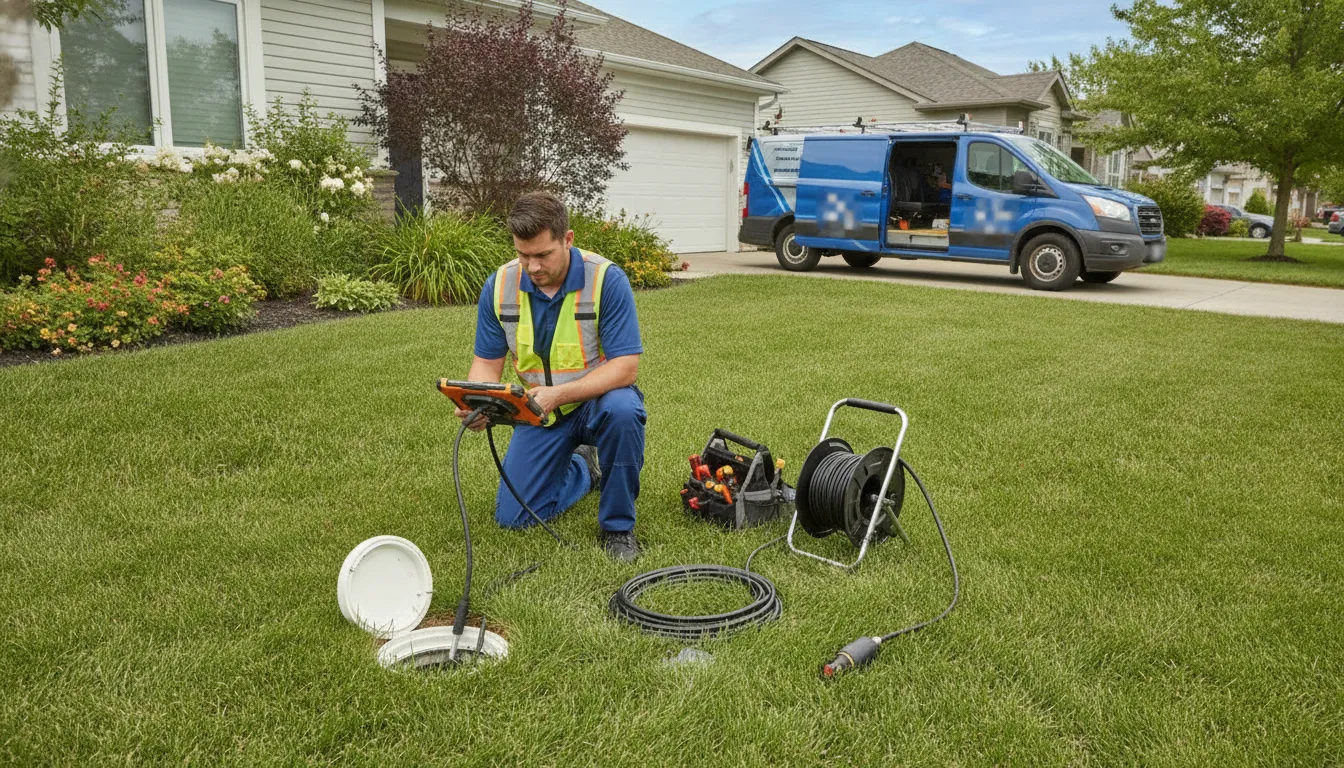
Scheduling a professional plumbing inspection once a year allows a technician to spot these problems early. Using tools like a sewer camera, we can see exactly what’s happening inside your pipes. If we find tree roots or a tough clog, we have the right equipment to clear it out properly. Regular plumbing services are a small investment that prevents major headaches down the road.
Consider a Backwater Prevention Valve
While maintenance keeps your internal pipes clear, you also need protection from issues in the main city sewer line. Heavy rain or a municipal blockage can force sewage back toward your home. A backflow preventer is your best defense against this. This simple device acts like a one-way gate, allowing wastewater to leave your home but automatically closing to block any from flowing back in. We can help you choose and install the right backflow preventer for your property.
For homes with basements, a sump pump is another essential tool. It works to remove groundwater that accumulates around your foundation, preventing it from seeping in and causing floods. A reliable sump pump keeps your basement dry and protects it from water damage, which is especially important during Detroit’s heavy rains and thaws. This device is a key part of keeping your lower level safe and dry year-round.
Related Articles
- Sewage Clean Up: A Complete Homeowner’s Guide
- Basement Drain Backup: Your Step-by-Step Guide
- Drain Backup in Basement? A Step-by-Step Guide
Frequently Asked Questions
How can I tell if I have a main sewer backup or just a simple clogged drain? A simple clog usually isolates itself to one spot, like a single slow-draining sink or a toilet that won’t flush. A main sewer line backup, however, is a system-wide problem. You’ll see symptoms in multiple places at once, especially on the lowest level of your home. For instance, flushing an upstairs toilet might cause water to gurgle or rise in your basement shower drain. If multiple fixtures are acting up, it’s a strong signal the issue is in your main sewer line.
What is the absolute first thing I should do if I see sewage backing up? Before you even think about cleaning, your first move must be to ensure everyone’s safety. Immediately get all people and pets out of the affected area and keep them away. Do not walk through the standing water, as it is hazardous and may hide electrical dangers. If water is near outlets or appliances, call your utility companies to shut off the power and gas from outside your home. Securing the area is always the first and most important step.
Is it really necessary to throw away my carpet and furniture after a backup? I know it’s difficult, but for most soft, porous items, the answer is yes. Materials like carpet, mattresses, and upholstered furniture absorb contaminated water deep into their fibers, making them nearly impossible to fully sanitize. Attempting to clean them creates a significant risk for mold growth and lingering bacteria that can affect your family’s health. When you’re weighing the cost of an item against your well-being, it’s always best to let it go.
My insurance policy is confusing. How do I know if a sewer backup is covered? You’re not alone; insurance policies can be hard to understand. Most standard homeowner’s policies do not automatically cover damage from a sewer backup. This protection is typically an optional add-on, often called a “water backup” endorsement. The most direct way to find out is to call your insurance agent. Ask them to review your policy with you and confirm exactly what is and isn’t covered. It’s a five-minute call that can save you a lot of stress later.
After cleaning up, how can I be sure my home is truly safe from mold and bacteria? True safety comes from being extremely thorough with the final drying and sanitizing steps. After cleaning, the area must be dried completely with fans and dehumidifiers running for several days. Even after surfaces feel dry, you should keep an eye on the area for a few weeks. A persistent musty smell is a clear sign that moisture is still trapped. If you have any doubt, the best way to get peace of mind is to have a professional handle the cleanup. They have the tools to measure moisture and ensure the job is done right.