Your water heater works tirelessly out of sight, but ignoring it can lead to a messy and expensive surprise. The best way to handle a water heater leak is to prevent it from ever happening. With a little proactive care, you can extend the life of your unit and protect your home from water damage. Simple steps like annual maintenance, checking key components, and managing your water pressure can make all the difference. This guide provides actionable tips to keep your water heater in top shape, saving you from the stress and cost of an unexpected plumbing emergency.
That small pool of water near your water heater raises an immediate, stressful question: is this a quick fix or a total disaster? The answer depends entirely on where the water is coming from. A drip from a valve is a very different problem than a leak from the tank itself. Making the right call between a simple repair and a full replacement starts with a proper diagnosis. This article is designed to help you understand what to look for. We’ll break down the key reasons for water heater leaking so you can better assess the situation and know when to call for professional help.
Key Takeaways
- Prioritize annual maintenance to extend your heater’s life: Simple tasks like flushing the tank to clear out sediment and having a professional inspect the anode rod can prevent the internal corrosion that causes most leaks.
- The leak’s location determines your next step: A drip from a pipe fitting or valve is often a straightforward repair, but water coming from the tank body itself is a clear sign that you need a full replacement.
- Act quickly and safely when you discover a leak: Your first steps should always be to shut off the water and power supply to the unit. This contains the problem and keeps the area safe while you wait for a professional plumber.
Why Is My Water Heater Leaking?
Finding a puddle around your water heater is never a welcome sight. While it’s easy to assume the worst, a leak doesn’t always mean you need a brand-new unit. Leaks can start for several reasons, ranging from a simple loose fitting to a more serious internal problem. Understanding the potential causes can help you figure out your next steps and know when to call for professional help. Let’s walk through the most common culprits behind a leaking water heater.
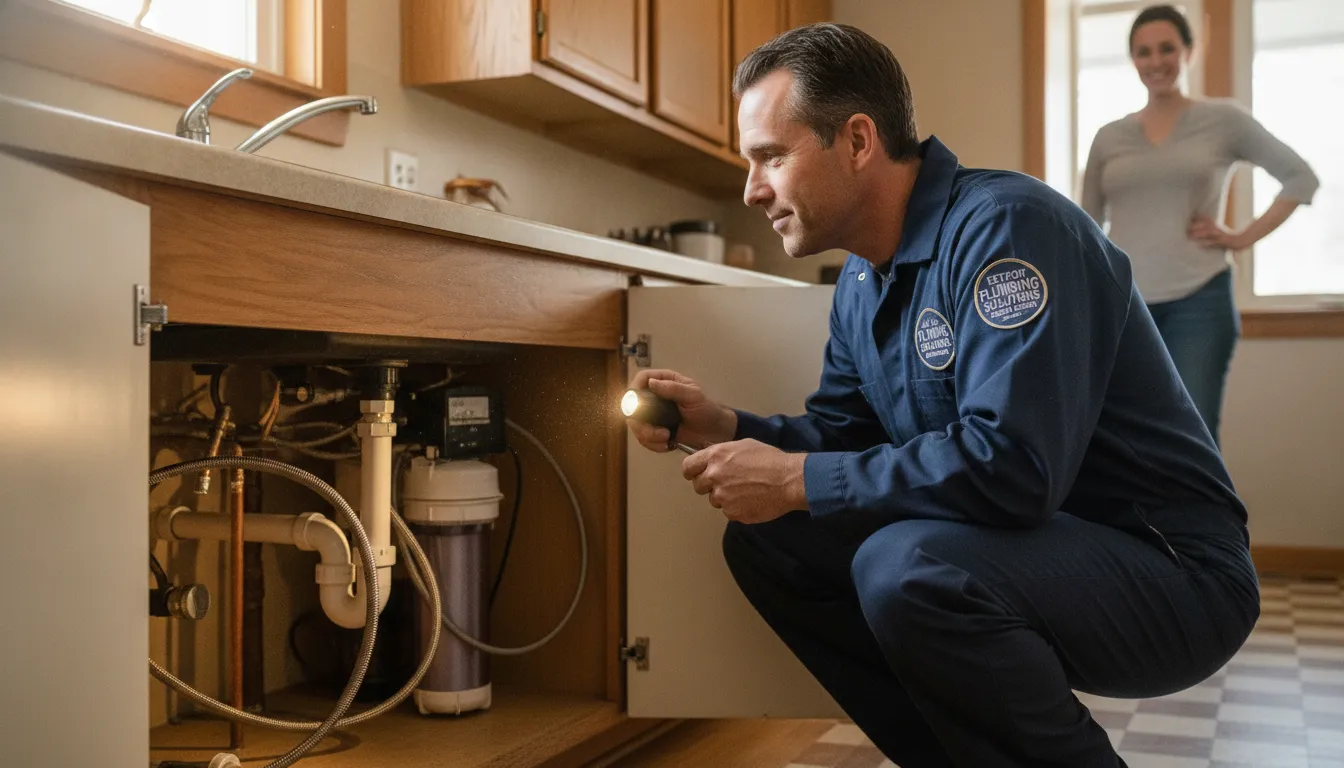
Check for Loose Pipe Connections
Over time, the constant expansion and contraction from heating and cooling water can cause the connections on top of your water heater to loosen. This includes the cold water inlet and the hot water outlet pipes. A leak from these fittings is often a slow drip that you might not notice right away. The good news is that this is usually a straightforward fix. Sometimes, the connection just needs to be tightened, but other times a fitting or pipe may need to be replaced. If you’re not comfortable doing this yourself, a quick visit from a plumber can resolve the issue and prevent further water damage.
A Word of Caution on Overtightening
When you spot a drip coming from a pipe fitting, your first instinct might be to grab a wrench and tighten it as much as possible. It’s a logical thought, but it’s important to proceed with caution. Overtightening is a common mistake that can turn a minor drip into a major headache. Applying too much force can crack the fitting, strip the threads, or even damage the pipe itself, leading to a much worse leak. As the water heater experts at A.O. Smith note, you have to be careful not to tighten too much because a broken part will need a full replacement. A gentle snug-up might be all that’s needed, but if you feel resistance or the leak continues, it’s best to stop before you cause more damage.
Furthermore, a loose connection isn’t always the root cause of the leak. Sometimes, the real issue is excessive pressure inside the water heater tank. If the pressure is too high, water will find the path of least resistance to escape, which often looks like a leak at a pipe fitting. In this scenario, no amount of tightening will solve the problem because you aren’t addressing the pressure itself. The solution might involve adjusting your water heater’s thermostat or installing an expansion tank to give the heated water a place to go. Since diagnosing and fixing pressure issues can be complex, this is where professional expertise becomes invaluable. If you’re unsure or a simple tightening doesn’t stop the drip, it’s safest to call for professional plumbing services to properly diagnose and resolve the underlying issue.
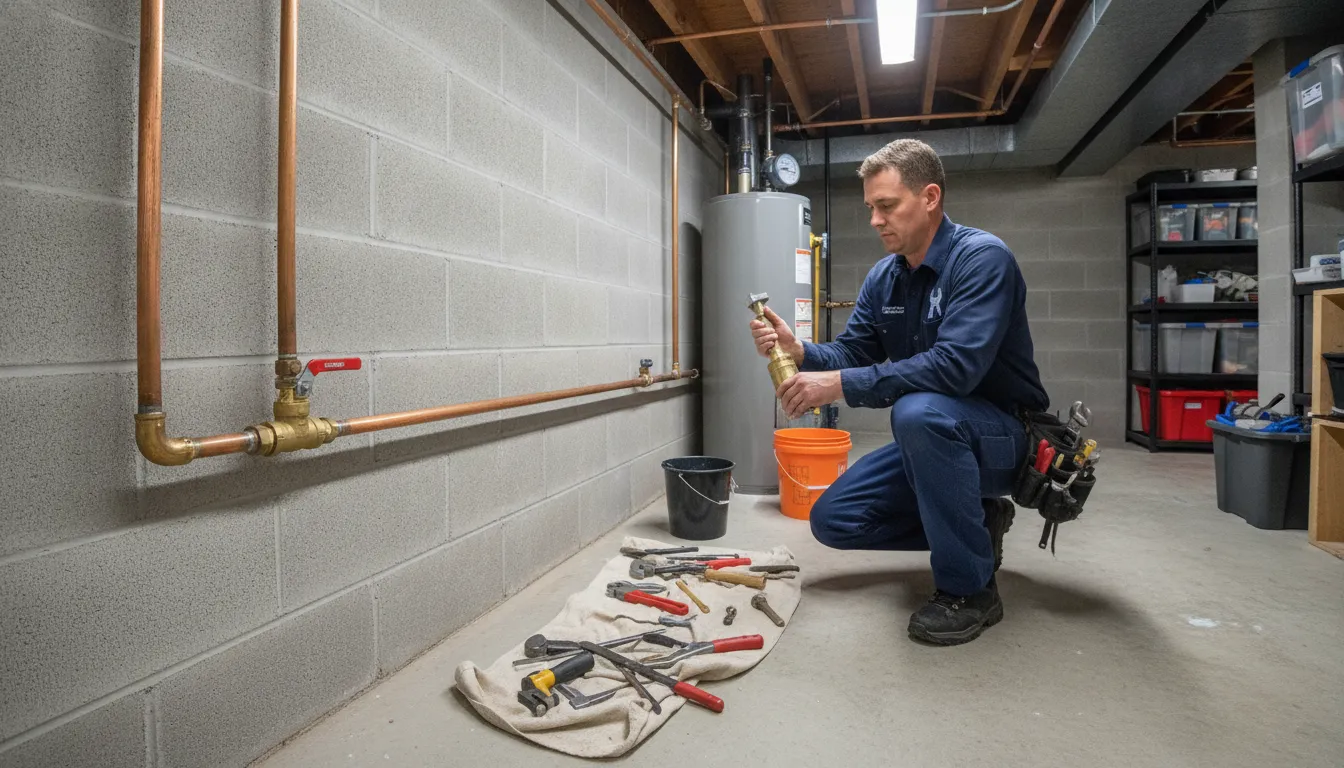
Could a Faulty Drain Valve Be the Culprit?
At the bottom of your water heater tank, there’s a drain valve used for flushing out sediment. These valves can sometimes fail, either because they weren’t closed tightly after the last use or because the valve itself is old and has worn out. A faulty drain valve will typically cause a slow leak or a steady drip from the bottom of the tank. While replacing a drain valve is a relatively minor repair, it does require draining the tank first. If you spot water pooling near the base, it’s a good idea to have a professional take a look and get it fixed before it worsens.
How to Tighten a Leaky Drain Valve
If you’ve pinpointed the source of the drip to the drain valve at the bottom of your tank, you’re in a good spot to attempt a fix. This is a frequent problem, often caused by the valve loosening over time or not being fully closed after a tank flush. While tightening it is a manageable task for many homeowners, it’s not a simple twist of a wrench. The process requires you to completely drain the water heater tank first, so you’ll need to set aside some time. Addressing this small leak promptly is key. Ignoring it can lead to persistent water damage to your floor, create a welcoming environment for mold, and ultimately turn a minor annoyance into a much larger, more expensive problem.
Ready to give it a try? Here’s a step-by-step guide to safely tightening the valve:
- Shut Off the Water and Power: First things first, safety. Turn off the water supply to the heater using the shutoff valve on the cold water pipe. Then, turn off the power. For an electric heater, flip the corresponding breaker in your circuit panel. For a gas heater, switch the thermostat to the “Pilot” or “Off” setting.
- Drain the Tank: Connect a garden hose to the drain valve. Run the other end to a floor drain or safely outside. Open the valve to begin draining. To help it drain faster, you can open a hot water faucet somewhere in your house to let air into the tank.
- Gently Tighten the Valve: With the tank empty, use a pipe wrench to give the valve a gentle clockwise turn—about an eighth to a quarter turn should do it. The key word here is gentle. Overtightening can crack the plastic valve or damage the tank fittings, creating a much worse leak.
- Refill and Check Your Work: Close the drain valve, disconnect the hose, and turn the water supply back on. Let the tank fill completely (you’ll hear the water stop running). Once it’s full, restore power. Now, watch the valve closely for any signs of dripping.
If you still see a drip after tightening the valve, the problem likely lies with a worn-out washer or a crack in the valve body itself. At this point, the entire valve assembly will need to be replaced. While some DIY enthusiasts might tackle this, it can be a tricky job. If you’re not completely confident, or if the leak simply won’t stop, it’s the perfect time to call for professional help. A persistent water heater leak isn’t something to ignore. Our team at Mr. Pipey treats every home like our own and is always ready to help with any water heater repairs, big or small. We’ll get the job done right, ensuring your home is safe and your hot water is flowing reliably.
Is Your Water Pressure Too High?
Your home’s plumbing system is designed to operate within a specific pressure range. If the water pressure is too high, it puts a huge amount of stress on all your pipes and appliances, including your water heater. This constant strain can lead to leaks from various points on the tank or even cause the tank itself to fail prematurely. A professional plumber can test your home’s water pressure and, if needed, install a pressure-reducing valve to protect your plumbing system. This is a key preventative step that can save you from costly emergency plumbing situations down the road.
What Is a Safe Water Pressure Level?
Ideally, your home’s water pressure should sit comfortably between 40 and 60 PSI (pounds per square inch). While a little fluctuation is normal, pressure that consistently exceeds 80 PSI is a red flag for your entire plumbing system. This excessive force puts constant stress not only on your water heater but also on your pipes, faucets, and appliance hoses, significantly increasing the risk of leaks and premature failure. If you suspect your pressure is too high—maybe you hear banging pipes or water spits from the faucet—it’s wise to get it checked. A professional can test the pressure and, if necessary, install a pressure-reducing valve to protect your home from the kind of damage that often leads to a stressful plumbing emergency.
The Worst-Case Scenario: A Cracked Tank
A crack in the inner tank is one of the most serious reasons for a water heater leak. This usually happens because of corrosion from the inside out. As the tank ages, rust can weaken the steel, and eventually, the internal pressure causes it to crack. Unfortunately, a cracked tank cannot be repaired and means the entire water heater needs to be replaced. If you see water leaking from the body of the tank itself (not from a pipe or valve), it’s a clear sign that it’s time for a new unit. Contacting a professional right away is the best course of action.
Understanding the “Tank Within a Tank” Design
To get why a tank leak is such a big deal, it helps to know how your water heater is built. Most modern tank-style heaters use what’s called a “tank within a tank” design. There’s a heavy-duty steel inner tank that holds all the water, and then an outer shell, or jacket, that you see on the outside. In between those two layers is a thick blanket of insulation. This design is fantastic for maintaining water temperature and improving energy efficiency. But here’s the critical part: that outer shell is just a cover. It’s not waterproof and isn’t designed to hold water if the inner tank fails.
Why a Leaking Tank Can’t Be Patched
So, when you see water coming from the body of the heater itself, it means that inner steel tank has given up. This isn’t like a small hole you can just patch up. A leak is the final symptom of widespread internal corrosion that has eaten away at the metal, compromising its structural integrity. Trying to weld or patch it is not only ineffective but dangerous; the high pressure inside the tank would likely cause any patch to fail, leading to a much bigger flood. A leaking tank is one of the clearest signs you need a new water heater, making replacement the only safe and reliable path forward.
Could a Worn-Out Anode Rod Cause a Leak?
Inside your water heater tank is a component called an anode rod. Its job is to protect the tank from rusting by attracting corrosive elements in the water. Think of it as a “sacrificial” rod that corrodes so your tank doesn’t have to. These rods typically need to be replaced every three to five years. If the anode rod is completely worn away, the water will start to corrode the tank’s inner lining, leading to rust, cracks, and eventually, leaks. Regular inspection and replacement of the anode rod is a simple maintenance task that can significantly extend the life of your water heater.
Is Your T&P Relief Valve Leaking?
The Temperature and Pressure (T&P) relief valve is a critical safety feature on your water heater. It’s designed to open and release water if the temperature or pressure inside the tank gets dangerously high. If you see water leaking from this valve, it could mean one of two things: either the valve itself is faulty, or it’s doing its job because of excessive pressure in the tank. Both scenarios require immediate attention. A professional can determine the cause and ensure your system is operating safely. Don’t ignore a leaking T&P valve; it’s a warning sign you need to address.
Leaks from Heating Element Gaskets
If you have an electric water heater, it uses heating elements—much like the ones in an electric kettle, but bigger—to warm your water. Each element is sealed against the tank with a rubber gasket. Over years of service, these gaskets can become loose, dry out, or deteriorate, creating a path for water to escape. You’ll typically notice this as a slow drip coming from the access panel on the side of your tank. While the fix often involves simply tightening or replacing the gasket, this job is more complex than it sounds. It requires shutting off the power, partially draining the tank, and handling electrical components. For safety and peace of mind, it’s always best to have a professional handle this kind of repair.
Physical Damage to the Tank
A leak coming directly from the body of the water heater tank is the one problem you can’t fix. This usually indicates that the inner, glass-lined tank has rusted through or cracked under pressure. As one expert source notes, a leaking inner tank cannot be patched or repaired; the only solution is to replace the entire unit. This kind of internal failure is the end of the road for your water heater. While discovering this can be stressful, the most important thing is to act quickly to prevent significant water damage to your home. If you see water seeping from the tank’s seams or shell, it’s time to call in a professional for an immediate replacement. Our team is always ready to help with emergency plumbing situations like this.
How Sediment Buildup Leads to a Water Heater Leak
One of the most common culprits behind a leaking water heater is something you can’t even see: sediment buildup. This sneaky issue develops over time, quietly putting stress on your tank until a leak appears. Understanding what sediment is and how it causes damage is the first step to preventing a major headache and an even bigger mess in your basement. Let’s walk through how this happens and what you can do about it.
What Is Sediment, Anyway?
Think of sediment as a collection of tiny minerals and dirt particles that travel with your water. If you have hard water, which is common in many areas, your water contains a higher concentration of minerals like calcium and magnesium. Over time, these particles settle at the bottom of your water heater tank, creating a thick, sludgy layer. This layer of gunk acts like an unwanted blanket over the heating element, forcing it to work much harder to heat the water. This constant strain can lead to overheating and start to corrode the inside of your tank.
How Sediment Damages Your Water Heater
When sediment forces your water heater to overheat, it puts a tremendous amount of stress on the tank’s metal lining. The constant expansion and contraction from the excessive heat can weaken the tank’s structure, eventually causing small cracks to form. At first, these cracks might be microscopic, but over time, they can grow until water begins to seep out. This is often a slow, gradual process, which is why you might not notice a problem until you find a puddle. A cracked tank is a serious issue that can quickly turn into a major flood, often requiring an emergency plumbing visit.
How to Prevent Sediment Buildup
The best way to stop sediment from destroying your water heater is with regular maintenance. Flushing your tank annually is a simple yet effective way to clear out all the accumulated gunk. This process involves draining the tank completely to wash away the sediment, which helps your heater run more efficiently and significantly extends its lifespan. While it might sound straightforward, flushing a water heater can be tricky and involves handling very hot water. For your safety and to ensure the job is done right, it’s always a good idea to schedule a professional to handle your expert plumbing solutions.
The Dangers of a Leaking Water Heater
A small puddle under your water heater might seem like a minor annoyance you can deal with later, but it’s often a warning sign of much bigger problems. Ignoring a leak doesn’t just risk a bigger puddle; it can lead to catastrophic water damage, create serious safety hazards, and end up costing you a lot more in the long run. As a family-owned company that treats every client in Metro Detroit like our own, we’ve seen firsthand how a small issue can escalate into a major household emergency. Understanding the potential dangers is the first step in realizing why immediate action is so important. Let’s break down exactly what’s at stake when your water heater starts to leak.
Risk of Bursting and Major Water Damage
That slow drip from your water heater tank is more than just a leak; it’s a sign that the tank’s structural integrity is compromised. Internal corrosion has likely created a weak spot, and it’s only a matter of time before it fails completely. As one source points out, “Even a small leak can quickly become a big flood, leading to major water damage to your home.” Imagine coming home to a basement filled with water, ruining drywall, flooring, furniture, and personal belongings. This is the reality of a burst tank. Acting fast and calling for emergency plumbing services at the first sign of a tank leak can prevent a manageable problem from turning into a full-blown disaster.
Rapid Mold Growth
Where there’s persistent moisture, mold is sure to follow, and it happens faster than you might think. According to experts, “Mold can start growing within 24 to 48 hours of water exposure.” A slow, steady leak from your water heater creates the perfect damp, dark environment for mold to thrive in your walls, subflooring, and insulation. Not only does this cause further damage to your home’s structure, but it also poses a significant health risk to your family, especially for those with allergies or asthma. By the time you notice a musty smell, the problem is already well-established and can be expensive to remediate.
Safety Hazard: Gas Leaks
If you have a gas water heater, a water leak introduces a particularly dangerous risk. Water dripping onto the burner assembly or gas control valve can cause corrosion and damage these critical components. In a worst-case scenario, this damage could lead to a natural gas leak inside your home. Gas leaks are incredibly dangerous and can lead to fires or explosions. The advice is simple and non-negotiable: if you ever smell gas (a rotten egg odor) near your water heater, do not try to fix it yourself or even turn on a light switch. Leave your home immediately and call your gas company from a safe distance.
Poor Performance and Higher Utility Bills
A leaking water heater is an inefficient water heater. Whether the leak is from the tank or a faulty component, your unit has to work harder to keep the water hot. It’s constantly heating new, cold water to replace what’s leaking out, which means it runs more frequently and for longer periods. This extra work doesn’t just put more wear and tear on the appliance; it also shows up directly on your utility bills. As experts note, “A leaking water heater won’t heat water well and will use more energy, costing you more money.” That slow drip is literally money going down the drain, making a prompt professional repair or replacement a smart financial decision.
Potential Liability in Shared Buildings
If you live in a condo, apartment, or townhome, a leaking water heater isn’t just your problem—it can quickly become your neighbor’s problem, too. Water doesn’t respect property lines, and a significant leak or burst tank in your unit can easily cause extensive damage to the units below or adjacent to you. This can lead to complicated and expensive situations, including insurance claims and potential legal issues if it’s determined that you neglected a known problem. Addressing a leak immediately is part of being a responsible neighbor and can save you from a major financial and legal headache.
Is Your Water Heater’s Age a Leak Risk?
Your water heater works tirelessly behind the scenes, but it won’t last forever. As it gets older, the risk of a leak increases significantly. While it’s easy to forget about this essential appliance, paying attention to its age can save you from the headache and expense of water damage. Over time, constant use, heat, and pressure take a toll on its internal components, making failure more of a possibility than a probability. Understanding the typical lifespan and the signs of age-related wear can help you decide when it’s time to repair or replace your unit before a small drip becomes a major disaster.
How Long Should a Water Heater Last?
Most conventional tank-style water heaters have a lifespan of about 8 to 12 years, while tankless models can last 20 years or more. However, this is just an average. Factors like your local water quality, usage levels, and, most importantly, maintenance habits play a huge role. A water heater that receives regular professional check-ups and is flushed annually to remove sediment is far more likely to reach or even exceed its expected lifespan. Without proper care, a unit can fail much sooner, leaving you with an unexpected cold shower and a potential leak on your hands.
The Unpredictable Lifespan of a Leaking Tank
If you’ve determined the leak is coming from the tank itself, the question of “how long will it last?” becomes urgent. The honest answer is, you can’t predict it. A leaking water heater tank is a clear sign of failure. While it might only drip for a few days or even weeks, there’s a significant risk that the small leak could escalate into a sudden and catastrophic burst at any moment. This happens because a leak in the tank means the inner wall has been compromised by corrosion. It’s no longer structurally sound, and the constant pressure from the water inside is a disaster waiting to happen.
Ignoring a leaking tank is a major gamble. Unlike a loose fitting that can be tightened, a crack in the tank itself cannot be permanently fixed or patched. The only safe and reliable solution is to replace the entire water heater. Putting off this decision can lead to a much bigger problem, turning a manageable leak into a full-blown flood that causes extensive water damage to your floors, walls, and belongings. This is the kind of problem that requires immediate professional attention, as it can quickly become an emergency plumbing situation. Acting fast is the best way to protect your home.
How Age Wears Down Key Parts
As a water heater ages, its parts naturally begin to wear out. The anode rod, which protects the tank from rust, gets used up. Seals and gaskets can become brittle and crack, creating slow drips that can go unnoticed. Most critically, the inside of the steel tank itself can start to corrode. This internal rust is often invisible from the outside but slowly eats away at the metal. Eventually, this deterioration of parts can create a weak spot that gives way under pressure, leading to a serious leak or even a burst tank.
Older Heater: Should You Repair or Replace It?
So, how do you know when to stop repairing an old unit and start fresh? A good rule of thumb is to seriously consider replacement if your water heater is over 10 years old and needs a major repair. If you’re facing frequent fixes or notice signs of rust on the tank or in your hot water, it’s often more cost-effective to replace it. An older, less efficient model is already costing you more on your energy bills. Investing in a new, reliable water heater not only prevents future leaks but can also lower your monthly expenses. If you’re unsure, our team can provide an honest assessment to help you make the best choice.
How to Spot a Water Heater Leak Early
Your water heater usually works quietly in the background, but it will often give you clues before a small issue becomes a major flood. Catching a leak early can save you from costly water damage and a huge headache. Knowing what to look and listen for is the first step in protecting your home. Pay attention to these common warning signs, as they’re your water heater’s way of asking for help.
Don’t Ignore Puddles Near the Tank
The most obvious sign of a leak is, of course, water where it shouldn’t be. If you notice puddles, damp spots on the floor, or small streams of water around the base of your water heater, you have a problem that needs immediate attention. Don’t dismiss a small amount of water, as it could be evidence of a slow leak that might worsen suddenly. A persistent puddle can damage your flooring and lead to mold growth. If you find standing water, it’s best to call for emergency plumbing services to diagnose the source and prevent further damage to your home.
Is Your Hot Water Rusty or Lukewarm?
Sometimes, the first clue comes directly from your faucet. If your hot water suddenly appears rusty, cloudy, or has a metallic smell, it’s a strong indicator of trouble inside your tank. This discoloration is often caused by rust and sediment that has built up over time. As the inside of the tank corrodes, these particles mix with your water. Not only does this affect your water quality, but it also signals that the structural integrity of your tank is weakening from the inside out, which can eventually lead to a serious leak.
Hearing Strange Noises? (Popping, Rumbling, Hissing)
Your water heater should operate relatively quietly. If you start hearing loud or unusual sounds like popping, rumbling, or cracking, it’s time to listen closely. These noises are typically caused by a layer of sediment that has settled at the bottom of the tank. When the burner turns on, the water trapped beneath the sediment boils, creating steam bubbles that make a popping sound as they escape. This process, known as kettling, puts a great deal of stress on the tank and can cause cracks over time. Addressing these strange noises early can extend the life of your heater.
Visible Rust Is a Major Red Flag
Take a moment to visually inspect your water heater, paying close attention to the outside of the tank and its connections. Visible rust on the tank’s shell or corrosion around the pipe fittings and valves is a major red flag. While a little rust on the outside might seem like a cosmetic issue, it often points to a slow, persistent leak or indicates that the tank is corroding from the inside. The anode rod inside your tank is designed to prevent this, but once it’s depleted, the tank itself begins to rust away, making a leak almost inevitable.
Is It a Leak or Just Condensation?
Not all moisture around your water heater spells disaster. Sometimes, it’s just condensation. This is common when a tank is first filled with cold water, which causes moisture from the warmer surrounding air to collect on the tank’s surface. You might also see it during humid weather. To tell the difference, simply wipe the water away with a dry cloth and check back in a few hours. If the moisture returns, you likely have a slow leak. If the area stays dry, it was probably just condensation.
Identifying Intermittent Leaks
An intermittent leak is one of the most frustrating plumbing problems. You might find a small puddle one day, clean it up, and then see nothing for a week, making you question if you saw it at all. These leaks often occur under specific conditions, like when the tank is heating up and expanding, or when water pressure fluctuates. This can make them incredibly difficult to diagnose on your own. Look for subtle clues like faint water stains on the floor or a white, chalky residue around pipe fittings and valves. These are mineral deposits left behind by evaporating water and are a sure sign that water has been escaping, even if you can’t catch it in the act. If you suspect an intermittent leak, it’s a good idea to call a professional to investigate the issue before it becomes a constant problem.
Found a Leak? Here’s What to Do First
Discovering a puddle around your water heater can definitely cause a moment of panic. But before you worry, take a deep breath. By following a few immediate steps, you can control the situation and prevent serious damage. Acting quickly and calmly is key. Here’s your action plan for what to do the moment you spot a leak.
Step 1: Turn Off the Power and Water
Your first priority is safety. Before you do anything else, you need to cut the power and water supply to the heater. If you have an electric water heater, go to your breaker box and flip the switch that controls it. For a gas heater, you’ll find a dial on the gas pipe leading to the unit; turn it to the “Off” position. Next, shut off the water. Look for a valve on the cold water inlet pipe, which is usually at the top of the tank, and turn it clockwise until it stops. This simple action prevents more water from filling the tank and feeding the leak, which is a critical first step in any emergency plumbing situation.
Step 2: Contain the Water
Once the power and water are off, your next job is damage control. Grab some old towels, a mop, or a wet/dry vacuum to start cleaning up the water. If you notice puddles or even just damp spots on the floor, you have a problem that needs immediate attention. Don’t dismiss a small amount of water, as it could be evidence of a slow leak that might worsen suddenly. A persistent puddle can cause serious damage to your flooring, subfloor, and drywall, not to mention creating the perfect environment for mold to grow. Containing the mess right away helps protect your home while you figure out the source of the leak.
Step 3: Drain the Tank if the Leak Is Severe
If you’re dealing with more than just a small puddle and water is actively leaking from the tank, you’ll want to drain it to prevent further water damage. Find the drain valve near the bottom of the tank and attach a standard garden hose to it. Run the other end of the hose to a floor drain, a sump pump pit, or outside. Once the hose is in place, open the valve to let the water drain out. This step is crucial for managing a severe leak, as it empties the tank and stops the flow of water. This buys you valuable time and minimizes the mess while you wait for a professional to arrive for an emergency plumbing repair.
Step 2: Assess the Size of the Leak
Once the power and water are off, take a moment to figure out how serious the leak is. Is it a slow drip or a steady stream? Try to pinpoint where the water is coming from. Leaks from the top pipes or valves are often fixable, but a leak from the tank body itself usually means it’s time for a replacement. Remember, even a small leak can lead to big problems like water damage, mold growth, and electrical hazards. Don’t underestimate a seemingly minor issue. Understanding the source and flow of the leak will help you give accurate information when you call for professional help.
Step 3: Document Everything for Insurance
Before you start cleaning up, grab your phone and take photos and videos of the scene. This step is incredibly important for your homeowner’s insurance claim. Capture clear images of the leak itself, the extent of the water pooling on the floor, and any damage to surrounding walls, flooring, or personal belongings. Get shots from multiple angles, including close-ups of the leak’s source and wider views of the affected area. Having solid visual evidence makes the claims process much smoother and helps ensure you get the coverage you need for repairs. Once you have your documentation, you can contact us for a professional assessment.
Step 4: Call a Professional Plumber
While it might be tempting to try a DIY fix, water heaters are complex and potentially dangerous. They combine water, high pressure, and either electricity or natural gas, which is not a combination you want to experiment with. You should always call a professional if the tank itself is leaking, if you can’t find the source of the leak, or if you’re simply not comfortable with the unit. A licensed plumber can accurately diagnose the problem, determine if a repair is possible, and perform the work safely. As a family-owned business, we treat every home like our own and provide honest, reliable solutions.
How to Prevent Water Heater Leaks
A leaking water heater is more than just an inconvenience; it can lead to serious water damage and costly repairs. The good news is that you can prevent most leaks with a bit of proactive maintenance. Taking these simple steps will extend the life of your water heater and give you peace of mind.
Flush Your Tank to Remove Sediment
Over time, minerals from your water supply settle at the bottom of your tank, creating a layer of sediment. This buildup can cause the tank to overheat, leading to corrosion and weak spots that eventually leak. Flushing your tank once a year removes this sediment and keeps your heater running efficiently. While some homeowners tackle this themselves, it’s a task a professional can easily handle during a routine check-up, preventing a future call for emergency plumbing services.
Check Your Anode Rod Once a Year
Think of the anode rod as your water heater’s bodyguard. This metal rod is designed to corrode so your tank doesn’t have to. It attracts corrosive elements in the water, sacrificing itself to protect the steel tank lining. Once the anode rod is completely worn away, the tank itself begins to rust from the inside out, which is a common cause of leaks. Having a plumber inspect and replace this rod when needed is a small, affordable step that can save you from needing a full replacement later.
Let a Pro Inspect It Annually
The easiest way to catch problems before they start is to schedule annual professional inspections. A trained plumber can spot the subtle warning signs of a potential leak that you might miss. During an inspection, a technician will check the pressure relief valve, inspect the anode rod, look for any signs of corrosion on the tank and its connections, and ensure everything is operating safely. This yearly visit is a smart investment that protects your home from unexpected water damage and keeps your system in top shape.
Test Your T&P Valve and Water Pressure
Your home’s water pressure puts constant stress on your plumbing system, including your water heater. If the pressure is too high (ideally, it should be between 40 and 60 PSI), it can strain fittings and seams, eventually causing them to fail. Similarly, a temperature setting that’s too high can accelerate corrosion and increase pressure inside the tank. A plumber can test your home’s water pressure and adjust your pressure-reducing valve if needed, ensuring your water heater isn’t under unnecessary strain.
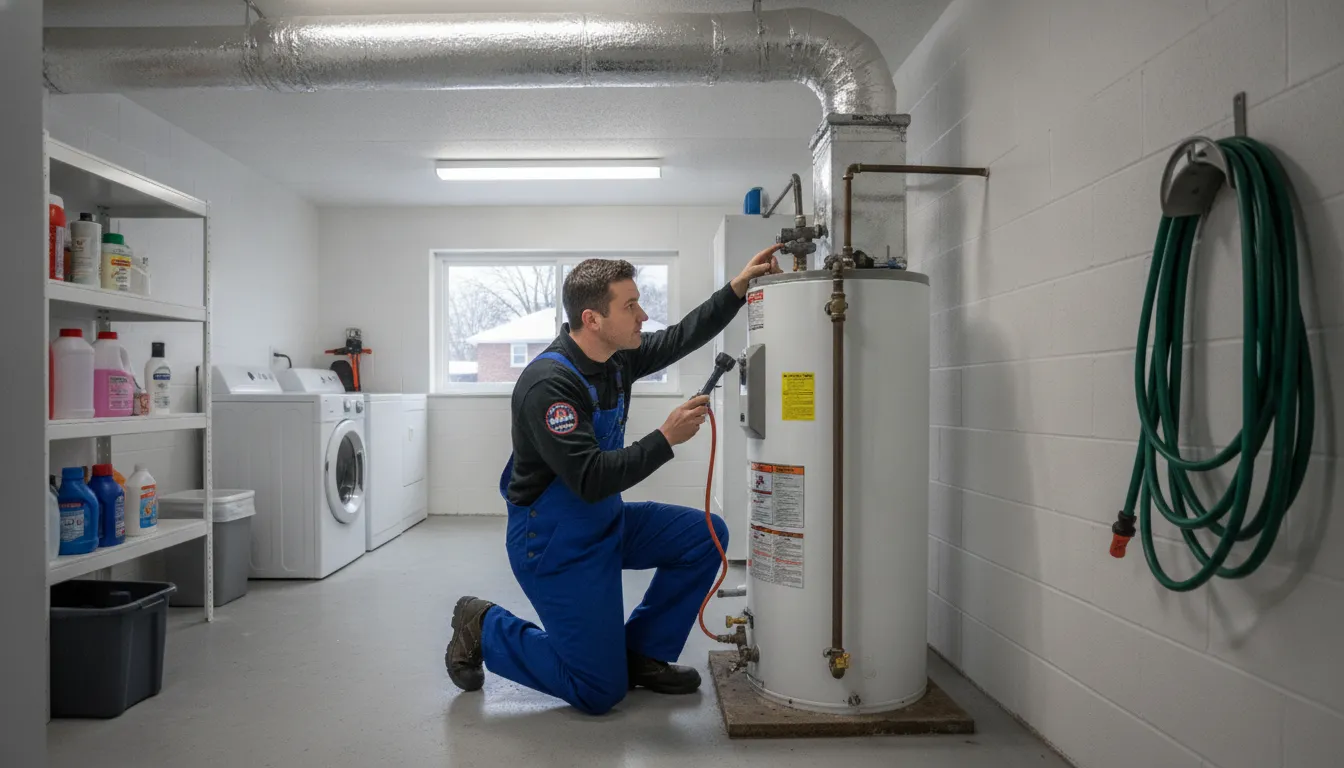
How to Test Your T&P Valve
The Temperature and Pressure (T&P) relief valve is a small but mighty safety device on your water heater. Its job is to automatically open and release water if the pressure or temperature inside the tank climbs to dangerous levels. To make sure it’s working correctly, you can test it yourself. Place a bucket under the discharge pipe connected to the valve, then briefly lift the test lever. You should see a burst of hot water flow into the bucket. Let go of the lever, and the water should stop completely. If only a little water trickles out or it continues to drip after the test, the valve may be faulty. A leaking T&P valve is a warning sign you shouldn’t ignore, as it could mean the valve has failed or there’s excessive pressure in your tank. If you’re unsure, it’s best to have a professional inspect your system.
Install a Drip Pan Under Your Heater
One of the simplest and most effective ways to protect your home from water damage is to install a drip pan underneath your water heater. This inexpensive pan acts as a basin to catch any water from a slow leak or a faulty valve, preventing it from seeping into your floors and subfloors. It’s an especially crucial addition if your water heater is located in an attic, a second-floor closet, or any finished area of your home where a leak could cause significant damage. When you get a new water heater, make sure a pan is part of the installation. It’s a small, one-time investment that provides major peace of mind and can save you thousands in potential repairs down the road.
Set the Thermostat to a Safe Temperature
Many water heaters are set to 140°F by default, but this high temperature can be both a safety hazard and a source of unnecessary stress on your tank. A setting of 120°F is recommended for most households, as it’s hot enough for all your needs while reducing the risk of scalding. Lowering the temperature also slows down the buildup of mineral deposits and reduces wear and tear on the tank’s components. If the water temperature is too high, it can stress the tank and its connections, which can eventually cause leaks. During a routine maintenance visit, a plumber can check your thermostat setting and ensure it’s optimized for both safety and efficiency, protecting your investment for the long haul.
Ensure Proper Installation Standards Are Met
A water heater will only perform as well as its installation allows. From the very beginning, ensuring your unit is installed correctly by a qualified professional is key to preventing future leaks and ensuring a long service life. Proper installation includes using the right fittings, ensuring all connections are secure, setting up the T&P valve correctly, and making sure the unit is level. It also involves checking that the anode rod is properly installed to begin its job of protecting the tank from corrosion. A rushed or improper installation can lead to immediate problems and premature failure. When you trust a professional team like Mr. Pipey, you can be confident that every detail is handled correctly from the start.
Repair or Replace? Making the Right Call
When you find a leak, the big question is always: can this be fixed, or do I need a whole new water heater? It’s a tough spot to be in, especially when you’re worried about costs and potential water damage. The answer depends on a few key factors, like the heater’s age, the source of the leak, and its repair history. Thinking through these points can help you make a confident decision that’s right for your home and your budget.
When a Simple Repair Is Enough
A leak doesn’t always mean your water heater is done for. Sometimes, the problem is a specific part that can be fixed or replaced. For instance, issues like a loose pipe connection, a faulty drain valve at the bottom of the tank, or a malfunctioning temperature and pressure relief (TPR) valve are often straightforward repairs for a professional. If your water heater is relatively new and this is its first issue, a repair is usually the most sensible and cost-effective path. It’s a good idea to have a plumber take a look to confirm the source of the leak and ensure a simple fix is all you need.
Signs It’s Time for a New Water Heater
If your water heater has been around for a while, replacement might be the smarter long-term investment. Most water heaters have a lifespan of about 8 to 12 years. If yours is over a decade old, it’s living on borrowed time. Constant repairs on an aging unit can add up quickly, and you might be throwing good money at a failing system. Think about it this way: putting money into a new, more energy-efficient model can save you from future emergency calls and lower your utility bills. If your heater has a history of problems or you see significant rust, it’s time to start looking at new options.
When Repair Isn’t an Option
Some leaks are clear signs that the water heater cannot be saved. The most critical one is a leak coming from the tank itself. If you see water pooling at the base or notice rust and corrosion on the tank that is actively weeping, it almost always means there’s an internal failure. The steel tank has likely rusted through from the inside, and this is not something that can be patched or repaired safely. At this point, the structural integrity is gone, and the unit needs to be replaced immediately to prevent a major flood. This is a true emergency plumbing situation, so don’t hesitate to call for professional help right away.
Why Calling a Pro Can Save You Time and Money
When you spot water pooling around your water heater, it’s easy to assume the worst. Many homeowners jump to the conclusion that they need a brand-new unit, a costly and often stressful project. But what if the problem is something much simpler? Guessing the cause of a leak can lead to unnecessary expenses and temporary fixes that don’t address the root issue. Before you start shopping for a replacement, getting a professional opinion is the smartest and most cost-effective step you can take.
An experienced plumber can tell the difference between a minor issue and a major failure, potentially saving you hundreds or even thousands of dollars. They have the tools and knowledge to accurately identify the source of the water, whether it’s a loose fitting, a faulty valve, or something else entirely. This expert assessment ensures you’re paying for the right solution, not just the most expensive one. It also protects your home from the significant damage a persistent leak can cause over time. A professional can spot underlying issues you might miss, like incorrect water pressure or sediment buildup, and provide a comprehensive solution that prevents future problems.
Debunking Common Myths About Water Heater Leaks
One of the biggest myths about a leaking water heater is that it automatically needs to be replaced. While a cracked tank is a definite sign that your heater’s time is up, many leaks come from less dramatic sources. Sometimes, the “leak” isn’t even a leak at all. It could just be condensation, which can happen when cold water enters the tank, especially with gas heaters in cooler basements or electric heaters in warm, humid rooms. A true leak will be a steady drip or puddle, while condensation is often more widespread moisture that comes and goes. Understanding this difference can prevent a lot of unnecessary panic.
What an Expert Plumber Will Spot
A professional plumber does more than just fix the problem; they provide peace of mind. They can safely and accurately diagnose the issue, which is especially important for gas heaters where a mistake can be dangerous. An expert can pinpoint if the leak is from a simple pressure relief valve or a corroded pipe, saving you from replacing a perfectly good unit. Even a small, slow drip shouldn’t be ignored. Over time, it can lead to serious water damage, mold growth, and structural issues in your home. A professional diagnosis stops small problems from turning into major disasters.
Let Mr. Pipey Handle Your Water Heater Leak
At Mr. Pipey, we treat your home like our own. Our first step is always to find the true source of the leak. Our experienced technicians provide an honest and thorough diagnosis, explaining exactly what’s wrong and what your options are. We believe in offering cost-effective solutions, and if a simple repair is all you need, that’s what we’ll recommend. We offer expert leaking pipes repair for all types of water heaters, ensuring you get a reliable, long-lasting fix. You can trust our family-owned team to give you the straightforward advice you need to make the best decision for your home and budget.
Related Articles
Frequently Asked Questions
Is a little bit of water around my heater always a sign of a leak? Not always, but it definitely deserves a closer look. Sometimes, moisture is just condensation, which can happen when cold water fills the tank in a humid room. A good way to check is to wipe the area completely dry and see if the water returns. If it does, you likely have a slow leak that needs attention. If the area stays dry, it was probably just condensation.
My water heater is making strange noises. Should I be worried about a leak? Yes, those sounds are a definite warning sign. Popping or rumbling noises usually mean a layer of mineral sediment has built up inside the tank. This forces your heater to work harder and puts a lot of stress on the metal, which can eventually cause cracks and lead to a leak. Think of it as your water heater telling you it needs a check-up before a small problem becomes a big one.
Can I just repair the leak myself? While it can be tempting to try a quick fix, it’s usually not the best idea. Water heaters involve a combination of high pressure, very hot water, and either gas or electricity, which can be dangerous to work with if you’re not trained. A professional can safely identify the true source of the problem and ensure the repair is done correctly, preventing further damage or safety risks.
How do I know if it’s better to repair or replace my leaking water heater? A good rule of thumb is to consider the heater’s age and the location of the leak. If your unit is less than 10 years old and the leak is coming from a replaceable part like a valve or pipe fitting, a repair is often the most cost-effective choice. However, if the tank itself is leaking or the unit is over a decade old and needs frequent fixes, replacement is usually the smarter long-term investment.
What’s the most important thing I can do to prevent leaks in the first place? The single best thing you can do is schedule regular professional maintenance. An annual inspection and tank flush can make a huge difference. Flushing removes the sediment that causes corrosion and overheating, while an inspection allows a technician to check the anode rod and other components for wear. This proactive care can significantly extend your heater’s life and help you avoid a surprise flood.
The Mr. Pipey Approach to Water Heater Service
At Mr. Pipey, we know a leak is stressful, which is why we approach every service call with a simple promise: to treat your home like it’s our own. Our process isn’t about finding the quickest fix; it’s about finding the right one. Our experienced technicians start with a thorough inspection to accurately diagnose the true source of the leak, because we know a drip from a valve is a world away from a corroded tank. We’ll explain exactly what’s happening and lay out all your options, whether it’s a simple repair or a full replacement. Our goal is to provide an honest, long-lasting solution, not just a temporary patch, ensuring you have the information you need to make a confident decision. When you’re facing a leak, you can count on our team to provide reliable expert plumbing solutions.