Staring down at a sewage backup in your basement can feel paralyzing. Where do you even begin? The questions pile up instantly: Is it safe to go down there? What do I do first? Who should I call? It’s a chaotic situation, but acting without a clear plan can lead to costly mistakes and lingering health risks. This guide cuts through the confusion. We provide a straightforward, step-by-step roadmap for your sewage cleanup in basement. You’ll get the actionable steps you need to manage the mess safely and effectively, from shutting off utilities to disinfecting every surface.
Key Takeaways
- Protect Yourself First: Before you do anything, shut off the electricity and gas to the affected area. Sewage is hazardous, so always wear full personal protective equipment, including waterproof boots, heavy-duty gloves, and a respirator mask, to protect yourself from contaminants.
- Clean Before You Disinfect: Disinfectants are not effective on dirty surfaces. You must first remove all solid waste and scrub every surface with hot, soapy water. After everything is physically clean, you can apply a disinfectant solution to kill any remaining germs.
- Know When to Call a Professional: While you can manage a small spill, large backups or situations where sewage has soaked into drywall and carpet require expert help. To prevent future issues, avoid pouring grease down drains and only flush toilet paper.
Found Sewage in Your Basement? Here’s What to Do First
Discovering a sewage backup in your basement is one of the most stressful situations a homeowner can face. It’s messy, hazardous, and feels completely overwhelming. Before you do anything else, take a deep breath. The most important thing is to proceed safely and methodically. Acting quickly is key to minimizing damage, but acting safely is what will protect you and your family.
Your immediate response can make a huge difference in the cleanup process and the final cost. The next few steps are all about securing the area and preparing for what comes next. Don’t rush into cleaning without taking these critical precautions. If the situation feels too large or dangerous to handle on your own, it’s always best to call for professional help. A trusted plumber can provide the emergency plumbing services needed to stop the problem at its source and guide you through the cleanup.
Understanding Why Sewage Backups Happen
When you’re dealing with a basement full of sewage, the immediate priority is cleanup. But once the crisis is managed, it’s important to understand why it happened in the first place. A sewage backup isn’t just a random, unlucky event; it’s a symptom of a bigger problem in your plumbing system. Identifying the root cause is the only way to prevent a stressful and expensive sequel. From simple blockages to invasive tree roots, the reasons for a backup can vary, but knowing what you’re up against is the first step toward a long-term solution.
Common Causes: From Clogs to Tree Roots
Most sewage backups start with a blockage in your main sewer line. Sometimes, the culprit is simple: an accumulation of grease, hair, and items that should never be flushed, like paper towels or “flushable” wipes. Over time, these materials build up and create a stubborn clog. In other cases, the problem is outside your home. As one homeowner on Reddit noted, plant roots can infiltrate sewer lines, creating dense networks that block the pipe and cause waste to back up into your house. Heavy rainfall can also overwhelm municipal sewer systems, forcing sewage back through your pipes. Whatever the cause, a backup is a clear sign that you need immediate emergency plumbing attention to diagnose and fix the issue.
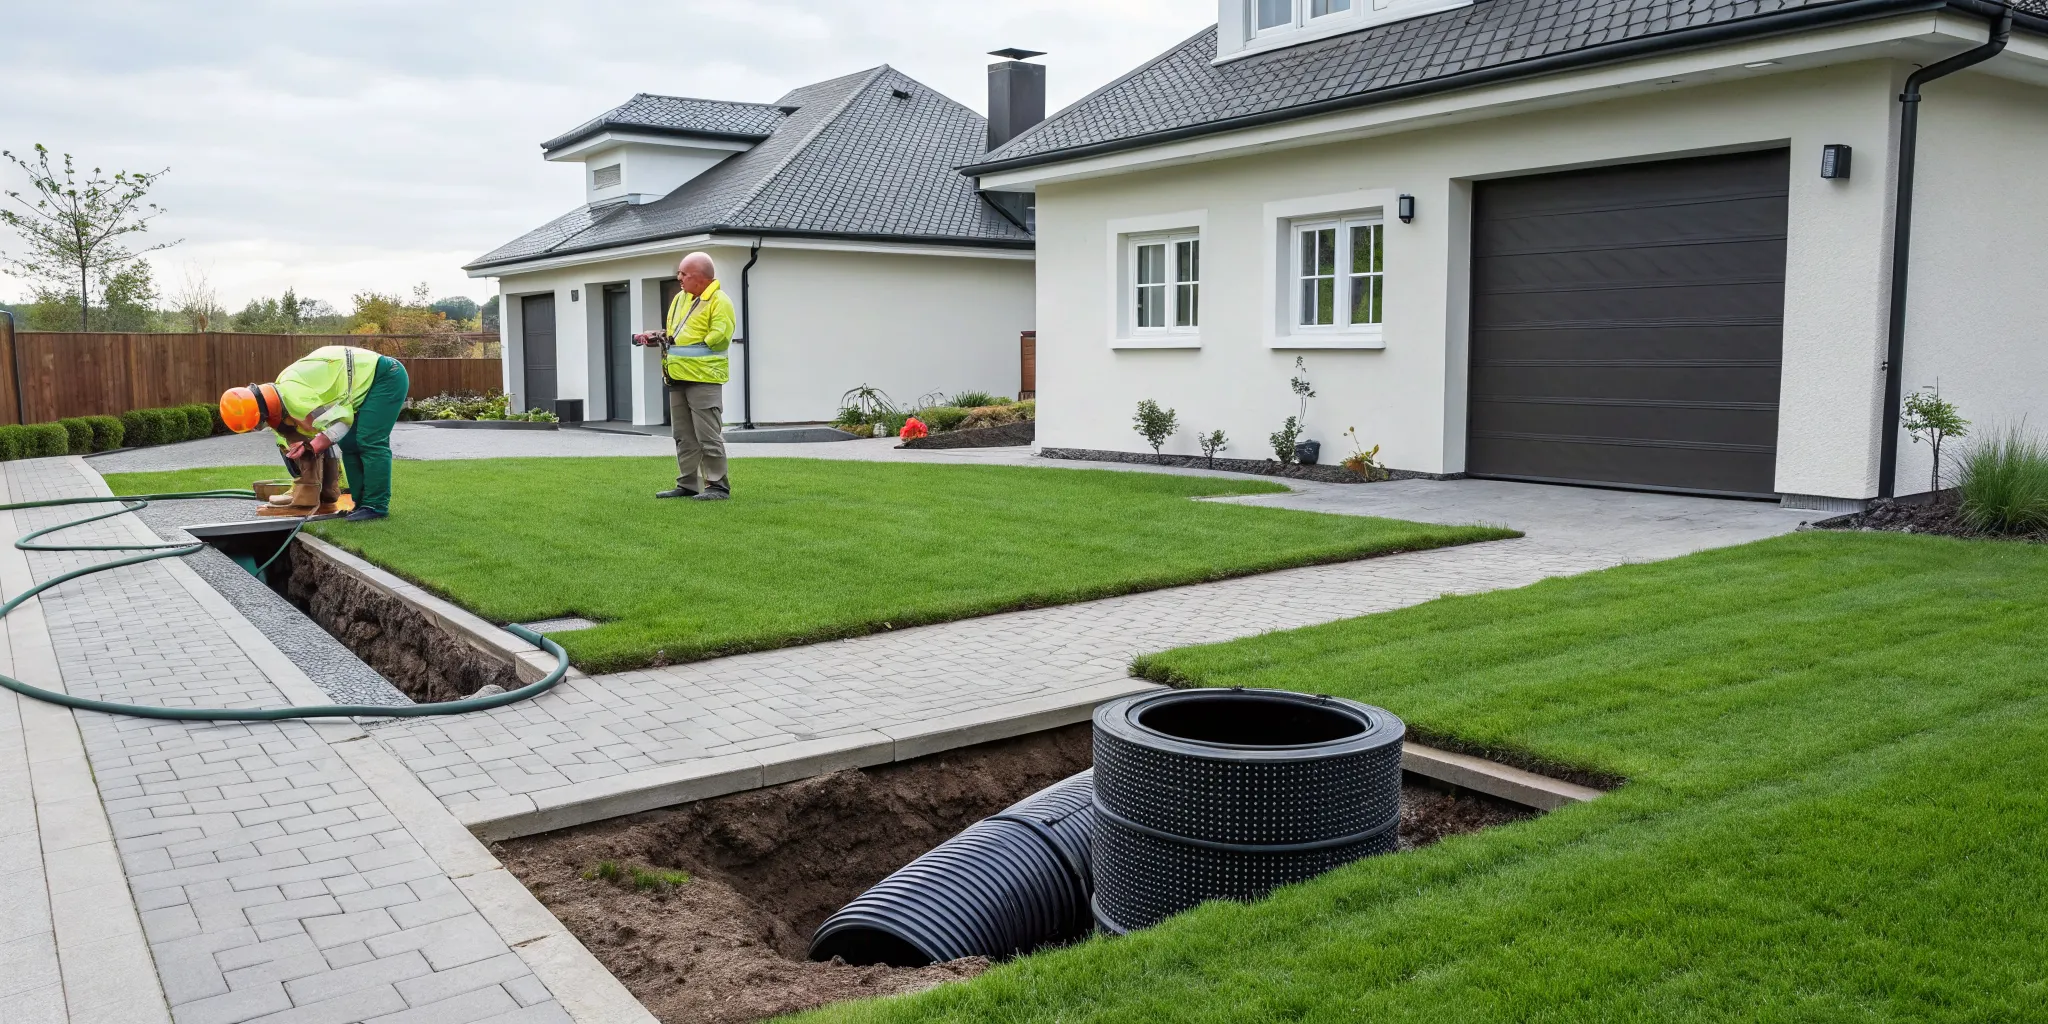
Finding Your Sewer Line Cleanout
To fix a main line clog, a plumber needs access to your sewer system. That access point is called the sewer cleanout. Locating this cleanout is one of the most helpful things you can do while waiting for a professional to arrive. It allows them to get to work immediately, saving valuable time and potentially reducing the extent of the damage. If you know where it is, you can clear any obstructions around it, like overgrown plants or stored items. If you don’t know where it is, don’t worry—many homeowners don’t. The next few steps will guide you on what to look for.
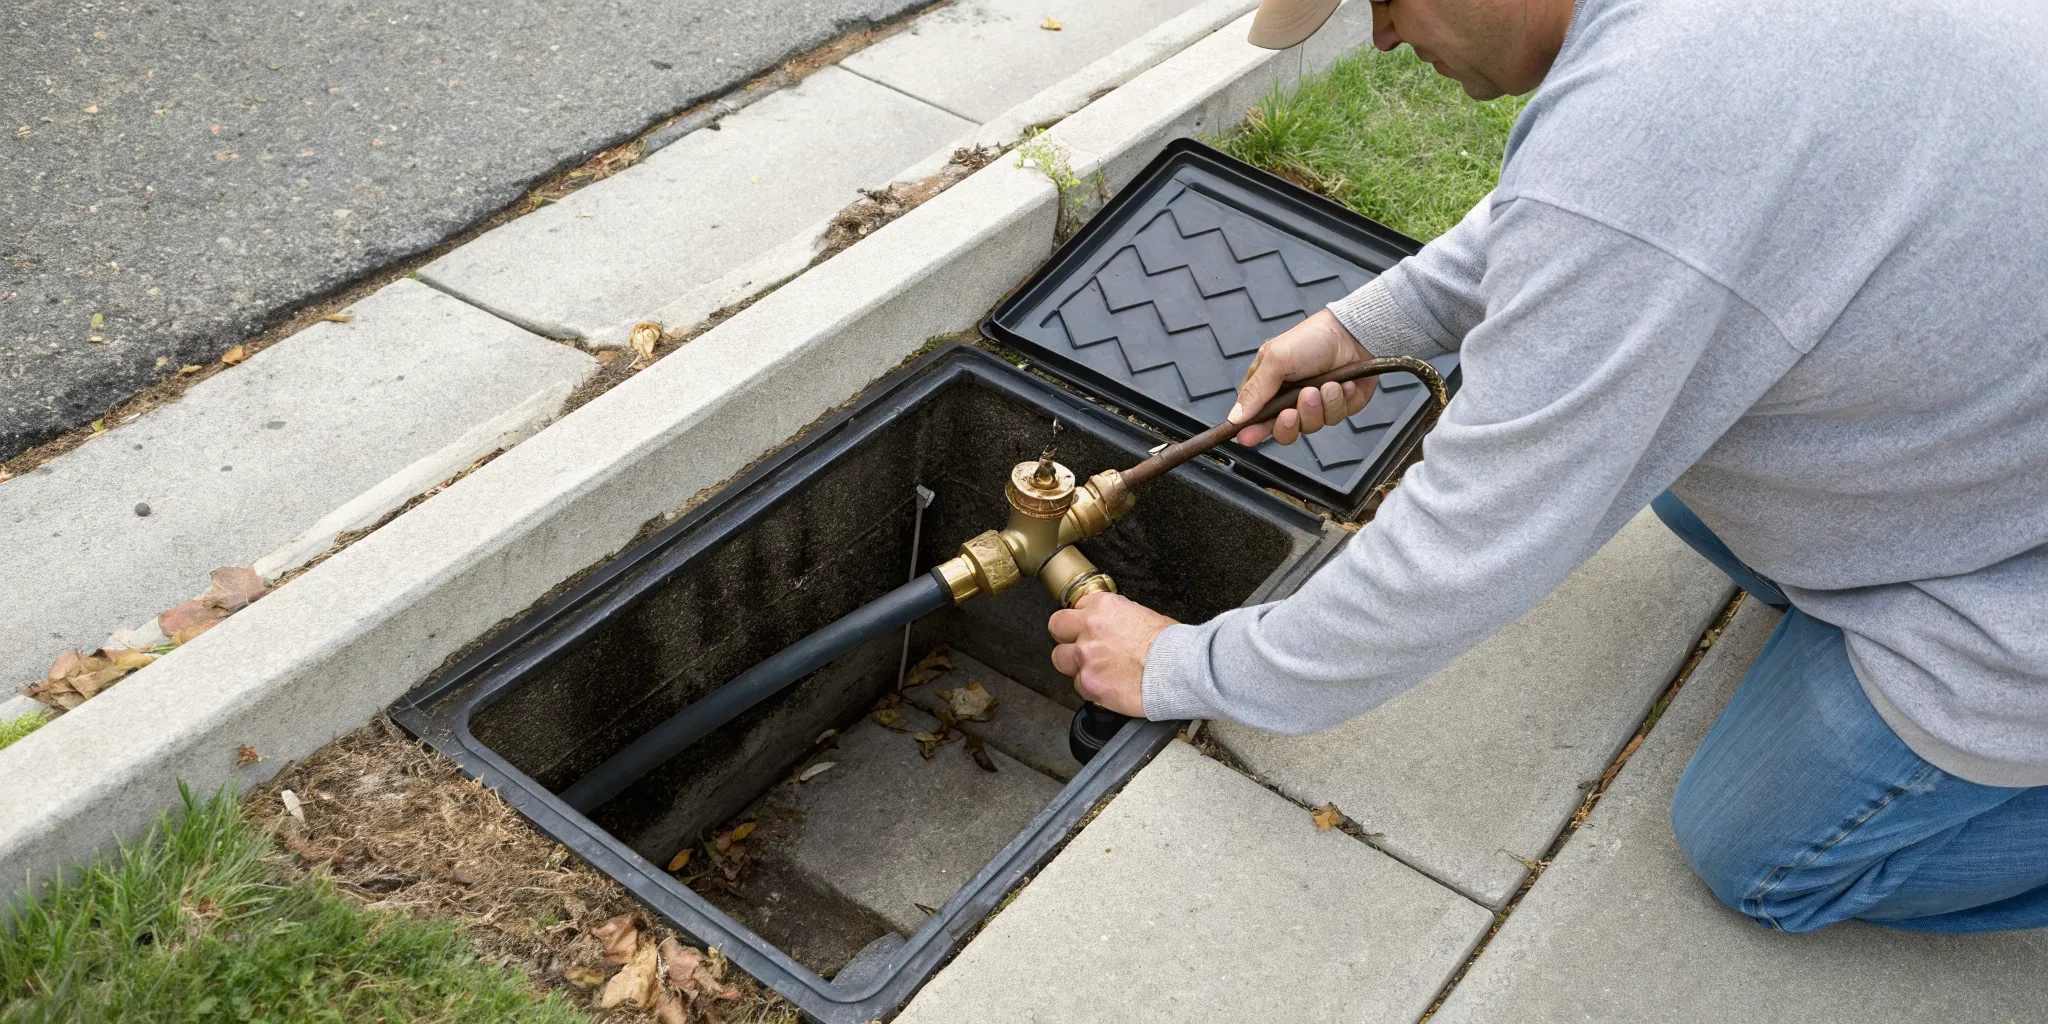
What is a Sewer Cleanout?
Think of the sewer cleanout as a doorway to your home’s main drain. According to plumbing experts at Roto-Rooter, it’s a special pipe with a removable cap that provides direct access to your sewer line. This access is essential for a plumber to inspect the line with a camera, clear out a clog with an auger, or perform high-pressure water jetting. Without a cleanout, accessing the sewer line becomes much more difficult and invasive, sometimes requiring the removal of a toilet. Knowing the location of your cleanout is a key piece of information for any homeowner, as it’s the starting point for resolving major plumbing blockages.
Where to Find Your Cleanout Pipe
Your sewer cleanout is usually located outside your home, somewhere between the foundation and the street. Look for a 4-inch wide pipe sticking out of the ground with a screw-on cap. This cap often has a square knob or indentation on top for unscrewing it. While it’s typically found in the front or side yard, it can sometimes be located in the back, especially if your home’s plumbing runs that way. In some older homes or different climates, the cleanout might be in the basement, crawl space, or garage. Take a walk around your property and look for this distinct feature—it’s your plumbing system’s most important access point.
What to Do if You Can’t Locate It
If you’ve searched your property and still can’t find the cleanout, don’t panic. Sometimes they are buried under landscaping, hidden by decks, or were never installed to be easily accessible. In this situation, the best thing to do is call a professional. Trying to find it yourself without the right knowledge could lead to wasted time or even damage to your yard. A licensed plumber has the tools and expertise to locate the cleanout quickly, even if it’s buried. Here at Mr. Pipey, our team can use specialized equipment to find your cleanout with minimal disruption, ensuring we can address your plumbing emergency fast. If you’re in Metro Detroit and need help, don’t hesitate to contact us.
First: Shut Off Water and Electricity
Before you even think about stepping into the affected area, your absolute first priority is to shut off the utilities. Standing water and electricity are a lethal combination, and the risk of electrocution is very real. You also need to turn off your natural gas line, as sewage backups can sometimes damage pipes and create a risk of explosion. If you aren’t sure how to do this or can’t safely access your breaker box or gas valve, call your utility companies immediately and wait for them to handle it. Your safety is not worth the risk.
How to Safely Assess the Sewage Damage
Once the utilities are off, you can begin to look at the extent of the problem. But don’t go in unprotected. Raw sewage contains dangerous bacteria, viruses, and parasites that can make you seriously ill. Before entering the basement, put on personal protective equipment (PPE). This should include waterproof rubber boots, heavy-duty gloves, and safety glasses. Because of airborne contaminants, it’s also crucial to wear a protective mask, like an N95 or a HEPA respirator, to protect your lungs. The Illinois Department of Public Health provides excellent guidance on cleaning up after floods and sewer overflows that you can reference.
Take Photos and Videos for Your Insurance Claim
As you carefully assess the damage, pull out your phone and start taking pictures and videos. Document everything: the standing water, the source of the backup if you can see it, and any items that have been damaged. This evidence will be essential when you file a claim with your homeowner’s insurance. Get shots from multiple angles and be as thorough as possible. This documentation creates a clear record of the conditions before any cleanup begins. Once you have a good understanding of the situation, you can decide if it’s something you can handle or if it’s time to contact a professional for cleanup and restoration.
Staying Safe During Your Basement Sewage Cleanup
Before you even think about cleaning, your number one priority must be safety. A sewage backup isn’t just messy; it’s a serious health hazard. The water contains bacteria, viruses, and other contaminants that can make you sick. Taking the right precautions is not optional. It’s the most important part of the entire process. Protecting yourself from exposure, electrical shock, and poor air quality will ensure you can handle the situation without putting your health at risk. Think of it as setting up a secure work zone before the real cleanup begins. We’ll walk through the three most critical areas of safety: wearing the right gear, managing electrical risks, and keeping the air you breathe as clean as possible.
Your PPE Checklist for Sewage Cleanup
The first rule of sewage cleanup is to protect yourself from head to toe. Raw sewage can cause infections and illness through skin contact, inhalation, or ingestion, so you need a barrier between you and the contamination. Your essential personal protective equipment (PPE) should include waterproof, steel-toed boots, heavy-duty rubber gloves that go up to your elbows, and safety goggles to protect your eyes from splashes. You also need to protect your lungs with a respirator, like an N95 mask. Your everyday clothes won’t cut it; wear something you can dispose of afterward, like coveralls, or clothing you can wash separately in hot water.
Practicing Good Personal Hygiene
After you’ve been working in a contaminated area, cleaning yourself properly is just as important as cleaning the basement. Any part of your body that touched the sewage water needs to be washed thoroughly with soap and water. Don’t forget to scrub under your fingernails with a brush. Throughout the cleanup, make a conscious effort to avoid touching your face, eyes, or mouth, as this is the fastest way for germs to enter your body. Once you’re done for the day, immediately remove your work clothes. Wash them separately from your other laundry in hot water to kill any lingering bacteria and prevent the spread of illness. These steps are simple but crucial for protecting your health during a stressful time.
How to Manage Electrical Hazards Safely
Water and electricity are a dangerous combination, and a flooded basement creates a serious risk of electrical shock. Before you step into the affected area, go to your home’s breaker box and shut off the power to the basement. If you can’t access the breaker box safely or if it’s also in the flooded area, call an electrician immediately. Never touch or use any electrical devices, outlets, or appliances that have come into contact with water. If you have any doubts about the electrical safety of the space, it’s always best to wait for professional help. When facing a situation this serious, calling for emergency plumbing services can ensure the job is handled safely.
A Note on Submerged Appliances
It’s a heartbreaking question, but one that needs to be asked: what about your furnace, water heater, or washer and dryer? Unfortunately, you should assume that any appliance with electrical components, motors, or fans that has been submerged in sewage is a total loss. The complex internal wiring, insulation, and motors are impossible to fully decontaminate. Even if an appliance seems to dry out, attempting to power it on creates a serious risk of electrical shock or fire and can circulate harmful contaminants throughout your home. Never try to test a submerged appliance yourself. Instead, have a qualified professional assess the damage. An HVAC technician can inspect your furnace, while an expert plumber can evaluate your water heater or sump pump. This is a critical part of any emergency plumbing situation, as they can safely decommission the unit—a step your insurance company will likely require for your claim.
How to Properly Ventilate Your Basement
Sewage doesn’t just contaminate surfaces; it pollutes the air with harmful microbes and foul odors. Proper ventilation is key to making the area safer to work in and helps start the drying process. As soon as it’s safe to enter, open any windows and exterior doors to get fresh air moving through the space. You can use fans to speed up the process, but be strategic about it. Place fans so they blow the contaminated air out of the basement through a window or door, rather than just circulating it inside your home. This simple step helps reduce airborne contaminants and is your first line of defense against future mold growth.
A Step-by-Step Guide to Basement Sewage Cleanup
Okay, you’ve assessed the situation and you’re ready to tackle the cleanup. Taking a methodical, step-by-step approach is the best way to make sure your basement is clean, safe, and free of contaminants. Remember to wear your protective gear through this entire process. Let’s walk through the three main phases of cleaning up after a sewage backup.
Step 1: Remove the Sewage and Water
The first thing you need to do is get all the standing water and sewage out of the area. If the backup was minor, you might be able to use a wet/dry shop vacuum. For larger floods, you’ll likely need a submersible pump to remove the liquid. The goal is to get rid of all the floodwater so you can begin to address the solid waste and contaminated surfaces. This initial step is messy but absolutely essential for preventing further damage. If you’re dealing with a significant amount of water, our emergency plumbing services can help with professional extraction.
Disposing of Contaminated Water
Once you’ve collected the sewage water, you can’t just pour it down the nearest drain. This water is considered hazardous waste, and you need to handle its disposal carefully to avoid further contamination or creating new plumbing issues. For a small amount of liquid collected in a shop vac, the proper method is to slowly pour it into a working toilet and flush it away. It’s important to do this in small batches to prevent overwhelming your home’s plumbing system. Remember to keep your full protective gear on throughout this process, as splashes are almost guaranteed, and you need to protect yourself from any contact with the contaminated liquid.
If you’ve used a submersible pump for a larger flood, disposal becomes much more complicated. You can’t simply pump the water onto your lawn or into a storm drain. This action can contaminate the local environment, harm wildlife, and may even violate local health ordinances, leading to fines. When you’re dealing with a large volume of sewage, the safest and most responsible solution is to get professional help. A licensed team has the proper equipment and knowledge to handle and dispose of hazardous wastewater according to all local regulations, ensuring the job is done right while keeping your family and community safe.
Step 2: Clear Out Contaminated Items and Debris
With the water gone, it’s time to deal with the solid debris. Carefully pick up any large clumps of waste with paper towels and place them directly into heavy-duty trash bags. Next, you’ll need to sort through any items that came into contact with the sewage. Unfortunately, you’ll have to throw away anything that is porous and can’t be thoroughly cleaned and disinfected. This includes things like carpets, rugs, upholstered furniture, mattresses, and drywall. It’s tough to part with belongings, but keeping contaminated items poses a serious health risk.
Scraping Away Solid Waste
With your protective gear still on, it’s time to tackle the solids. Use a shovel to scoop up the larger pieces of debris and sludge, placing everything into heavy-duty, double-bagged trash bags. Once the bulk of the waste is gone, you have to make some tough decisions about your belongings. The rule is simple: if an item is porous and absorbed the sewage, it must be thrown away. This includes carpets, rugs, books, mattresses, and most furniture made from particleboard or upholstery. It’s hard to let go of personal items, but bacteria and viruses can embed themselves deep within these materials, making them impossible to truly sanitize. If the task feels too big or you’re unsure what’s safe to keep, calling for emergency plumbing services can provide peace of mind and ensure the job is done right.
Step 3: Cleaning and Scrubbing All Surfaces
Now that the space is clear, you can focus on cleaning every surface the sewage touched. Start by washing all walls, concrete floors, and other hard surfaces with hot water and a low-sudsing soap or detergent. This initial wash removes the grime and prepares the surfaces for disinfection. Once everything is scrubbed clean, you’ll need to go over it all again with a disinfectant to kill any lingering bacteria and pathogens. This two-part process ensures you aren’t just spreading contaminants around but are actually removing them for good.
How to Disinfect Your Basement After a Sewage Backup
Once you’ve removed the standing water and solid waste, your basement might look clean, but it’s far from safe. Sewage is filled with bacteria, viruses, and other pathogens that can pose serious health risks. The next step, and arguably the most important one, is to thoroughly disinfect every surface the sewage touched. This isn’t just about wiping things down; it’s about methodically eliminating invisible threats to make your home healthy again. Proper disinfection protects you and your family from potential illness and gives you peace of mind. Let’s walk through how to do it right.
How to Make and Use a Bleach Solution Safely
A simple bleach solution is one of the most effective ways to kill germs left behind by a sewage backup. For a powerful disinfectant, you can mix one cup of regular household bleach with one gallon of water. Before you start, open windows and doors to get plenty of fresh air moving through the area. Always wear waterproof gloves and eye protection, as bleach can irritate your skin and eyes. Never, ever mix bleach with ammonia or any other cleaning products, as this can create toxic gas. Apply the solution to hard, non-porous surfaces like concrete floors, tile, and metal, and let it sit for at least 10 minutes before rinsing or wiping it away. This contact time is what allows the bleach to do its job and kill the harmful microorganisms.
Important Warning About Using Bleach
I want to be very clear here because this is a critical safety point. Bleach is a fantastic disinfectant, but it must be handled with respect. The most important rule is to never mix it with ammonia or any other household cleaners. Doing so can create dangerous toxic gases that are incredibly harmful to breathe. Also, remember that bleach is only effective on hard, non-porous surfaces. It won’t properly disinfect porous materials like drywall, wood, or carpet because the contamination has soaked deep into the material where the bleach can’t reach. If sewage has saturated these parts of your home, they almost always need to be removed and replaced. When the damage goes beyond surface-level cleaning, it’s a sign that you need professional help to ensure your home is truly safe, and calling for emergency plumbing services is the right move.
Choosing the Right Commercial Disinfectant
While bleach is a great option, it’s not suitable for every surface. It can damage wood, discolor fabrics, and corrode certain metals. For these materials, you’ll want to use a good commercial disinfectant. Look for products that are specifically labeled to kill bacteria and viruses. Many people find that cleaners like Pine-Sol are effective and leave behind a much fresher scent than bleach. When you choose a disinfectant, always read the label carefully and follow the instructions for dilution and application. For fabrics or upholstered items you hope to salvage, a laundry disinfectant might be a gentler but still effective choice. The key is to match the product to the material you’re cleaning.
Alternative Disinfecting Solutions
Bleach is a go-to for a reason, but it’s not always the right tool for the job. It can be harsh on certain materials, potentially damaging wood floors, discoloring fabrics, and even corroding some metals. If you’re dealing with surfaces like these, you’ll need a different approach. This is where commercial disinfectants come in handy. Products like Pine-Sol can be just as effective at killing germs and often leave a much more pleasant scent behind. The most important thing is to read the label and choose a product specifically designed to kill bacteria and viruses. For any fabrics you’re trying to save, look for a dedicated laundry disinfectant to add to your wash cycle. If the cleanup feels too extensive, remember that professional emergency plumbing services can handle the entire process, from extraction to disinfection.
How to Sanitize Porous vs. Non-Porous Surfaces
Disinfectant works best on a clean slate, so your first step is to wash everything. Using warm, soapy water, scrub all the walls, floors, and any other hard surfaces that came into contact with the sewage. After you’ve scrubbed everything down, rinse it all with clean water. Now you’re ready to apply your chosen disinfectant, whether it’s your bleach solution or a commercial product. Let the disinfectant sit on the surface for the recommended amount of time before you do a final rinse. For a major backup with extensive contamination, especially on porous materials like drywall and carpet, it’s often best to call in the pros. A professional team has the right equipment and expertise to handle severe situations and ensure your home is completely safe. If you feel overwhelmed, our emergency plumbing services are here to help.
What to Keep and What to Toss
After a sewage backup, one of the toughest parts is figuring out what can be saved and what needs to be thrown away. It’s hard to part with personal belongings, but your family’s health has to come first. Contaminated items can harbor dangerous bacteria and viruses long after the water is gone. To make the right call, you need to understand how different materials react to sewage.
Porous vs. Non-Porous: What Can Be Saved?
The key is to know the difference between porous and non-porous items. Porous materials, like fabric, wood, and drywall, have tiny holes that soak up liquid and contaminants, making them almost impossible to clean completely. Think of things like carpets, upholstered furniture, bedding, and even your kids’ stuffed animals. The Illinois Department of Public Health advises that unless you can clean and disinfect these items perfectly, it’s safest to get rid of them. Non-porous items like hard plastic, metal, and glass are much easier to salvage because the contamination stays on the surface. When it comes to your family’s safety, it’s better to be cautious with anything that could have absorbed sewage.
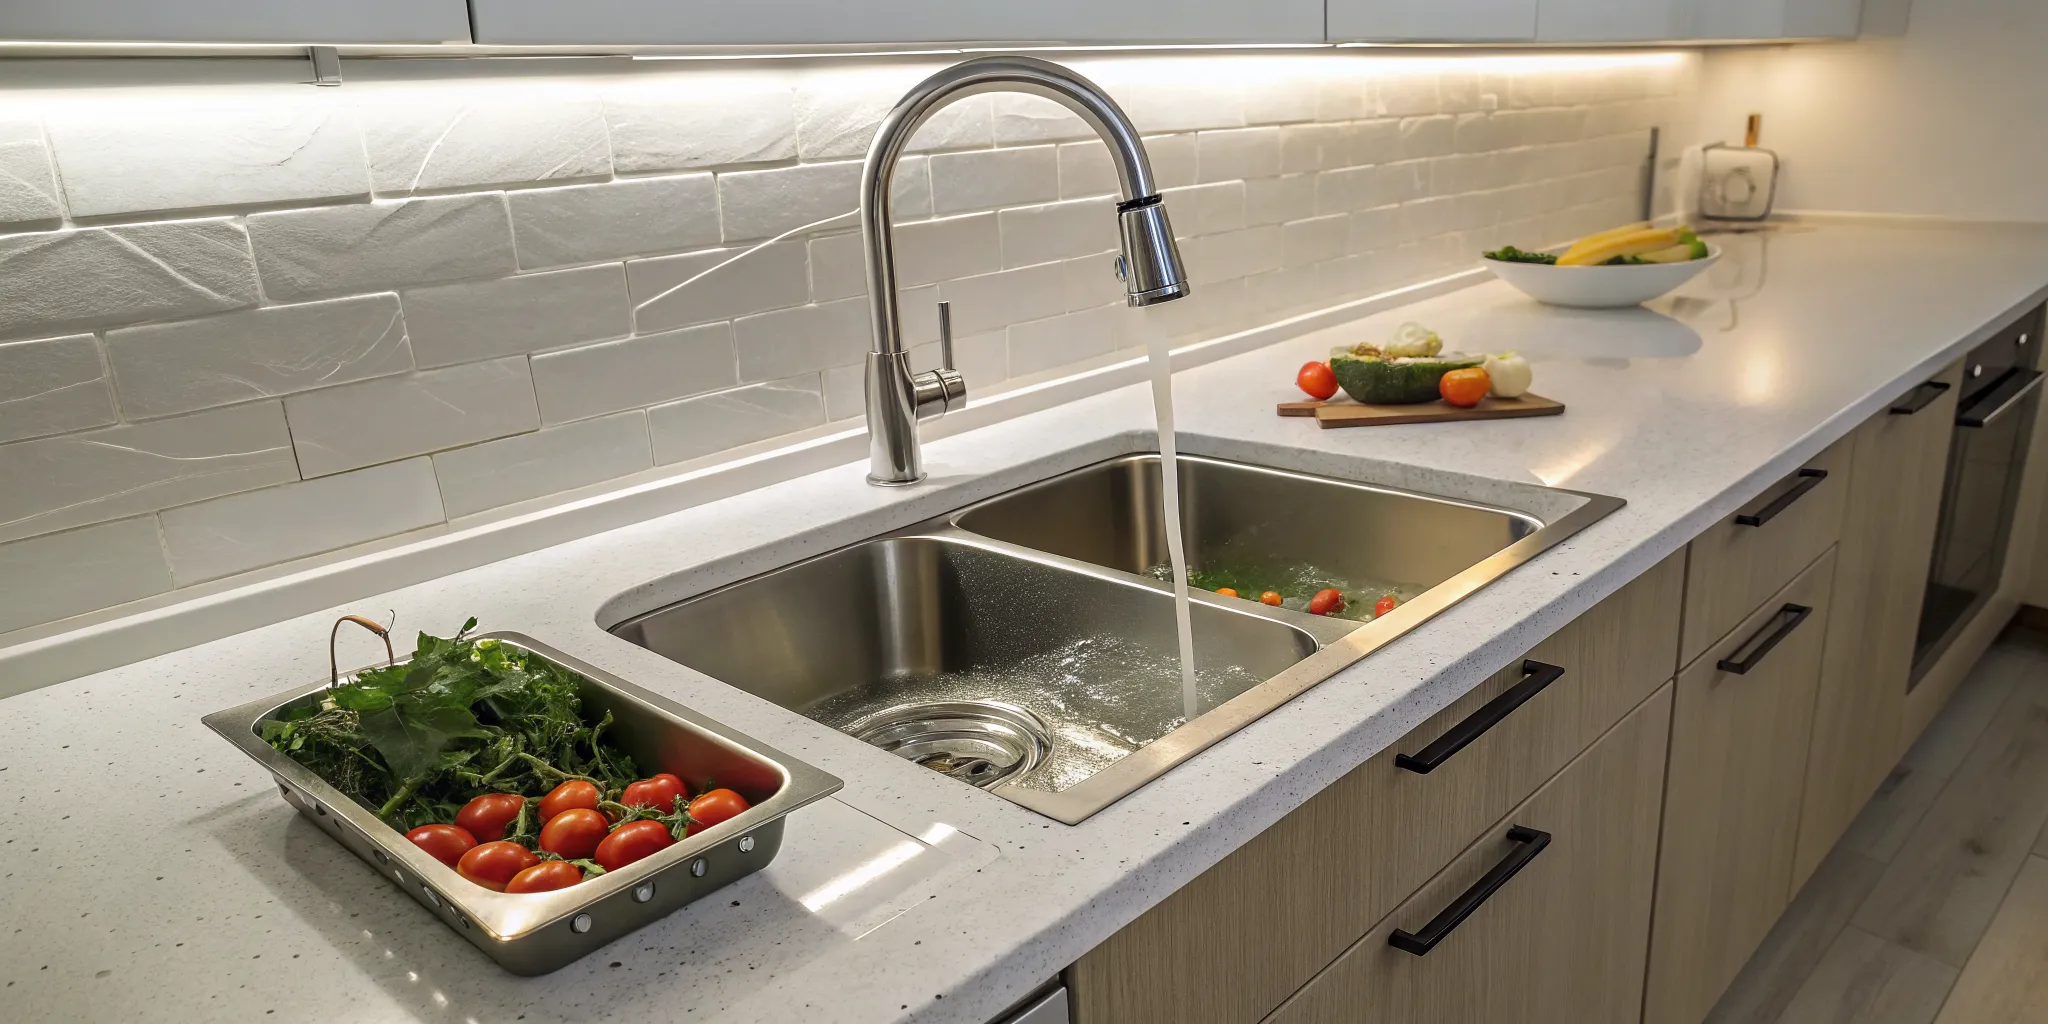
Is Your Food Safe to Eat?
When your basement pantry or kitchen is part of the disaster zone, the question of food safety is immediate and critical. It’s tempting to try and save as much as possible, but sewage water carries contaminants that can easily transfer to food packaging. Even if something looks fine on the outside, it might not be safe to consume. The golden rule is always “when in doubt, throw it out.” However, some items, like commercially sealed cans, can be salvaged if you follow a strict cleaning protocol. Let’s break down what you need to know to protect your family from foodborne illness after a backup.
Handling Canned Goods
Your canned goods have the best chance of survival, but only if they are handled correctly. Start by gathering all cans that were in contact with the floodwater. You’ll need to scrub them thoroughly with hot, soapy water, using a brush to get into the crevices around the rim. After they are physically clean, the disinfection process begins. Create a solution of one ounce of bleach per gallon of water and soak the cans for at least 15 minutes. This will kill any lingering bacteria on the surface. Once they’ve soaked, remove them and let them air dry completely to prevent any rust from forming. Be sure to discard any cans that are dented, bulging, or were already rusty, as their seals may have been compromised.
Assessing Food from the Fridge and Freezer
Any food in your refrigerator or freezer that came into direct contact with sewage water must be thrown away. This includes anything in cardboard boxes, plastic wrap, or screw-top jars, as these containers are not waterproof. If the power went out, you have a different problem to solve. Food in a refrigerator will only stay safely cold for about four to six hours if the door remains closed. After that, you should discard perishable items like meat, dairy, and leftovers. For your freezer, a full one can keep food frozen for about two days, while a half-full one lasts about a day. You can safely refreeze meat that still has ice crystals on it. If it has thawed but is still cool, cook it immediately and then you can refreeze it.
How to Safely Dispose of Contaminated Materials
Once you’ve decided what to toss, you need to dispose of it safely to avoid spreading contamination. Place all discarded items into heavy-duty, tightly sealed plastic bags. For larger items like carpet or drywall, you may need to cut them into smaller, manageable pieces first. Be sure to check with your local waste management provider about rules for disposing of contaminated materials. Also, throw out any food that may have come into contact with floodwater, especially if it has an unusual color or smell. When you’re dealing with a major cleanup, our emergency plumbing team can help manage the process and ensure your home is safe again.
What Are the Health Risks of Sewage Exposure?
A sewage backup is more than just a messy inconvenience; it’s a serious health hazard for you and your family. The water that backs up into your basement isn’t just dirty—it’s contaminated with a mix of waste, chemicals, and disease-causing germs. Exposure to this raw sewage can lead to a range of health problems, from minor skin irritations to severe illnesses. Understanding these risks is the first step in handling the situation safely and effectively. It’s why tackling a major backup on your own can be so dangerous and why calling for professional help is often the safest choice.
The Bacteria, Viruses, and Parasites to Watch For
The biggest threat hiding in sewage water is the collection of invisible microorganisms. This water is a breeding ground for harmful bacteria like E. coli and Salmonella, as well as various viruses and parasites. According to health experts, flood and sewer water can carry germs that make people sick through direct contact or by contaminating surfaces. These pathogens can cause everything from stomach bugs to more serious infections. Because you can’t see them, it’s easy to underestimate the danger, which is why treating every inch of the affected area with extreme caution is so important.
How Sewage Exposure Affects Your Skin and Lungs
Direct contact with sewage can wreak havoc on your body. Your skin is the first line of defense, and exposure can cause rashes, irritation, and infections, especially if you have any cuts or scrapes. It’s also crucial to keep contaminated water and your hands away from your eyes, nose, and mouth to prevent germs from entering your body. Beyond direct contact, the risks can also be airborne. As the sewage sits, harmful microorganisms can become aerosolized, meaning you can inhale them. This can lead to respiratory issues and other illnesses. This is a key reason why handling a backup is considered an emergency plumbing situation that requires immediate and careful attention.
Long-Term Health Effects and What to Watch For
Unfortunately, the health risks don’t disappear once the water is gone. Sewage contamination can linger for weeks or even months if not cleaned and disinfected properly, leaving behind a hazardous environment. It’s important to be aware of the warning signs of exposure, which can appear hours or even days later. Keep an eye out for symptoms like nausea, vomiting, diarrhea, stomach cramps, fever, or headaches. Other potential issues include skin rashes, respiratory problems, and infections in your eyes or ears. If you or anyone in your household experiences these symptoms after a sewage backup, it’s best to see a doctor right away.
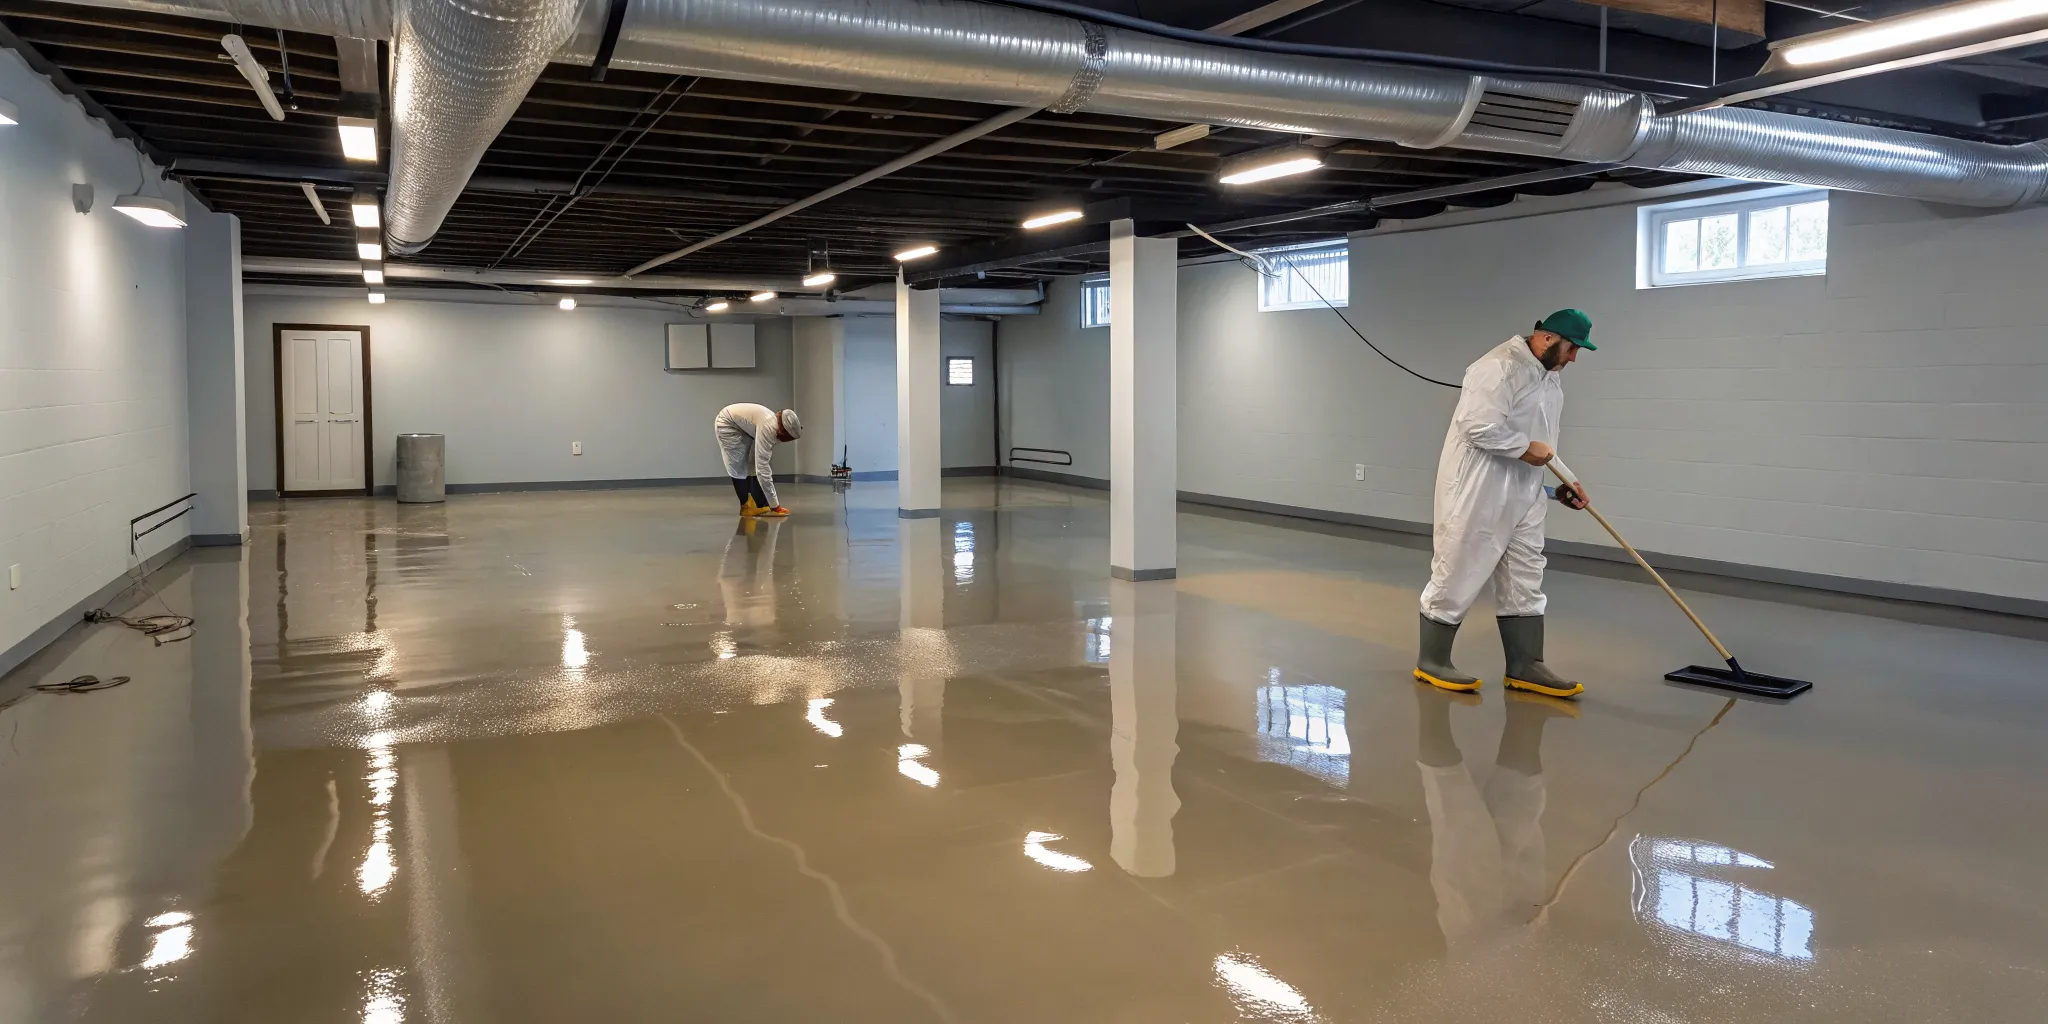
How to Dry Your Basement and Prevent Mold
After you’ve cleaned and disinfected every surface, the final and most crucial step is to thoroughly dry your basement. Simply wiping things down isn’t enough. Lingering moisture is a welcome mat for mold, mildew, and structural problems that can cause headaches for years to come. Getting your basement bone-dry is non-negotiable for making the space safe and healthy again. This process requires a combination of good air circulation, moisture removal, and a bit of patience. By using the right equipment and techniques, you can prevent mold from taking hold and ensure your basement is fully restored. Let’s walk through how to do it right.
Using Fans, Dehumidifiers, and Airflow to Dry the Space
Your main tools for this job are fans, dehumidifiers, and good old-fashioned fresh air. Start by opening any basement windows to get air moving and help clear out remaining odors. Next, set up several fans throughout the space. Industrial-grade fans are best, but any box fan will help. Point them directly at the floor, walls, and any damp items to speed up evaporation. While fans move moist air around, a dehumidifier pulls that moisture out of the air. If the situation feels overwhelming, our emergency plumbing team has the professional-grade equipment to dry your space quickly. Run a high-capacity dehumidifier continuously until humidity levels are back to normal, typically between 30% and 50%.
Drying Salvageable Items Outdoors
For any non-porous items you were able to salvage, the drying process isn’t over once they’re wiped down. Take these items outside on a clear, sunny day. Sunlight is a fantastic natural disinfectant and, combined with fresh air, it will help ensure every last bit of moisture is gone. This step is critical because bringing even slightly damp items back into your newly cleaned basement can reintroduce moisture and create the perfect environment for mold to grow. It’s a final, simple precaution that protects all the hard work you’ve just put in. If the scope of the cleanup and restoration feels like too much, remember that our emergency plumbing team can manage the entire process, from water removal to ensuring your home is completely dry and safe.
How to Prevent Mold Growth After a Cleanup
Mold prevention begins the moment you finish cleaning. Because mold can start growing in as little as 24 hours, you need to act fast. The fans and dehumidifiers you’re using are your first line of defense, as they lower the moisture that mold needs to thrive. If you’re worried about hidden moisture or potential mold growth, it’s always best to contact a professional for an assessment. Keep a close eye (and nose) on the area. A musty smell often means that germs and mold are still active and growing. If you notice that signature earthy odor, it’s a sign you need to increase your drying efforts or revisit your cleaning process. Don’t ignore it; addressing it immediately is key to keeping your home safe.
Deodorizing and Final Touches
Your basement is finally clean, disinfected, and dry. You’ve done the hardest part, but a few final steps are needed to truly close the book on this messy chapter. Even after a thorough cleaning, a stubborn, unpleasant odor can linger in the air, serving as a constant reminder of the backup. Getting rid of that smell is essential for making your basement feel like part of your home again. Additionally, the tools you used for the cleanup are now contaminated and need to be properly cleaned or disposed of to prevent cross-contamination. These finishing touches ensure your home is not only visibly clean but also safe and fresh.
Getting Rid of Lingering Odors
That musty, foul odor left after a sewage backup is caused by airborne microbes. To get rid of it, you need to clear the air, not just mask the smell. The best way to do this is with aggressive ventilation. Open up any basement windows and doors to the outside to create a cross-breeze. Then, place fans in the windows, positioning them to blow the contaminated air out of your house. Simply running fans in the middle of the room will only circulate the stale air. Once the air feels fresher, you can place open boxes of baking soda or bowls of activated charcoal around the room to absorb any remaining odors. If a foul smell persists after a few days of airing out, it could be a sign of hidden moisture or contamination, and it might be time to contact a professional for an assessment.
Cleaning Your Cleanup Tools
Your cleanup job isn’t finished until your tools are clean, too. Anything you used, from the bucket to the shop vac, is now contaminated and needs immediate attention. Start by sorting your supplies. Anything porous that can’t be disinfected, like sponges or cloth rags, should be sealed in a heavy-duty plastic bag and thrown away. For your non-porous tools like shovels, buckets, and squeegees, take them outside and scrub them thoroughly with hot, soapy water. After they are physically clean, disinfect them by wiping them down with your bleach solution and letting them air dry completely in the sun. This final step is critical for ensuring you don’t accidentally spread contaminants the next time you use them.
Common Cleanup Mistakes (And How to Avoid Them)
When you’re faced with a mess as serious as a sewage backup, your first instinct is to clean it up as fast as possible. While that urgency is understandable, rushing can lead to critical mistakes that compromise your safety and the effectiveness of your cleanup. Even with the best intentions, a simple oversight can expose you to harmful contaminants or leave your basement improperly sanitized, creating long-term problems like mold and lingering odors.
Knowing what not to do is just as important as knowing what to do. The most common errors often involve underestimating the risks and cutting corners on essential steps. From failing to wear the right protective gear to using cleaning products in the wrong order, these missteps can turn a bad situation into a dangerous one. Taking a moment to understand these pitfalls will help you handle the cleanup safely and correctly, ensuring your basement is truly clean and your family is protected. If the job feels too big or too risky, remember that professional emergency plumbing services are always an option.
Forgetting to Use Proper Safety Gear
This is the single most dangerous mistake you can make. Sewage isn’t just dirty water; it’s a toxic mix of bacteria, viruses, and other pathogens that can cause serious illness. Treating it like a simple spill is a risk you can’t afford to take. Before you even think about starting the cleanup, you must put on the right personal protective equipment (PPE). This includes heavy-duty rubber gloves, waterproof boots that cover your ankles, and safety goggles. Most importantly, you need to protect your lungs by wearing a high-quality respirator mask, like an N95, to avoid inhaling airborne contaminants. Your regular clothes won’t cut it, so wear something you can throw away afterward.
Applying Disinfectants the Wrong Way
Many people grab a bottle of bleach and start spraying, but this is not the right approach. Disinfectants are not effective on dirty surfaces. You must clean everything first, then disinfect. Start by scrubbing all affected surfaces with hot, soapy water to remove the physical grime and waste. Once the area is visibly clean, you can apply your disinfectant. A solution of one cup of bleach mixed with one gallon of water is effective for many hard surfaces, a recommendation supported by public health departments. Be sure to never mix bleach with ammonia or other cleaning products, as this can create toxic gas. For items that could be damaged by bleach, use a suitable commercial household disinfectant and follow the manufacturer’s instructions carefully.
How Long Does Contamination Last?
After a sewage backup, one of the biggest questions is, “When will my basement be safe again?” Unfortunately, the contamination doesn’t disappear when the water does. Harmful germs, including bacteria, viruses, and parasites, can linger for weeks or even months. These pathogens thrive in damp environments and cling to wet surfaces, making a basement the perfect place for them to stick around long after the initial cleanup.
The lingering danger isn’t just about a bad smell; it’s a serious health risk. Simply cleaning the visible mess isn’t enough to make the space safe for your family. The duration of the contamination depends heavily on how the situation is handled, what materials were affected, and whether the area is dried completely. Understanding these factors is key to ensuring your home is truly clean and safe to use again.
Factors That Affect Contamination Timelines
Several key things determine how long your basement remains a hazard zone. The most significant factor is moisture. A damp, humid environment is a breeding ground for germs, allowing them to survive and multiply long after the sewage is gone. Another major factor is the type of materials that were contaminated. Porous items like carpet, drywall, wood, and upholstery absorb contaminants deep within their fibers, making them incredibly difficult to fully sanitize. Non-porous surfaces like tile, concrete, and metal are much easier to clean effectively. Finally, the quality of the cleanup itself plays a huge role. A thorough, professional response to an emergency plumbing situation will drastically shorten the contamination timeline compared to a surface-level cleaning.
How to Be Sure Your Basement Is Safe Again
You can’t rely on your senses to give you the all-clear. Even if your basement looks and smells clean, microscopic pathogens can still be hiding on surfaces and in the air. The only way to be certain that your basement is safe is through professional testing. A professional restoration or plumbing company can test for remaining contaminants and check that humidity levels are low enough to prevent mold growth. They have the right equipment to confirm that all harmful substances have been eliminated. Don’t risk your family’s health by guessing. Getting a professional assessment provides the peace of mind that your home is truly safe to live in again. If you have any doubts, it’s always best to contact an expert.
When to Call a Professional for Sewage Cleanup
While it’s great to be prepared, some jobs are too big or too hazardous to handle on your own. A sewage backup can be one of them. Knowing your limits is the most important part of keeping your family safe and protecting your home from long-term damage. If the situation feels overwhelming, or if you’re unsure about any step in the cleanup process, it’s always best to step back and let an expert take over. Your health and safety are the top priorities.
Sometimes, a professional cleanup isn’t just a good idea; it’s a necessity. Professionals have the training and equipment to handle hazardous materials, properly sanitize your home, and ensure no hidden moisture is left behind to cause mold. They can also help identify the source of the problem to prevent it from happening again. Let’s go over the clear signs that it’s time to pick up the phone and how you can be proactive about preventing future backups.
Signs the Job Is Too Big for DIY
While you might be able to manage a very minor spill, a significant sewage backup requires professional help. Raw sewage contains bacteria, viruses, and other germs that can be dangerous to your health. If you’re facing a large volume of contaminated water, if the backup has soaked into porous materials like drywall and carpet, or if the foul odor persists after your initial cleanup, it’s time to call for help. Professionals use special equipment like air scrubbers and powerful disinfectants to ensure your home is completely clean and safe. When in doubt, calling for emergency plumbing services is the safest choice for you and your family.
How to Prevent Future Sewage Backups
After you’ve dealt with a sewage backup, the last thing you want is to go through it all again. Fortunately, you can take a few simple steps to reduce the risk of another incident. Start in the kitchen and bathroom by never pouring fats, oils, or grease down the drain, and only flushing human waste and toilet paper. Even “flushable” wipes can cause major clogs. It’s also a good idea to have your plumbing inspected periodically to catch any potential issues early. Taking care of your home’s plumbing system is the best way to prevent messy and expensive emergencies. For a full range of preventative care, explore our expert plumbing solutions.
Related Articles
- Drain Backup in Basement? A Step-by-Step Guide
- Basement Drain Backup: Your Step-by-Step Guide
- Sewage Clean Up: A Complete Homeowner’s Guide
Frequently Asked Questions
What are the absolute first things I should do if I find sewage in my basement? Before you do anything else, prioritize your safety. Your first move should be to shut off the electricity and natural gas to the affected area to prevent electrocution or a gas leak. If you can’t safely reach your breaker box or gas valve, call your utility companies right away. Once the utilities are off, put on protective gear like waterproof boots, gloves, and a mask before you even think about assessing the damage.
Is it safe to clean up a small sewage backup myself? A very minor spill might be manageable, but you have to be extremely careful. Raw sewage is filled with harmful bacteria and viruses that can make you sick. If you decide to handle it, you must wear full personal protective equipment (PPE), including an N95 respirator, safety goggles, and waterproof gear. If the affected area is large, has soaked into drywall or carpet, or if you have any doubts about your ability to do it safely, it is always better to call a professional.
I’ve cleaned everything, but there’s still a musty smell. What does that mean? A lingering musty or earthy smell is a major red flag. It usually means that moisture is still trapped somewhere and mold or mildew has started to grow. This can happen in wall cavities, under flooring, or in other hidden spots. You should increase ventilation immediately with fans and run a dehumidifier. If the smell persists, it’s a clear sign you need a professional to find and address the hidden moisture source before it causes more damage.
Can I really not save my carpet or upholstered furniture? It’s tough, but for your health, it’s best to discard porous items like carpets, rugs, mattresses, and upholstered furniture. These materials have tiny holes that absorb sewage deep inside, making it nearly impossible to completely clean and disinfect them. Trying to salvage them creates a serious risk of leaving contaminants and mold spores behind in your home. Hard, non-porous items like metal or hard plastic can usually be saved with proper cleaning and disinfection.
I scrubbed everything with bleach. Is my basement safe now? Using bleach is a good step, but only if it’s done correctly. Disinfectant works best on an already clean surface. You first need to scrub everything with hot, soapy water to remove all the physical grime. After rinsing, you can then apply your bleach solution and let it sit for at least ten minutes to kill the germs. Simply spraying bleach on a dirty surface won’t be effective and can leave dangerous pathogens behind.
Install a Backflow Prevention Device
For the most powerful protection against future backups, consider installing a backflow prevention device. Think of this as a one-way gate for your main sewer line. It allows wastewater to flow out of your home but automatically closes if the city sewer system backs up, physically stopping sewage from flooding your basement. This single device can be the difference between a normal rainy day and a catastrophic cleanup. While it’s an incredibly effective tool, installation isn’t a DIY project. It requires a professional to ensure it’s installed correctly and meets local codes. Our team offers expert backflow preventer repair and testing, and we can help you choose and install the right device to protect your home from future disasters.