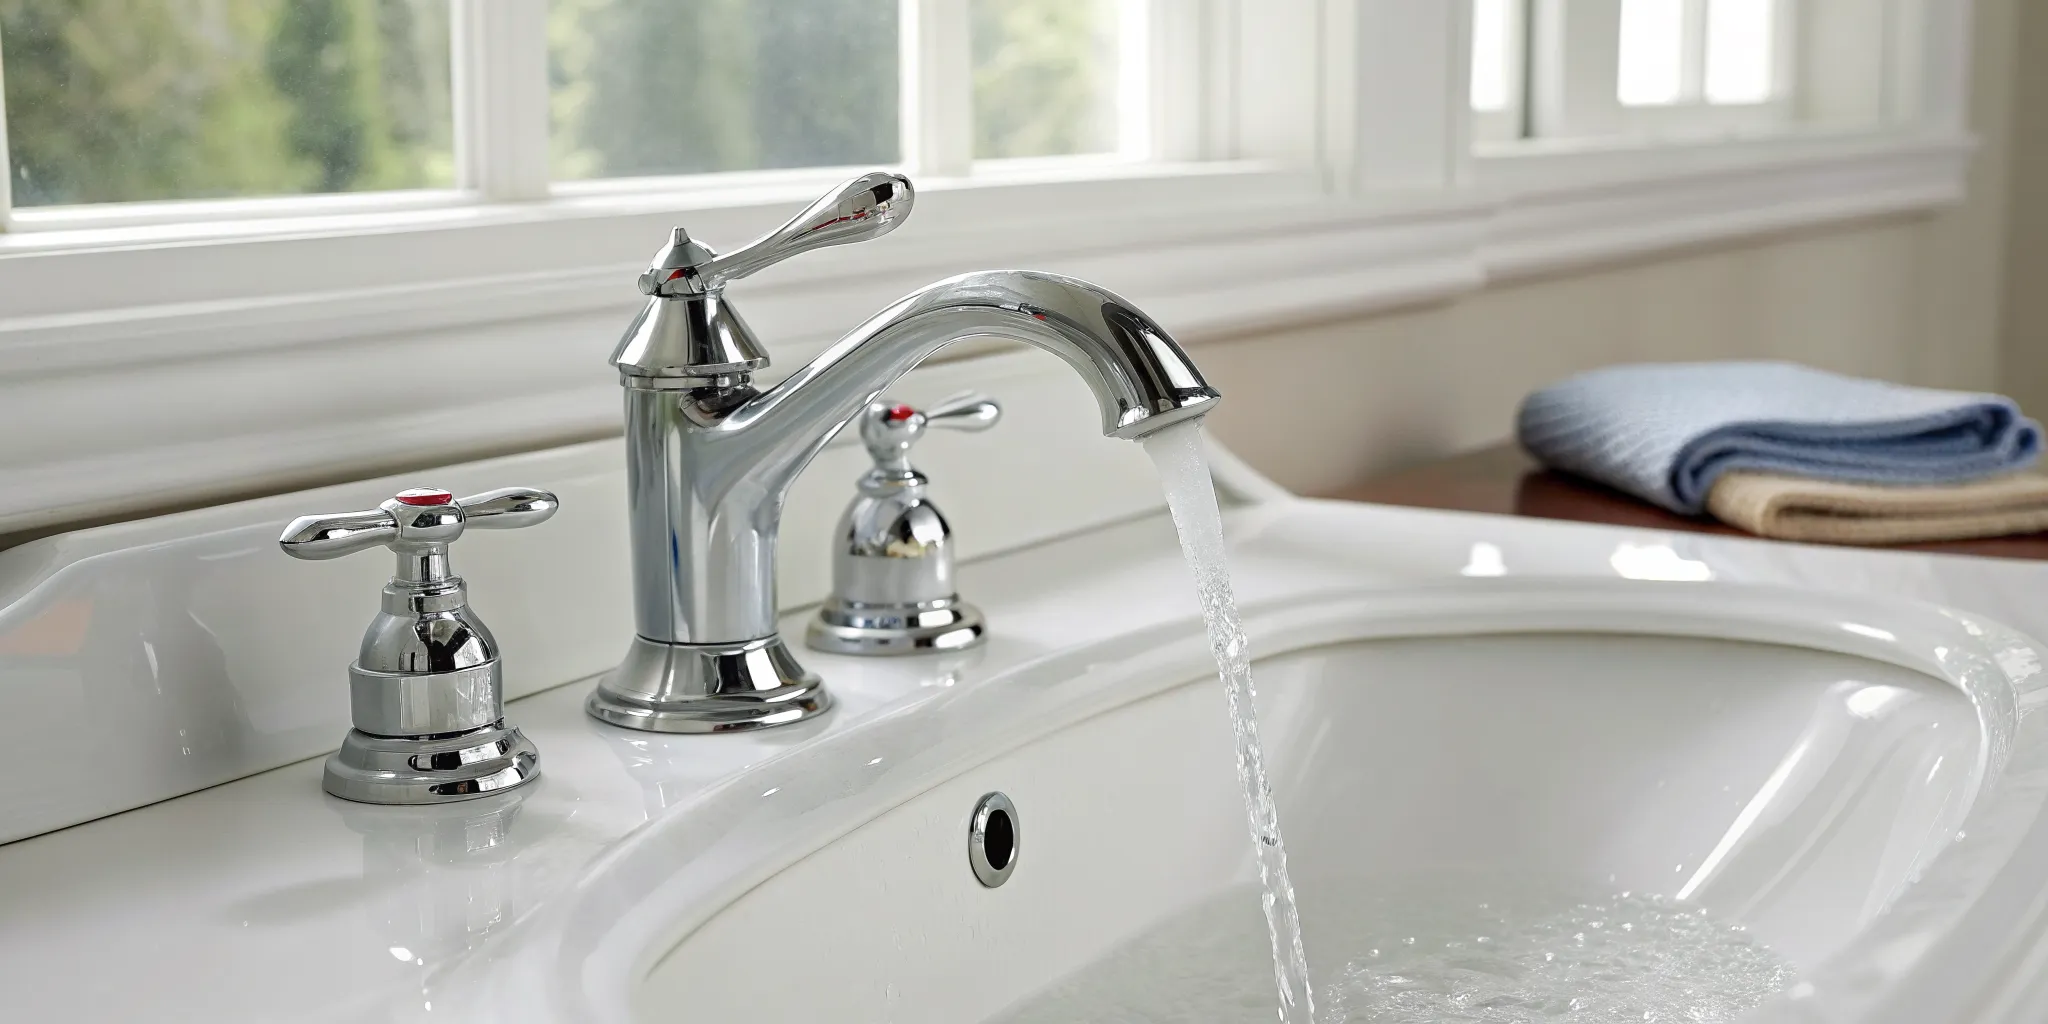
That tiny drip from your pipe seems harmless, right? But before you dismiss it, know that it could be a warning sign for a much bigger problem. The real question isn’t just how to fix it, but understanding what you’re fixing. Is it a simple pinhole, or is widespread corrosion at play? This guide helps you diagnose the root cause of your copper pipe leak. Knowing the source is the key to deciding if this is a quick DIY fix or a job that needs a professional’s touch.
Key Takeaways
- Master the Prep for a Lasting Repair: The success of your fix depends entirely on the prep work. Before you start, always shut off the water, drain the pipe, and clean the copper until it’s bright and shiny to guarantee a solid, leak-proof seal.
- Use Temporary Fixes for Emergencies Only: Pipe clamps and epoxy putty are lifesavers for stopping a leak fast, but they aren’t permanent solutions. Always follow up with a proper repair using soldering or reliable solder-free fittings to prevent a future failure.
- Know Your Limits and When to Call a Pro: If you’re facing multiple leaks, the repair is in a tricky spot like inside a wall, or you simply don’t feel confident, it’s time to call for professional help. A plumber can handle complex jobs safely and prevent a small issue from becoming a major one.
What’s Causing Your Copper Pipe Leak?
Finding a puddle under your sink or a water spot on your ceiling is never a welcome discovery. While copper pipes are known for their durability, they aren’t invincible, and a leak can spring for several reasons. Figuring out the root cause is the first step toward a lasting fix. Is it an issue with the water quality inside the pipes causing corrosion? Was there some kind of physical damage from a recent renovation project? Or is it simply the result of your plumbing system getting older and showing its age?
Understanding what’s going on behind your walls or under your floors will help you decide whether you’re looking at a quick DIY patch or a job that needs a professional’s touch. Sometimes a small drip is just that—a small drip. But other times, it can be a warning sign of a more serious, system-wide issue brewing that could lead to major water damage if ignored. Before you grab your tools, it’s worth taking a moment to play detective. Let’s break down the most common culprits behind a leaking copper pipe so you can get a better handle on your situation and make an informed decision on how to proceed.
Is Corrosion or Bad Water to Blame?
Sometimes, the problem starts from the inside out. The chemistry of your water, including its pH level and mineral content, can slowly eat away at the copper over time. This internal corrosion often results in tiny, hard-to-spot pinhole leaks. While a single pinhole leak might seem like a small issue, it can be a red flag for a much bigger problem. Often, where there’s one, more are likely to follow, indicating that your entire plumbing system could be failing. A temporary patch might stop the drip for now, but if corrosion is widespread, you’ll need a professional to assess the health of your pipes and determine if a larger replacement is necessary to prevent future emergency plumbing situations.
Electrical and Chemical Corrosion
It might sound unusual, but sometimes the problem with your pipes isn’t mechanical—it’s electrical. If your home’s electrical system isn’t grounded properly, a low-voltage current can travel through your copper water pipes. This stray electricity essentially supercharges the corrosion process, causing the metal to break down much faster than it normally would. It’s a sneaky issue that can lead to leaks and pipe failure without any other obvious signs of trouble. Because this problem involves both your plumbing and electrical systems, it’s a complex and potentially hazardous situation. If you have recurring leaks and can’t pinpoint another cause, it’s wise to get a professional opinion to ensure your home is safe and your pipes are protected.
How Water Chemistry Leads to Pinhole Leaks
Often, the culprit behind a copper pipe leak is the water itself. The specific chemistry of your water can create conditions that lead to corrosion from the inside out, resulting in tiny but persistent pinhole leaks. Water that is too acidic, with a pH level below 7.0, can slowly dissolve the copper, thinning the pipe walls over time. On the other hand, water that is too alkaline or has a high concentration of minerals (hard water) can also cause corrosive reactions. A single pinhole leak is often a red flag that the conditions for corrosion exist throughout your entire plumbing system. This means that while you can patch one leak, others are likely to appear, pointing to a need for a more comprehensive solution.
Spotting Physical Damage or a Botched Installation
Not all leaks are a slow burn. Sometimes, the cause is much more direct. A stray nail during a home improvement project, a pipe getting jostled too hard, or even the jarring shock of water hammer (caused by high water pressure) can create immediate damage. Another common cause is poor installation. If the pipes weren’t properly joined or supported when they were first put in, the joints can become weak spots that are prone to leaking under stress. A well-installed plumbing system should last for decades, but shortcuts or mistakes during installation can significantly shorten that lifespan. Carefully inspecting the area around the leak for any signs of physical impact or poorly fitted connections can help you pinpoint the source of the problem.
Common Installation Mistakes
Sometimes, a leak is a problem you inherited. A faulty installation, even one from decades ago, can create a ticking time bomb behind your walls. One common mistake is when two different types of metal, like steel and copper, are connected without a proper fitting. This can cause a reaction called galvanic corrosion, which weakens the pipe and eventually leads to a leak. Another hidden issue comes from the soldering process. If the installer didn’t properly clean off the acidic paste, or flux, used to join the pipes, that residue can slowly eat away at the copper over time. These aren’t issues you could have predicted, but they highlight why professional installation is so critical for the long-term health of your plumbing system.
Pipe Quality and High Water Pressure Issues
The water flowing through your pipes can also be the culprit. Water chemistry, especially in areas with hard water, can cause minerals to build up or create a corrosive environment inside the copper. This internal corrosion often leads to tiny pinhole leaks that can appear without warning. While one pinhole might seem manageable, it often signals a more widespread issue. Separately, high water pressure puts constant strain on your entire plumbing system, stressing joints and fittings. Think of it like overinflating a tire—eventually, the pressure can cause a weak point to fail, leading to a burst pipe that requires immediate emergency plumbing services. A professional can test your home’s water pressure and ensure it’s at a safe level.
How Age and Temperature Swings Affect Pipes
Like everything else in your home, your plumbing has a lifespan. If you live in an older house, your copper pipes may simply be reaching the end of their service life after decades of constant use. Over time, the pressure and flow of water cause natural wear and tear. Temperature fluctuations also play a big role, especially here in Metro Detroit. The constant expansion and contraction as hot and cold water flows through the pipes can weaken joints. In the winter, the risk of frozen pipes adds another layer of stress, as expanding ice can easily crack or burst copper. If your home has an older plumbing system and you’re starting to see multiple leaks, it might be a sign that it’s time for an upgrade.
How to Find a Copper Pipe Leak
Catching a copper pipe leak early can save you from a world of headaches and expensive repairs down the road. While a sudden burst is impossible to miss, many leaks start small and stay hidden, causing gradual damage. The key is to know the subtle signs that your plumbing is trying to send you. By paying attention to your home’s sights, sounds, and even smells, you can identify a problem before it becomes a catastrophe. Think of it as being a detective in your own home—here’s what to look for.
Start with the Visual Clues: Water Damage
The most straightforward sign of a leak is, of course, visible water. Keep an eye out for water stains on your ceilings, walls, or floors, which often look like brownish or yellowish rings. You might also notice bubbling or peeling paint and wallpaper, or warped floorboards near walls where pipes are located. Don’t forget to check the pipes themselves. Look for drips or beads of moisture, and pay attention to any green or bluish discoloration on the copper. This staining, called patina, is a classic sign of a slow, persistent leak that has been happening for a while. If you see any of these signs, it’s time to act before the damage gets worse.
Is Your Water Bill Suddenly Higher?
Sometimes, the clues aren’t visible at all. A hidden leak can often reveal itself through changes in your home’s water performance. Have you noticed a sudden drop in water pressure when you turn on a faucet or shower? That could mean water is escaping somewhere along the line. Another major red flag is an unexpected spike in your water bill. If your usage habits haven’t changed but your bill is suddenly much higher, you likely have a leak. Even a tiny pinhole leak can waste a surprising amount of water over time and may indicate that your entire plumbing system is at risk of failing. Don’t ignore these signs; they are clear calls for a closer inspection of your plumbing services.
Listen for Drips and Sniff for Musty Smells
Your ears and nose can be excellent leak detectors. In a quiet house, listen for unusual sounds near walls or in your basement. Faint dripping, hissing, or spraying noises can pinpoint the location of a leak that’s out of sight. An equally important clue is a persistent musty or earthy smell. This odor often indicates mold and mildew growth, which thrives in the damp environments created by a hidden water leak. Ignoring these sensory clues can lead to more than just water damage; it can also impact your home’s air quality. If you hear or smell something off, it’s a good idea to investigate or contact a professional to take a look.
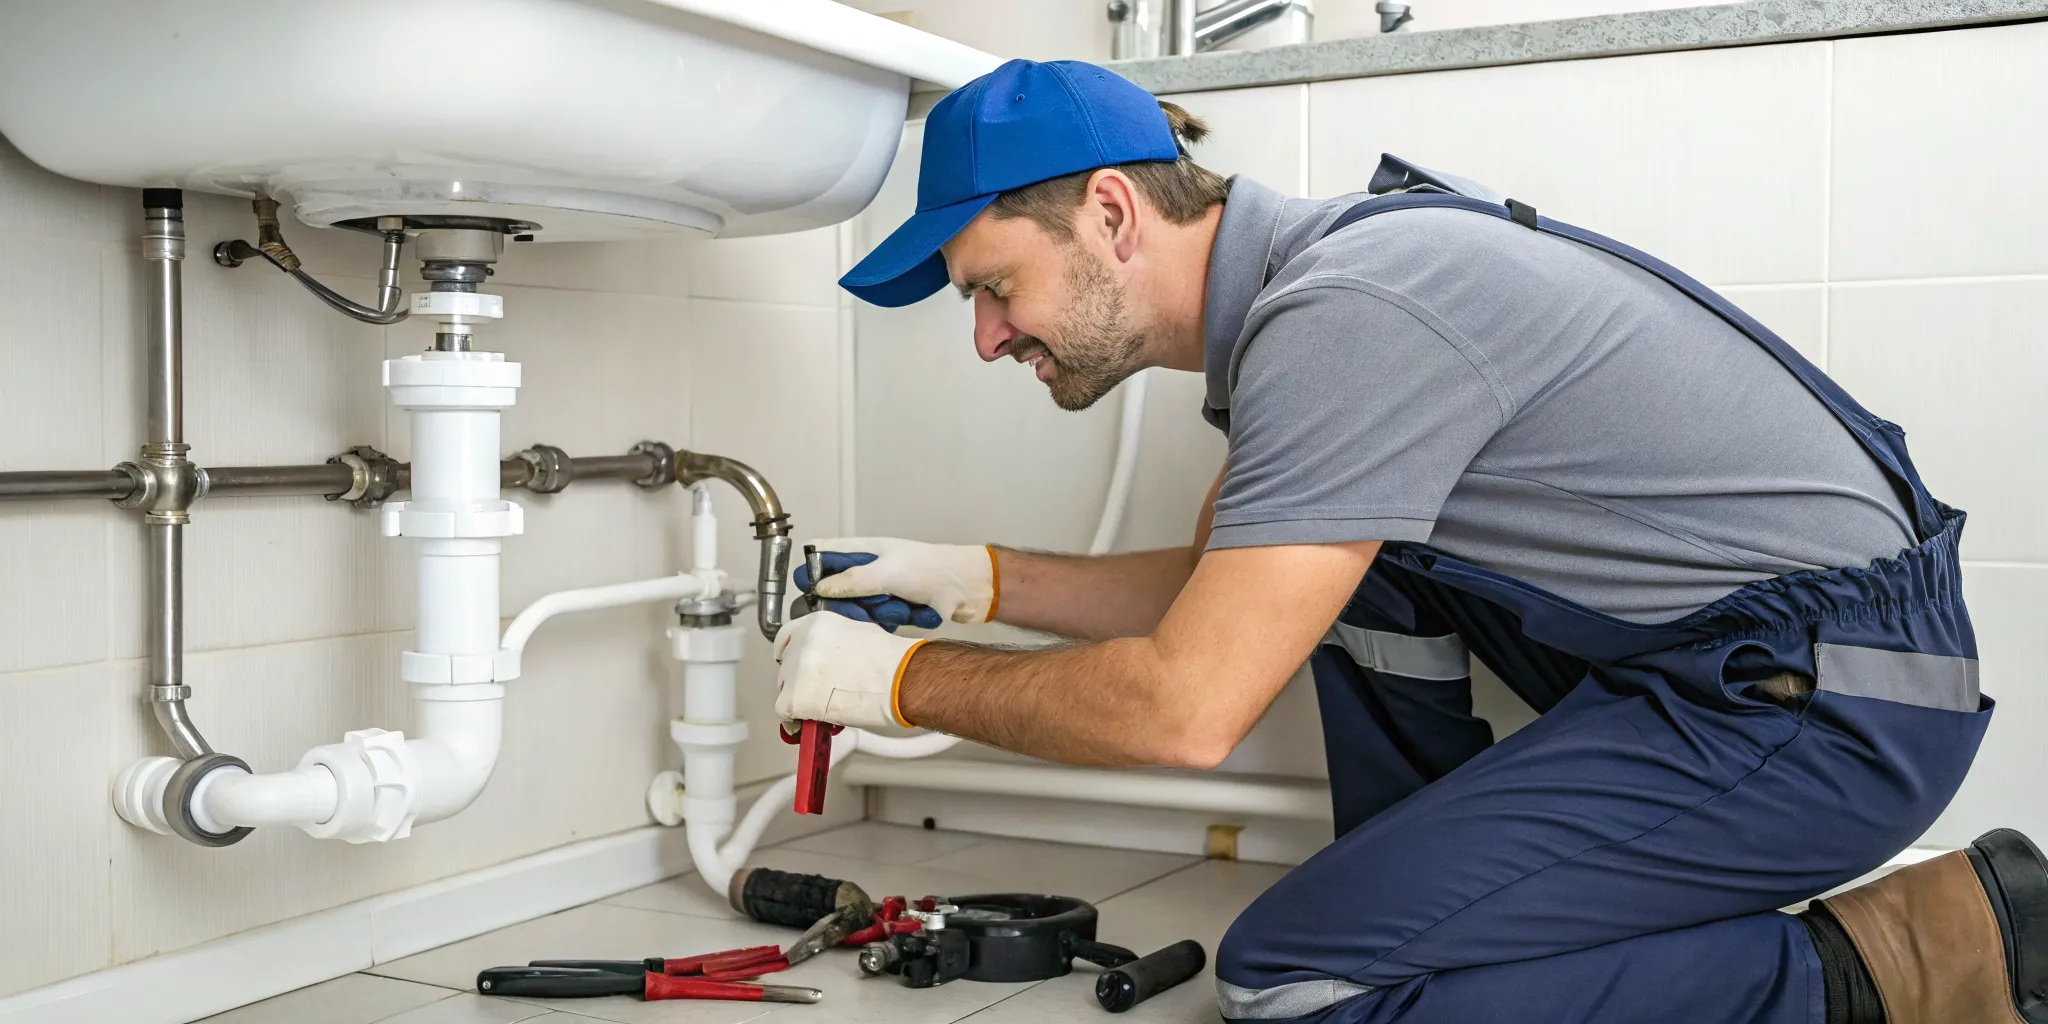
Gather Your Tools and Materials
Before you can tackle that leak, you need to have the right gear on hand. Walking into a repair without the proper tools can turn a small problem into a much bigger, wetter one. Taking a few minutes to gather everything you need will make the process smoother and safer. Your approach will depend on whether you’re aiming for a quick patch or a permanent solution. We’ll break down what you need for both, plus the safety equipment you should never skip.
What You’ll Need for a Temporary Fix
A temporary fix is your first line of defense, designed to stop the leak immediately until you can implement a permanent repair. These solutions are perfect for emergencies when you need to get the water under control fast. For a quick patch, you’ll want to have a pipe repair clamp, which is a simple device that snaps over the hole to seal it. Another great option is epoxy putty; you just knead it and apply it over the leak, where it will harden and form a seal. These temporary fixes are lifesavers, but remember, they aren’t meant to last forever.
Tools for a Permanent Pipe Repair
When you’re ready for a permanent fix, you have a couple of paths you can take. The traditional method is soldering, which creates the strongest bond. For this, you’ll need a pipe cutter, a deburring tool, flux, solder, and a propane torch. If you’re not comfortable using a torch, don’t worry! There are excellent solder-free options available. Push-to-connect fittings, like SharkBites, are incredibly user-friendly and create a secure seal without any special tools. Compression fittings are another great alternative that only requires a couple of wrenches to tighten. These solder-free methods are a reliable choice for most DIY repairs.
Your Safety Gear Checklist
Safety should always be your top priority. Before you even think about cutting into a pipe, make sure you shut off the main water supply to your home and drain the affected line. Keep a bucket and some old towels handy to catch any remaining water. Always wear safety glasses to protect your eyes from debris or water spray. If you decide to solder, heat-resistant gloves are a must to protect your hands from the torch flame and hot copper. Working in a well-ventilated area is also crucial. If at any point you feel unsure or the situation seems out of your control, don’t hesitate to call for emergency plumbing assistance.
Quick, Temporary Fixes for a Leaking Pipe
When you discover a leak, the immediate goal is to stop the water. While you’re waiting for a professional, a quick, temporary fix can prevent further damage and give you peace of mind. These methods are designed to be stop-gap measures, not permanent solutions, but they can buy you valuable time until an expert can assess the situation. Remember, a lasting repair is crucial for the health of your home’s plumbing system. If you’re facing a sudden leak, getting professional help quickly is the best course of action. Our team is always ready to handle emergency plumbing situations and provide a reliable, long-term fix.
How to Use a Pipe Repair Clamp
A pipe repair clamp is one of the simplest temporary fixes you can find at a hardware store. It’s essentially a metal sleeve with a rubber lining that you place directly over the leak. To use it, you just open the clamp, position the rubber gasket over the hole in the pipe, and then tighten the screws to create a secure seal. The main advantage is its simplicity—no special tools or skills are needed, and there’s no soldering involved. However, it’s important to know that these clamps are strictly for temporary use and are not compliant with most plumbing codes. Think of it as a reliable patch to hold things over until a professional can properly repair the pipe.
How to Apply Epoxy Putty for a Fast Seal
Epoxy putty is another great temporary solution for small leaks. This two-part compound is something you knead together to activate, and it hardens into a durable, waterproof seal. Before you start, make sure to shut off the water and completely dry the area around the leak—the putty won’t stick to a wet surface. Once the pipe is dry, knead the putty until it’s a uniform color, then press it firmly over and around the hole. It will harden in a few minutes, creating a solid patch. While effective for minor drips, epoxy is not a permanent fix for pipes under constant pressure and should be replaced with a proper repair.
Using the Rubber and Hose Clamp Trick
If you’re in a pinch and need a fix with items you might already have, the rubber and hose clamp method is a classic. All you need is a small piece of rubber—like from an old inner tube or a thick rubber glove—and a standard hose clamp. Place the piece of rubber directly over the pinhole leak, making sure it’s flat and covers the area completely. Then, wrap the hose clamp around the rubber and the pipe, and tighten it with a screwdriver. This creates pressure on the rubber, sealing the leak. While surprisingly effective for small pinholes, this is definitely an emergency-only, temporary solution until you can schedule a professional repair.
The Pro Method: Permanently Repairing a Pipe with Solder
If you’re looking for a long-term, reliable fix, soldering is the gold standard for repairing copper pipes. This method involves using a torch to melt solder into a joint, creating a permanent, watertight seal. While it requires more tools and a bit of practice compared to temporary fixes, it’s the same technique professionals use for installations and major repairs. The process involves cutting out the damaged portion of the pipe, cleaning the ends thoroughly, and then heating the new joint to bond the pieces together.
Soldering creates an incredibly strong connection that will last for decades. It’s a fantastic skill for any homeowner to learn, but it’s also a process where precision matters. The key to a successful solder joint is meticulous preparation—if the pipe isn’t perfectly clean, the solder won’t flow correctly, and you’ll end up with another leak. If you’re not comfortable working with an open flame or just want the peace of mind that comes with a professional job, don’t hesitate to reach out. For many homeowners in Metro Detroit, a quick call for emergency plumbing support is the simplest and safest solution.
Step 1: Shut Off the Water and Drain the Pipe
Before you do anything else, you absolutely must shut off the water supply to your home. Find your main water shut-off valve—it’s usually located in the basement, a crawl space, or near your water meter—and turn it clockwise until it’s fully closed. Once the water is off, you need to drain the remaining water from the pipes. To do this, open a faucet at the lowest point in your house, like a basement utility sink or an outdoor spigot. It also helps to open a faucet on the highest floor to allow air into the pipes, which helps the water drain out faster. Make sure the leaky pipe is completely empty before you start cutting.
Step 2: Cut Out the Damaged Section
With the water off and the pipe drained, it’s time to remove the leaky section. For the cleanest cut, use a tube or pipe cutter. This tool wraps around the pipe and scores it as you rotate it, creating a perfectly straight edge. If you don’t have one, a hacksaw will work, but be careful to keep your cut as straight as possible. You’ll want to “cut out the bad part” and remove the entire damaged area, plus a little extra on each side to ensure you’re working with solid, healthy pipe. Once the section is removed, measure it carefully so you can cut a replacement piece of copper pipe to the exact same length.
Step 3: Clean and Prepare the Pipe Ends
This is the most important step for a successful repair. Solder won’t stick to a dirty or oxidized surface, so you need to clean every piece until it shines. Start by using a deburring tool to “debur” the pipe ends and smooth out the inside edge of the cuts on both the existing pipe and your new piece. Any rough edges or burrs can disrupt water flow. Next, use emery cloth or a wire fitting brush to thoroughly clean the outside of the pipe ends and the inside of your new fittings. You’ll know they’re clean when the copper is bright and shiny, with no signs of discoloration. This preparation ensures the solder can flow evenly into the joint.
Step 4: Solder the New Connection
Now for the main event. Apply a thin, even layer of flux with a small brush to the cleaned ends of the pipes and the inside of the fittings. Flux is a paste that prevents oxidation during heating and helps the solder flow smoothly. Fit the new pipe section and couplings together, giving them a little twist to spread the flux. Using a propane torch, begin heating the joint. Focus the flame on the fitting, not the pipe itself. After about 30 seconds, touch the tip of your lead-free solder to the joint on the side opposite the flame. If the pipe is hot enough, the solder will instantly melt and get pulled into the joint, creating a perfect seal. Let it cool completely before slowly turning the water back on to check for leaks. If this feels like too much, our team is always ready to handle your plumbing service needs.
Pro Tips for a Perfect Solder Joint
Getting that perfect, leak-proof solder joint really comes down to the details. First, don’t underestimate the power of a good cleaning; even the natural oils from a fingerprint can be enough to prevent the solder from bonding correctly. When you’re ready to heat the connection, always aim the torch’s flame at the fitting, not directly on the pipe. This heats the entire joint evenly and allows capillary action to pull the molten solder deep into the gap for a complete, 360-degree seal. Let the hot copper melt the solder—if you try to melt it with the torch, it will just drip off instead of flowing into the joint. You only need a small amount, roughly the same length as the pipe’s diameter, to do the job. When it cools, you should see a clean, continuous silver ring. If you’re not confident in the seal, it’s always better to be safe than sorry and call for professional plumbing services to ensure a lasting, worry-free repair.
No Torch? No Problem: Solder-Free Pipe Repairs
If the idea of using a flaming torch near your home’s framework makes you nervous, you’re not alone. The good news is that soldering isn’t the only way to create a lasting repair for a leaky copper pipe. Modern plumbing offers several reliable, solder-free methods that are much more approachable for a DIY project. These techniques can create a permanent, watertight seal without the need for an open flame, making them a safer and often quicker alternative for fixing a damaged pipe.
How to Install a Compression Fitting
Compression fittings are a fantastic solder-free option, especially if you’re new to plumbing repairs. These fittings create a seal by compressing a ring, or ferrule, against the pipe as you tighten a nut. To use one, you’ll cut out the damaged pipe section, slide a nut and ferrule over each end of the remaining pipe, insert a new piece of pipe, and then tighten the nuts onto the fitting. This action squeezes the ferrule, creating a strong, watertight connection. While they are quite reliable, the key is to tighten them just right—not so loose that they leak, but not so tight that you damage the pipe or fitting. It’s one of the many expert plumbing solutions we handle every day.
The Easiest Fix: Using Push-to-Connect Fittings
Push-to-connect fittings, often known by the brand name SharkBite, are probably the easiest way to permanently fix a pipe. They are a lifesaver for quick repairs. After you cut out the leaky section, you just need to clean and smooth the pipe ends and then push the fitting firmly onto the pipe. An internal mechanism with stainless steel teeth grips the pipe, and an O-ring creates a secure seal. There’s no twisting or tightening required. These are incredibly effective, but it’s important to ensure the pipe is cut cleanly and pushed all the way into the fitting to prevent leaks. They are a go-to for many emergency plumbing situations because of their speed and simplicity.
A Word of Caution on Placement
Before you celebrate a successful repair, take a moment to consider where the leak happened. Sometimes, the location itself is the problem. If your copper pipe is in direct contact with a different type of metal, like a steel support beam or hanger, it can cause a chemical reaction called galvanic corrosion that eats away at the copper. Even your home’s electrical grounding can play a role; if it’s not set up correctly, stray electrical currents can travel through your pipes and accelerate wear. These issues often lead to pinhole leaks that seem random but are actually symptoms of a larger environmental problem. If you suspect something more than simple wear and tear is at play, it’s a good idea to have a professional take a look to ensure a simple fix doesn’t become a recurring headache.
When to Replace the Whole Pipe Section
Sometimes, the damage is more than just a pinhole leak, requiring you to replace an entire section of pipe. This might sound intimidating, but it’s very manageable with solder-free fittings. The process involves cutting out the compromised length of pipe from joint to joint. For the replacement, it’s a good idea to use Type L copper pipe, which has a thicker wall than the more common Type M and offers better durability. You can then connect the new pipe section at both ends using either compression or push-to-connect fittings. This approach ensures that you’ve completely removed the problem area, giving you a brand-new, solid section of pipe that you can count on for years to come.
Safety First: How to Handle Your Repair
Before you dive into the repair, let’s cover the most important part: safety. Working with plumbing involves water, potential electrical hazards, and sometimes open flames, so a little preparation goes a long way. Taking the right precautions not only protects you from injury but also prevents a small pipe leak from turning into a much bigger disaster. Think of these steps as your pre-flight check before you get started. They’re simple, effective, and absolutely essential for a successful and stress-free repair. If you ever feel like the situation is too risky, our team is always ready to provide emergency plumbing assistance.
How to Avoid Water and Electrical Hazards
First things first: turn off the main water supply to your house. This is the golden rule of plumbing repair. It stops water from flowing through the pipes, which prevents a potential flood and makes the repair process much cleaner and easier to manage. Once the water is off, open a faucet at the lowest point in your home to drain any remaining water from the system. Next, consider your surroundings. Water and electricity are a dangerous mix. Take note of any electrical outlets, wires, or appliances near your work area. If you’re working in a tight space or there’s any risk of water splashing, it’s always a smart move to shut off the power to that area from your circuit breaker.
Torch Safety 101: How to Prevent Fires
If your repair involves soldering, you’re literally playing with fire, so caution is key. Before you even light the torch, clear the area of anything flammable. This includes wood scraps, insulation, paint cans, rags, and even cobwebs. Keep a fire extinguisher within arm’s reach—this is non-negotiable. When you start soldering, focus on doing it right to avoid problems. Using too much or too little solder can create a weak joint, and forgetting to apply flux will prevent a proper seal. Always work in a controlled manner and keep the flame directed only at the pipe fitting. A little care here prevents a plumbing fix from becoming a fire hazard.
Don’t Skip Ventilation and Protective Gear
Soldering creates fumes from the flux and melting metal, and you don’t want to be breathing those in. Make sure your workspace has good ventilation. Open any nearby windows and doors, or use a fan to circulate the air and direct fumes away from you. Just as important is protecting yourself. Always wear safety goggles to shield your eyes from flying debris or a stray splash of hot solder. A pair of heat-resistant gloves is also essential for handling hot pipes and protecting your hands from burns. These items aren’t just suggestions; they are your first line of defense against common injuries. If a DIY repair feels too complex or unsafe, don’t hesitate to contact us for professional help.
Common DIY Mistakes to Avoid
Repairing a copper pipe can feel like a major win, but a few common missteps can turn a simple fix into a much bigger headache. Even seasoned DIYers can make mistakes that lead to water damage, repeat leaks, or a repair that just doesn’t hold up. The key to a successful, long-lasting fix is knowing what not to do. From getting the prep work right to understanding the limits of a temporary patch, avoiding these errors will save you time, money, and stress. If a small leak suddenly becomes a major crisis, remember that professional help is always available for emergency plumbing situations. By being aware of these potential pitfalls, you can approach your repair with confidence and ensure the job is done right the first time.
Mistake #1: Assuming a Quick Fix is a Final Fix
When water is spraying from a pipe, your first instinct is to stop it as quickly as possible. That’s where clamps, epoxy, and rubber patches come in handy. They are fantastic for stopping a leak in an emergency. However, a common mistake is leaving these temporary fixes in place indefinitely. While some patches can last a surprisingly long time, they are not designed to be a forever repair. Their goal is to stop the immediate leak until a proper, lasting fix can be done. Relying on a temporary solution can lead to a sudden failure down the road, often at the worst possible moment. Once the initial crisis is over, you should always plan for a permanent repair.
Mistake #2: Rushing the Prep Work
It’s tempting to jump straight to the repair, but skipping the prep work is a recipe for a failed seal. Before you do anything else, you must turn off the main water supply and drain the pipe completely. Any lingering water can interfere with soldering or the curing of adhesives. Next, the area around the leak needs to be thoroughly cleaned and dried. Use a wire brush or sandpaper to remove any oxidation, dirt, or grime from the copper surface until it’s shiny. A clean pipe is essential for creating a strong, watertight bond, whether you’re using solder, compression fittings, or epoxy putty. Taking a few extra minutes to prepare the pipe properly makes all the difference.
Mistake #3: Common Soldering Mistakes
Soldering creates the strongest and most durable seal for copper pipes, but it requires precision. Many DIY repairs fail due to simple soldering errors. One of the biggest mistakes is forgetting to apply flux, a paste that cleans the metal and helps the solder flow evenly into the joint. Another common issue is using the wrong amount of solder; too little creates a weak seal, while piling on too much can create drips inside the pipe that obstruct water flow. It’s also crucial to heat the fitting, not the solder itself, allowing the hot metal to draw the solder into the joint. Mastering these soldering techniques is key to a leak-proof connection.
Long-Term Solutions to Prevent Future Leaks
Fixing the leak in front of you is a great first step, but what about the ones you can’t see yet? If your home’s plumbing is getting older or you’re dealing with recurring pinhole leaks, it’s time to think bigger. A single leak can sometimes be a symptom of a system-wide issue, and simply patching up one spot after another can become an expensive and frustrating cycle. Taking a proactive approach can save you from future water damage and emergency calls. By understanding the underlying health of your plumbing system, you can make informed decisions that protect your home for the long haul. Let’s look at some of the most effective long-term strategies to keep your pipes in top shape.
Water Testing and Treatment Options
The problem might not be your pipes, but the water running through them. The specific chemistry of your water, like its pH level and mineral content, can be surprisingly aggressive. Over years, this can cause internal corrosion that slowly eats away at the copper from the inside, leading to those frustrating pinhole leaks. Since this damage happens out of sight, you often don’t know there’s a problem until you see a water stain. Testing your water can reveal if you have corrosive conditions. If you do, installing a water treatment system can neutralize the water, protecting not just your copper pipes but all of your water-using appliances, too.
Consider a Full Home Re-Pipe
If your home was built in the 1980s or earlier and you’re starting to see multiple leaks, it might be time to consider a full home re-pipe. While this sounds like a massive project, it can often be the most cost-effective solution in the long run compared to the endless cycle of finding and fixing individual leaks. A full re-pipe involves replacing all the old, deteriorating copper pipes with new ones, essentially giving your home a brand-new plumbing circulatory system. This is a definitive solution that provides peace of mind and eliminates the worry of another leak popping up next week. It’s a significant upgrade, but one that protects your home’s value and prevents catastrophic water damage. A professional can assess your system and help you decide if this is the right move for your home.
The Importance of Annual Inspections
You wouldn’t drive your car for years without an oil change, and the same principle applies to your home’s plumbing. An annual inspection from a qualified plumber is one of the best preventative measures you can take. During an inspection, a professional can spot the subtle signs of corrosion, stress on joints, and potential weak spots that you might miss. They can check your water pressure, inspect visible pipes, and identify areas of concern before they turn into full-blown leaks. This simple yearly check-up can save you thousands in potential water damage and emergency repair costs, making it a small investment with a huge return in security and peace of mind.
Understanding Copper Pipe Lifespan and Repair Costs
When you’re dealing with a leak, two questions usually come to mind right away: “How long should these pipes have lasted?” and “What is this going to cost me?” Understanding the typical lifespan of copper pipes and the factors that influence repair costs can help you manage your expectations and make better decisions. Copper is a durable material, but it doesn’t last forever, and its longevity can be affected by everything from your local water quality to the original installation quality. Knowing where your pipes are in their lifecycle can help you decide whether a simple repair is enough or if it’s time to start planning for a larger replacement project.
How Long Do Copper Pipes Last?
Generally, you can expect copper pipes in your home to last somewhere between 20 and 50 years. That’s a pretty wide range, and the actual lifespan depends on a few key factors. The type of copper pipe makes a difference—thicker-walled pipes will naturally last longer. The chemistry of your water also plays a huge role, as we’ve discussed. Hard or acidic water can significantly shorten the life of your pipes through corrosion. Finally, the quality of the initial installation is critical. A well-installed system can easily reach the upper end of that 50-year lifespan, while a poorly installed one might start showing problems much sooner.
What to Expect for Repair Costs
The cost to repair a leaking pipe can vary dramatically, with a typical range falling anywhere from $150 to over $4,700, and an average cost of around $500. So, why the huge difference? The final price tag depends heavily on the leak’s location and accessibility. A small leak on an exposed pipe in your basement is a relatively quick and inexpensive fix. However, if that same leak is hidden behind a tiled shower wall or under a concrete slab, the cost will go up significantly because of the labor required to access the pipe and then repair the wall or floor afterward. The extent of the damage also matters; replacing a small section is much cheaper than addressing widespread corrosion that requires a larger plumbing solution.
Will Your Homeowners Insurance Cover the Leak?
After the initial shock of finding a leak, your thoughts might turn to your homeowners insurance policy. Will it cover the cost of the repair and any resulting water damage? The answer, unfortunately, is “it depends.” Insurance policies can be complex, and coverage for water damage is often one of the most misunderstood areas. Whether or not you’re covered typically comes down to the source of the leak and the specific language in your policy. Understanding how insurance companies view pipe leaks can help you know what to expect and how to proceed if you need to file a claim.
Understanding Your Policy’s Coverage
Most standard homeowners insurance policies will cover water damage that is considered “sudden and accidental.” A perfect example is a pipe that bursts unexpectedly, flooding your basement. In that scenario, your policy would likely cover the cost of the water damage cleanup and repairs to your home, though it may not cover the cost of repairing the pipe itself. However, damage from a slow, gradual leak that has been dripping for weeks or months is often not covered. Insurance companies view this as a maintenance issue that should have been addressed sooner. It’s crucial to read your specific policy to understand its limitations and to address any leaks as soon as you find them to prevent a denied claim.
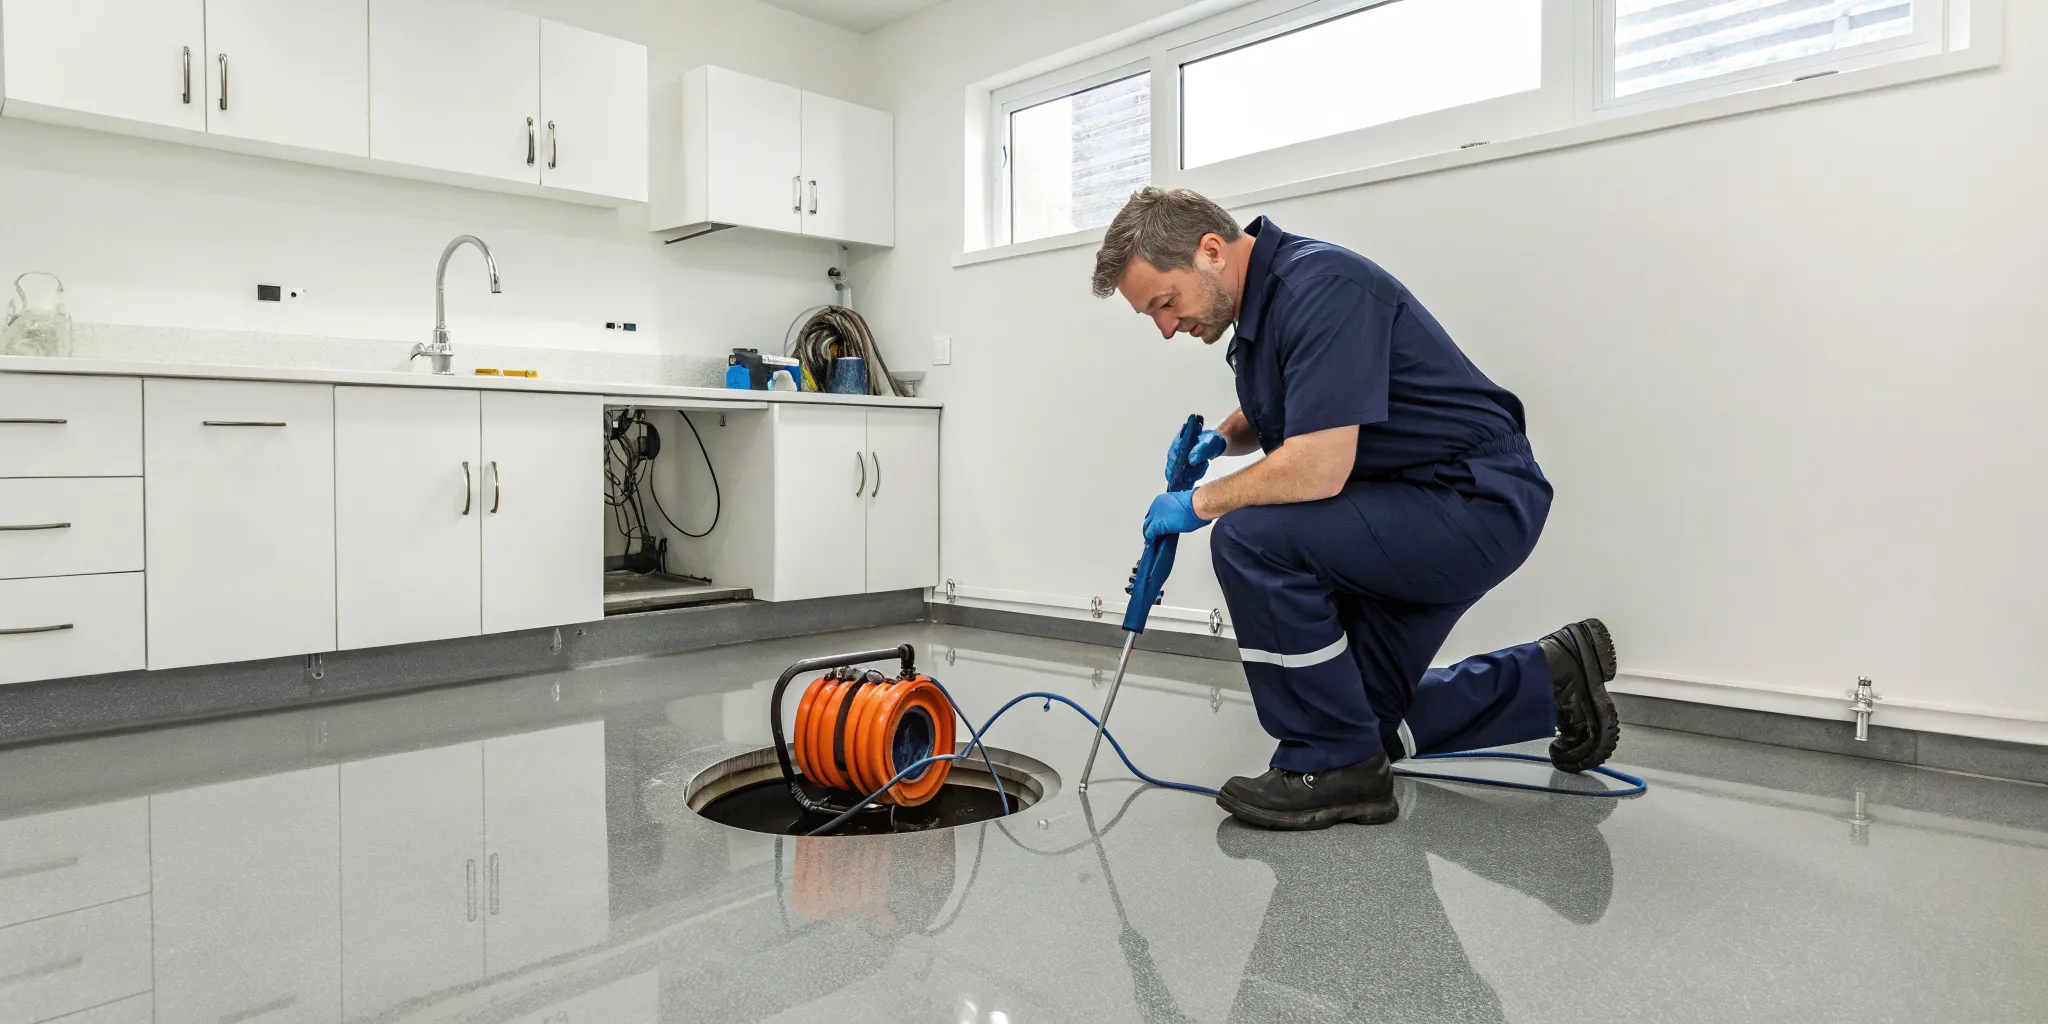
When Should You Call a Professional?
Tackling a home repair yourself can be incredibly satisfying, but it’s also important to know when a project is out of your league. When it comes to plumbing, a small mistake can lead to major water damage, turning a simple fix into a costly headache. So, how do you know when to put down the tools and pick up the phone?
If you’re playing a game of whack-a-mole with pinhole leaks, it’s a major red flag. While fixing one small leak is one thing, finding several often means your entire plumbing system is showing its age. These widespread issues suggest a bigger problem than a single weak spot, and a quick patch won’t solve the underlying cause. A professional can assess the health of your pipes and determine if a larger repair is needed to prevent future disasters.
The location of the leak also matters. Is it somewhere tricky, like inside a wall or ceiling? If you’re not sure how to handle a repair or the pipes are difficult to access, it’s best to call a plumber. Cutting into drywall or navigating tight spaces without experience can turn a small plumbing issue into a major home renovation project. Professionals have the tools and expertise to handle these complex repairs with minimal disruption.
Pipe clamps and epoxy putty are fantastic for stopping a leak in an emergency, but they aren’t meant to be forever repairs. If you’ve applied a temporary fix, the next step should be scheduling a permanent one. Similarly, if you don’t have the right tools or skills for a proper solder, it’s much safer to bring in an expert. A professional repair ensures a secure, long-lasting solution, giving you peace of mind. If you’re facing a tricky leak or just want an expert opinion, our team is here to help with any emergency plumbing situation across Metro Detroit.
Related Articles
- 8 Methods for Repairing Copper Piping
- How to Fix a Copper Pipe WITHOUT Soldering
- No-Sweat Plumbing Repairs
- The Most Common Soldering Mistakes and How to Fix Them
Frequently Asked Questions
Why did my copper pipe suddenly start leaking? A leak can pop up for a few different reasons. Sometimes, it’s simply a matter of age; after decades of service, pipes can wear thin. Other times, the problem is internal corrosion caused by your water’s mineral content, which creates tiny pinhole leaks. It’s also possible the pipe was accidentally damaged during a home project or that a joint wasn’t perfectly sealed during the initial installation.
Can I just use a pipe clamp and call it a day? A pipe clamp is an excellent tool for an emergency, as it stops the immediate leak and prevents water damage. However, you should always think of it as a temporary patch, not a permanent solution. These clamps aren’t designed to withstand constant water pressure for years on end and could fail without warning. Once the immediate crisis is handled, your next step should be planning for a proper, lasting repair.
Is this a repair I can handle myself, or should I call a plumber? If the leak is on a straight, easily accessible pipe and you feel confident with the tools, a DIY repair is certainly possible. However, you should call a professional if you’re dealing with multiple leaks, which could signal a system-wide problem. It’s also best to call for help if the pipe is located inside a wall, ceiling, or another hard-to-reach spot to avoid causing more damage to your home.
Are solder-free fittings like push-to-connects really a permanent solution? Yes, they absolutely are. Modern push-to-connect and compression fittings are engineered to create a secure, watertight seal that lasts for years, making them a reliable alternative to soldering. The key to their success is proper installation. The pipe must be cut cleanly, deburred, and inserted correctly into the fitting to ensure a perfect, leak-proof connection.
My leak is fixed. How can I prevent this from happening again? One of the best preventative steps, especially here in Metro Detroit, is to insulate pipes located in unheated areas like crawl spaces or basements to protect them from freezing. It’s also a good idea to be mindful of any sudden changes in your water pressure, as high pressure can strain your entire system. If you live in an older home, having a professional periodically inspect your plumbing can help you catch potential issues before they turn into urgent problems.