That faint dripping sound you hear isn’t just annoying—it’s a warning sign. A hidden pipe leak can quietly cause thousands in damage, from warped floors to compromised drywall, long before you see a single puddle. Protecting your home starts with spotting the subtle clues, like a sudden spike in your water bill or a musty smell you can’t quite place. This guide will show you how to identify the signs of a leak and what immediate steps to take. We’ll also cover temporary fixes and explain when a professional pipe leak repair is the only way to prevent a small issue from becoming a major headache.
Key Takeaways
- Be proactive about leak detection: Regularly check for visual signs like wall stains, listen for unusual dripping sounds, and review your water bill for unexpected spikes. These habits help you catch small problems before they become costly disasters.
- Know your immediate action plan: If you find a leak, your first step is always to shut off the main water supply. After that, drain the remaining water from your faucets and take photos of the damage for your records and for the plumber.
- Understand when to call a professional: While temporary patches can stop a drip in an emergency, they are not a permanent solution. A professional repair is necessary for lasting safety, especially for large leaks, burst pipes, or issues you can’t locate.
Think You Have a Leaking Pipe? Here’s How to Tell
A hidden pipe leak can feel like a sneaky intruder, causing damage long before you notice it. The good news is that your home often sends out subtle distress signals. Knowing what to look and listen for is the first step in protecting your property from serious water damage. Think of it as being a detective in your own home—by catching the clues early, you can stop a small drip from turning into a major disaster. Here are the key signs that point to a leaking pipe.
What Does a Pipe Leak Look Like?
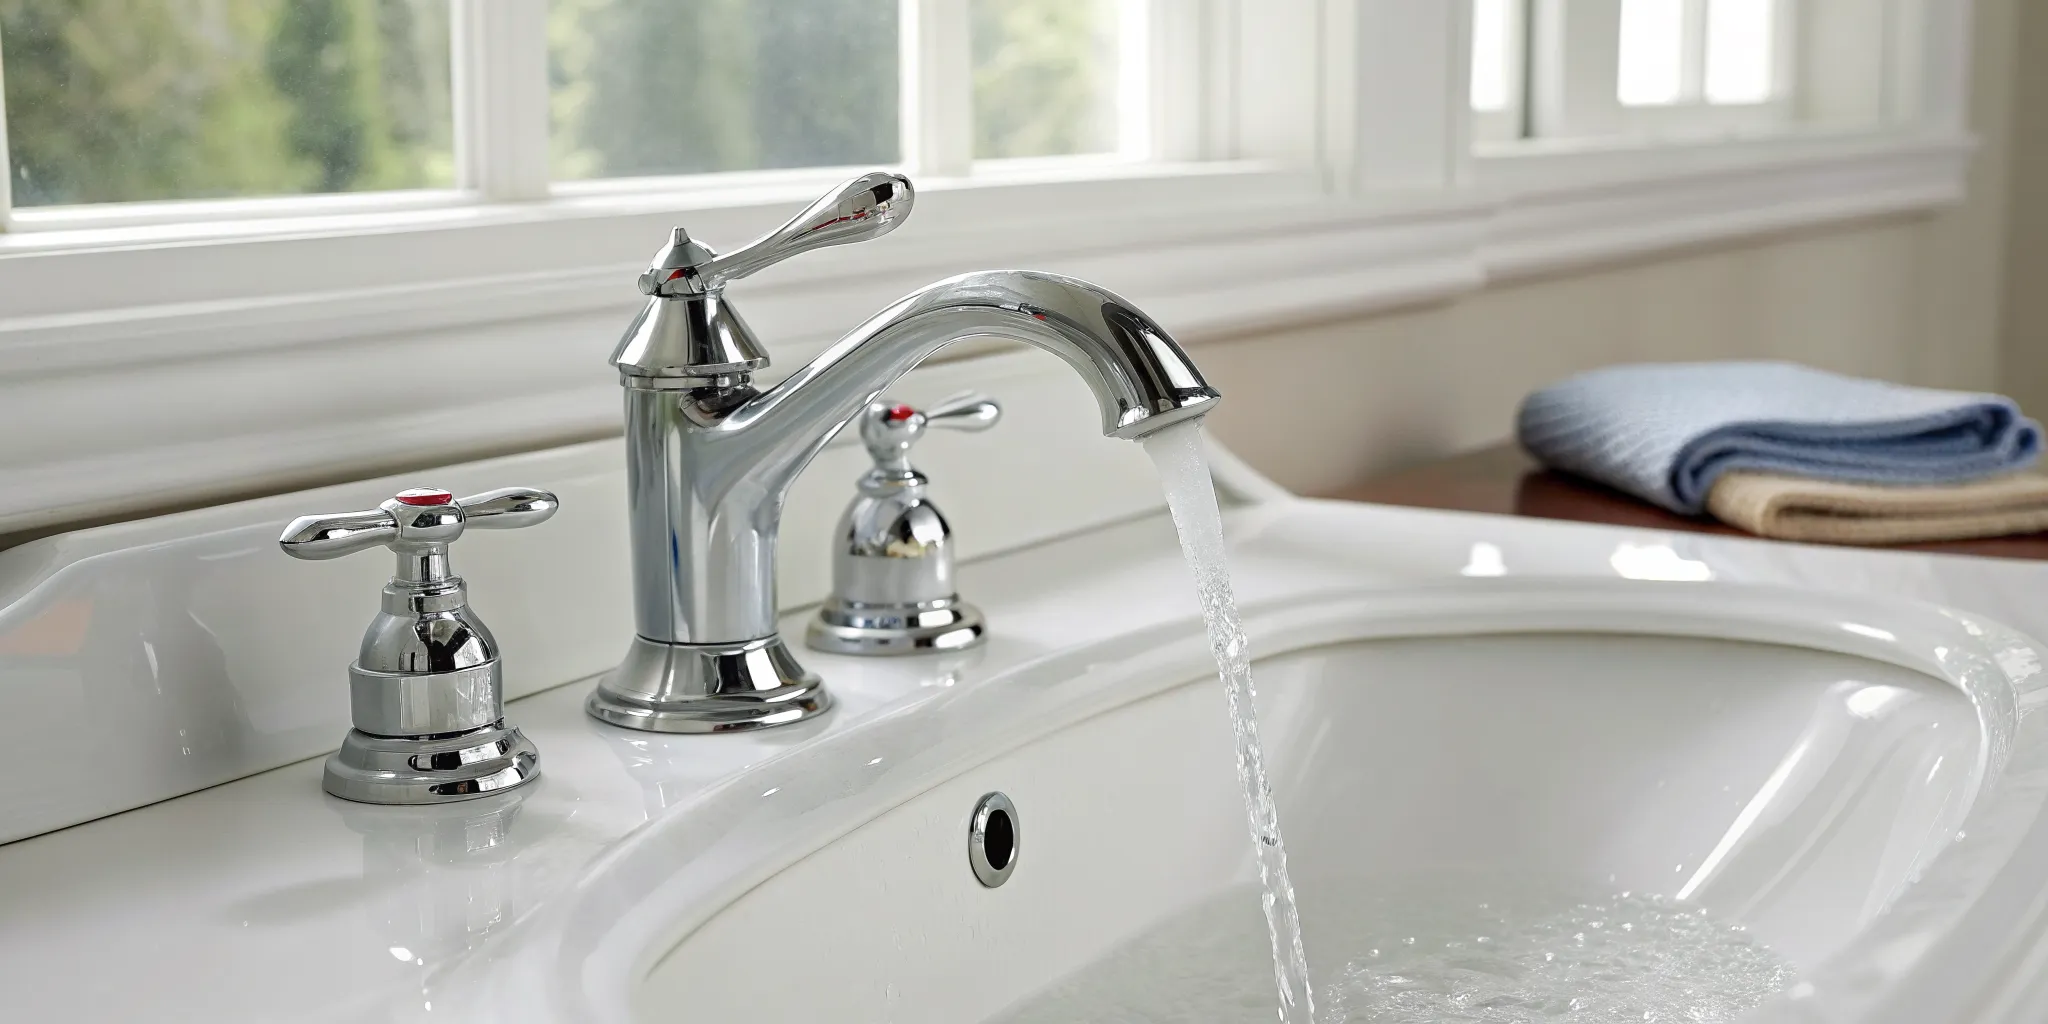
Your eyes are one of your best tools for leak detection. Keep an eye out for new water stains on your walls or ceilings; they often look like brownish or yellowish rings. You might also notice peeling paint or bubbling wallpaper in these areas, which means moisture is trapped behind the surface. Puddles of water on the floor are an obvious red flag, especially around appliances like your dishwasher or washing machine. Don’t dismiss damp spots or the musty smell of mold and mildew, particularly in basements, bathrooms, or under sinks. These visual cues often point to an urgent problem that needs immediate attention, so it’s wise to call for emergency plumbing services if you spot them.
Can You Hear a Water Leak?
Sometimes, you can hear a leak before you see it. When your house is quiet, take a moment to listen for any unusual plumbing noises. A faint but persistent dripping sound inside a wall is a classic sign of a leak. You might also hear hissing or bubbling, which can indicate water is escaping from a supply line under pressure. These aren’t sounds your plumbing should be making during normal operation. Even a tiny drip can waste a surprising amount of water over time and signal a bigger issue on the horizon. If you hear anything out of the ordinary, it’s a good idea to have a professional investigate your plumbing system.
Is Your Water Bill Suddenly Higher?
Your monthly water bill is more than just a number—it’s a diagnostic tool. A sudden, unexplained spike in your bill is one of the most reliable indicators of a hidden leak. If your water usage habits haven’t changed but your bill has shot up, there’s a good chance water is escaping somewhere in your system. Make a habit of reviewing your statement each month. Comparing your current usage to previous months can help you spot a problem right away. Catching a leak this way can save you from both a high bill and the costly repairs that follow extensive water damage. If your bill seems too high, don’t hesitate to contact us to help you find the source.
Common Causes of Pipe Leaks
A pipe leak can start for dozens of reasons, and understanding the root cause is the first step toward a reliable fix. From the bitter cold of a Michigan winter to simple wear and tear over the years, your plumbing system faces a lot of potential stress. Some issues build up slowly over time, while others happen in an instant. Knowing what to look for can help you identify the problem quickly and prevent minor drips from turning into major disasters. Here are some of the most common culprits behind leaking pipes in your home.
Frozen Pipes
Here in Metro Detroit, we’re no strangers to harsh winters, and unfortunately, neither are our pipes. When water inside a pipe freezes, it expands with incredible force, putting immense pressure on the pipe walls. This expansion can easily cause a pipe to crack or burst, leading to a major flood once the ice thaws. This is especially common in unheated areas like basements, crawl spaces, or exterior walls. A burst pipe isn’t just a mess; it can cause significant structural damage to your home. If you suspect a pipe has frozen, it’s critical to act quickly. Our team specializes in frozen pipe repair and insulation, helping you resolve the immediate crisis and prevent it from happening again.
Corrosion and Old Age
Like anything else in your home, pipes have a lifespan. Over decades, the materials they’re made from can begin to break down. Older homes often have pipes made of galvanized steel or cast iron, which are prone to corrosion from the inside out due to constant exposure to water and minerals. This deterioration happens slowly, thinning the pipe walls until they’re weak enough for a pinhole leak to form or a section to fail completely. You often won’t see any signs of trouble until the damage is already done. That’s why understanding the age and condition of your plumbing system is so important. Regular inspections can help identify pipes that are nearing the end of their life before they cause a major headache.
High Water Pressure
Good water pressure is a daily luxury, but when it’s too high, it puts your entire plumbing system under constant stress. Think of it like overinflating a car tire—eventually, something has to give. Excessive pressure strains pipe joints, fittings, and the internal mechanisms of your appliances, from your washing machine to your water heater. This continuous force can wear down components much faster than normal, leading to unexpected leaks and premature appliance failure. If you hear a loud banging noise when you turn off a faucet, known as a “water hammer,” it could be a sign of high pressure. A professional plumber can easily test your home’s water pressure and install a pressure-reducing valve to protect your pipes and fixtures from unnecessary strain.
Physical Damage
Pipes are tough, but they aren’t indestructible. Sometimes, a leak is caused by straightforward physical damage. This can happen during a home renovation project when a stray nail or screw accidentally punctures a pipe hidden in a wall. Outside, invasive tree roots are a common culprit, as they can wrap around and crush underground water or sewer lines in their search for moisture. Even the ground shifting slightly over time can put enough stress on a pipe to cause it to crack or break. When a pipe is physically damaged, the leak can be sudden and severe. In these situations, it’s important to know who to call for reliable emergency plumbing services to minimize the damage.
Failed Seals and Joints
A plumbing system is only as strong as its weakest link, and often, that weak link is a joint or a seal. Your pipes are connected at countless points throughout your home, and each connection relies on a seal, gasket, or fitting to remain watertight. Over time, these components can degrade, dry out, or loosen due to temperature fluctuations and vibrations. While the pipe itself might be in perfect condition, a failing seal can be all it takes to start a persistent and damaging drip. Below are some of the most common failure points we see in pipe connections.
Worn-Out Shut-Off Valves
Those small valves located under your sinks and behind your toilets are designed for emergencies, but they can become a source of leaks themselves. Inside these shut-off valves are rubber or plastic seals that can become brittle and wear out over many years, especially if they aren’t used often. This can lead to a slow, steady drip right at the valve handle. You might be tempted to crank it tighter, but forcing an old, stiff valve is a bad idea—it can break the handle or the internal components, turning a small drip into a full-blown gusher. If a shut-off valve is leaking, it’s best to have it replaced by a professional.
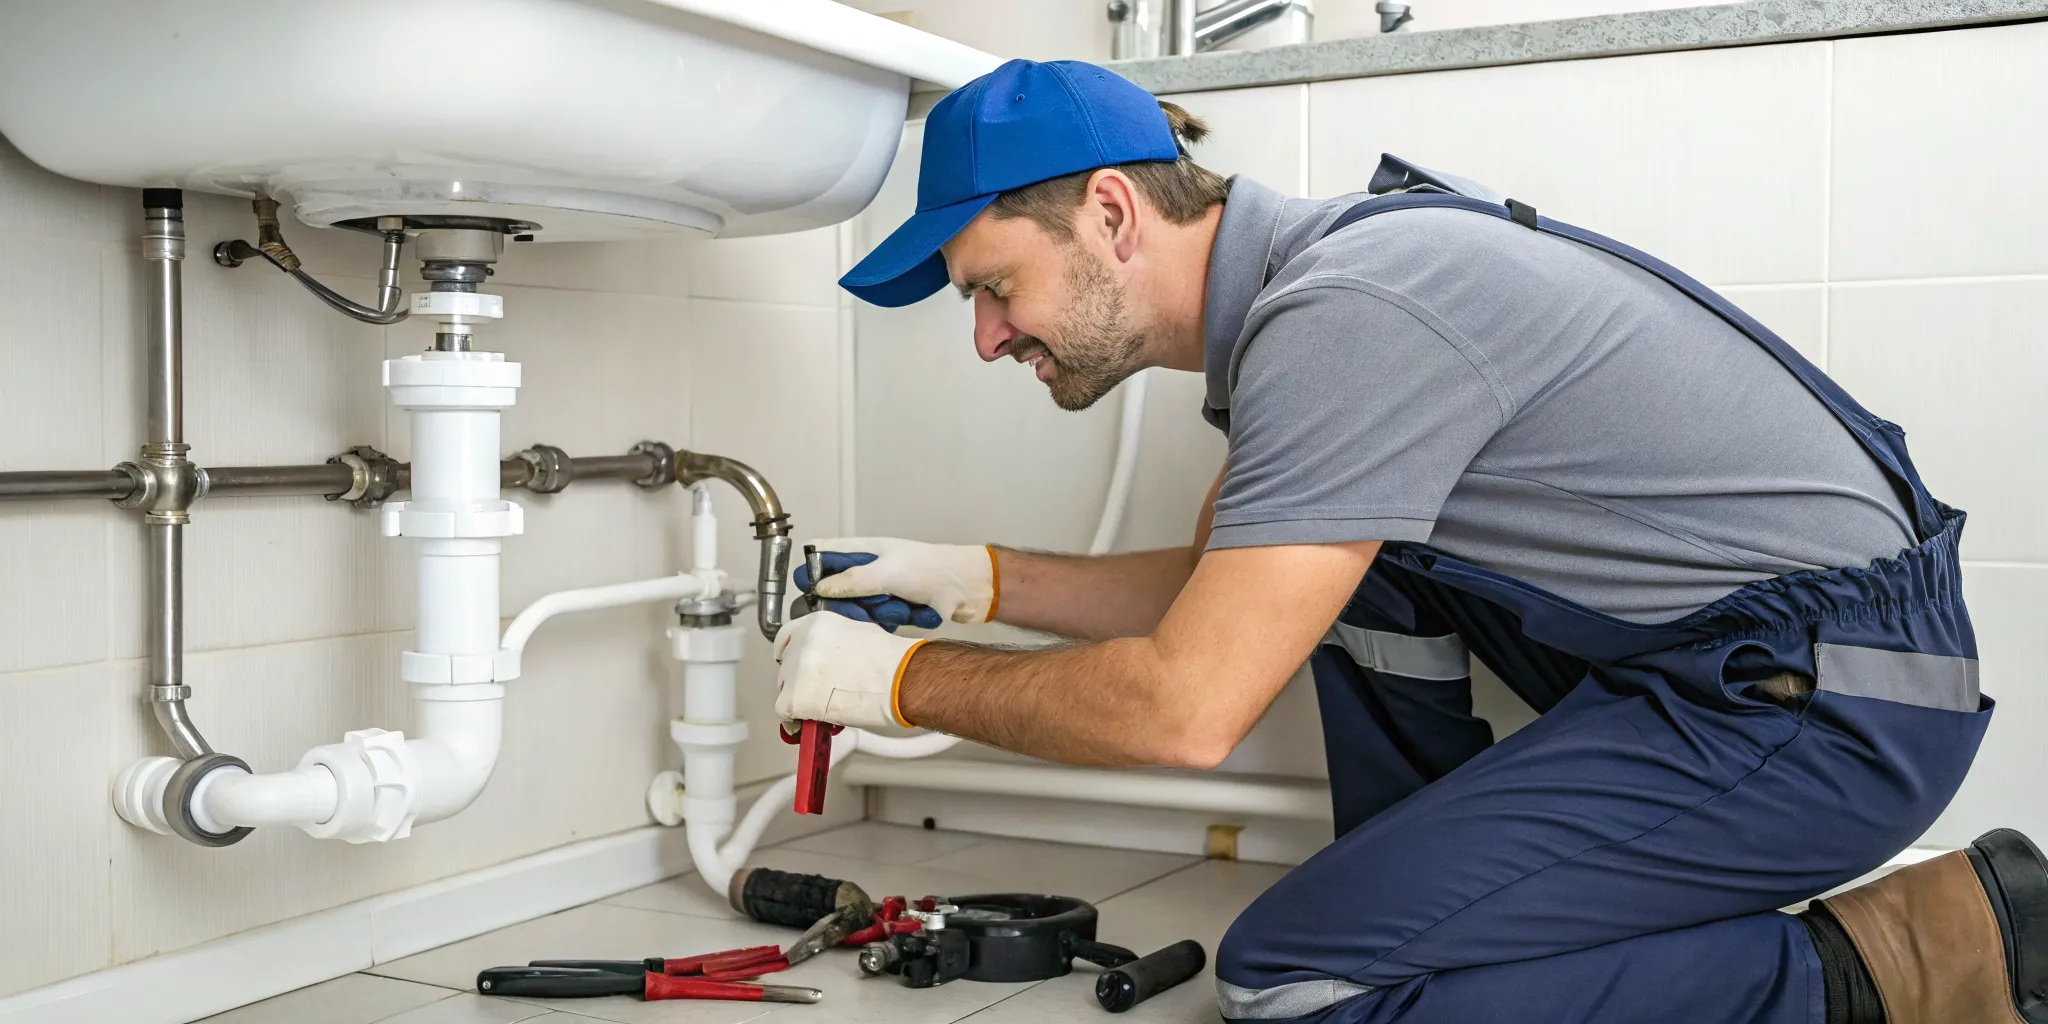
Loose Pipe Connections
Underneath your kitchen and bathroom sinks, you’ll find several pipes connected with large nuts called slip or compression fittings. These connections rely on pressure to create a watertight seal. Over time, everyday vibrations from your garbage disposal, temperature changes from hot and cold water, and the simple settling of your home can cause these fittings to loosen just enough to allow water to seep out. Sometimes, a quick, gentle tightening with a wrench is all that’s needed to stop the drip. However, if the leak persists, it could mean the washer or seal inside the fitting has failed and needs to be replaced.
Failed Toilet Wax Rings
If you notice water pooling around the base of your toilet, the culprit is often a failed wax ring. This ring is a simple but crucial component that creates an airtight and watertight seal between the bottom of your toilet and the drainpipe in the floor. If the toilet becomes loose and rocks even slightly, it can break this seal. The wax can also dry out and crumble over many years. When the seal is compromised, water can leak out with every flush, potentially rotting your subfloor and causing damage to the ceiling below. Replacing a wax ring is a common fix, and our team is always ready to help with any toilet repair needs.
Drain Line Blockages
A clog in your drainpipe can cause more problems than just slow-draining water. When a drain line is blocked by hair, grease, or other debris, the water that’s trying to flow down has nowhere to go. It backs up in the pipe, creating significant pressure behind the clog. This pressure can force water out through the weakest points in the drain line, which are typically the threaded joints and seals under your sink. So, that puddle in your cabinet might not be from a faulty supply line but from a blockage further down the pipe. Clearing the clog will often resolve the leak, but it’s a sign that your drains need attention.
Found a Leak? Take These Steps Immediately
That moment of panic when you spot a puddle where it shouldn’t be is something no homeowner wants. But don’t worry—taking a few deep breaths and acting quickly can make all the difference. Before you even think about grabbing tools or calling for help, there are three immediate steps you need to take to control the situation and prevent a small drip from turning into a major disaster. These actions will help you get a handle on the problem and set you up for a successful repair.
First, Turn Off the Main Water Supply
Your absolute first move is to stop the flow of water. Before you do anything else, you need to turn off the water supply to the leaking pipe or, even better, to your entire house. This prevents any more water from escaping and causing further damage while you figure out your next steps. If you don’t know where your main water shut-off valve is, now is the time to find it. It’s typically located in the basement, a crawl space, or near your water heater. Turn the valve clockwise until it’s fully closed. Knowing this location is crucial for any homeowner, as it’s your first line of defense in a plumbing emergency. If you’re dealing with a burst pipe, this is a critical step before calling for emergency plumbing services.
How to Safely Check the Damage
With the water shut off, you can now take a closer look without the pressure of a continuous flow. To make sure the pipes are empty, open a few faucets around your house to drain any remaining water. This will help stop the leak completely so you can get a clear view of the problem. Look closely at the pipe. Is it a tiny pinhole leak, a crack, or a loose joint? Note the location and the extent of the damage. Be extra cautious if the leak is near any electrical wiring or appliances. Understanding the severity of the issue will help you decide if it’s a simple fix you can handle or if it’s time to explore professional plumbing solutions.
Why You Should Take Photos and Notes
Before you attempt a repair or even clean up the mess, pull out your phone and take some pictures or a short video. Document the leaking pipe, the puddle of water, and any damage to surrounding walls, floors, or belongings. This might feel like a strange step in the moment, but it’s incredibly helpful. This documentation is invaluable if you need to file an insurance claim. It also gives a plumber a clear picture of the problem before they even arrive, which can save time and ensure they come prepared with the right tools. When you contact us for help, having these photos ready can make the process much smoother.
Your Quick Guide to Temporary Pipe Leak Repair
Once you’ve shut off the water and assessed the situation, you might be able to apply a temporary fix to stop the drip and prevent further damage while you wait for a professional. Think of these solutions as plumbing first aid—they’re designed to manage the immediate crisis, not to be a permanent cure. A quick patch can save your floors, drywall, and furniture from extensive water damage. Remember, these fixes are temporary measures. For a lasting solution that ensures the integrity of your plumbing system, you’ll need a professional repair. If you’re facing a leak you can’t manage, our emergency plumbing services are available to help you get the situation under control quickly and effectively.
Fixing Small Drips with Epoxy Putty
For small, pesky pinhole leaks, plumbing epoxy putty can be your best friend. This clay-like substance hardens into a durable seal. Before you start, make sure the pipe is completely clean and dry—the putty won’t stick to a wet surface. Cut off a piece of the putty and knead it with your fingers until it’s a single, uniform color. This activates the hardening agent. Press the putty firmly over the hole, making sure to cover the entire damaged area. Taper the edges to create a smooth, strong bond with the pipe. Let it cure for the time specified in the instructions before you even think about turning the water back on.
Choosing the Right Putty for Your Pipe Material
Grabbing just any epoxy putty off the shelf won’t cut it; the success of your temporary patch depends on matching the putty to your pipe’s material. Different putties are formulated to bond with specific surfaces, so what works for a copper pipe won’t necessarily hold on a PVC one. For example, you’ll find products specifically designed for steel, copper, or plastic pipes, and even special formulas for wet surfaces or high-heat situations. Using the right type is essential for creating a strong, reliable seal that will hold until a professional can provide a permanent fix. No matter which putty you use, always start with a clean, dry surface to ensure it adheres properly and gives you the best possible temporary plumbing solution.
How to Properly Use Pipe Repair Tape
Pipe repair tape, often made of self-fusing silicone, is another great tool for your temporary fix kit. It’s excellent for sealing small cracks or splits in a pipe. To use it, start wrapping the tape a few inches to one side of the leak. Pull it tight as you go, stretching it to activate its adhesive properties. Overlap each layer by about half as you continue wrapping. Make sure you cover the leak completely and extend the wrap a few inches past the damaged area on the other side. The pressure and the self-fusing nature of the tape create a watertight seal that can hold until a professional plumber arrives.
Understanding Different Types of Repair Tape
When you’re facing a leak, reaching for the nearest roll of tape might seem like a good idea, but not all tapes are up to the task. For plumbing repairs, you need something specifically designed to handle water pressure. Self-fusing silicone tape is the star player here. It’s not sticky like duct tape; instead, it bonds to itself when stretched, creating a seamless, waterproof seal around the pipe. This makes it perfect for small cracks and splits. Another option is fiberglass repair tape, which is water-activated and hardens into a rigid cast, offering a bit more structural support. These specialized tapes are essential for an effective temporary fix, ensuring your patch holds until you can schedule a professional plumbing repair.
How Self-Fusing Silicone Tape Works
Using self-fusing silicone tape is straightforward if you follow a few key steps. First, make sure the pipe is clean and dry. Begin wrapping the tape a few inches to one side of the leak, pulling it tight as you go. Stretching the tape is what activates its self-fusing properties, so don’t be shy. Overlap each layer by about half its width to build a strong, multi-layered seal. Continue wrapping until you’ve covered several inches on the other side of the damaged area. The constant pressure and the tape’s ability to bond to itself create a durable, watertight patch that can reliably stop the drip while you wait for a plumber to arrive and provide a permanent solution.
When Tape Repairs Might Not Work
Repair tape is a fantastic temporary tool, but it has its limits. It’s designed for small, clean cracks or pinhole leaks on straight sections of pipe. It is not a solution for large breaks, gushing leaks, or problems at joints and fittings where the surface is uneven. And please, step away from the duct tape. It isn’t waterproof and can’t handle water pressure, meaning it will likely fail within minutes and leave you with a sticky mess. If the pipe is dirty, corroded, or you can’t get it completely dry, the tape won’t be able to create a proper seal. In these situations, your best and safest bet is to call for emergency plumbing services to prevent further damage.
Stopping a Leak with a Pipe Clamp
A pipe clamp is a more heavy-duty temporary fix, ideal for larger cracks or holes that putty or tape can’t handle. This device consists of a rubber gasket and a metal sleeve that tightens around the pipe. First, clean the area around the leak and use a file or sandpaper to smooth any sharp edges that could damage the gasket. Place the rubber gasket directly over the leak, then position the metal clamp around it. Tighten the screws or bolts evenly with a screwdriver or wrench until the clamp is snug and the leak stops. Be careful not to overtighten, as this could cause more damage to the pipe.
The DIY Rubber and Clamp Method
If you don’t have a pipe clamp on hand, you can create a similar patch using a piece of rubber and a couple of hose clamps. A scrap piece of an old inner tube or a thick rubber sheet will work perfectly. Cut a piece of rubber that’s large enough to wrap around the pipe and cover the leak completely. Place it tightly over the damaged area. Then, secure a hose clamp on either side of the leak, tightening them enough to press the rubber firmly against the pipe and stop the water flow. This is a solid temporary fix that can hold things together until you can get a permanent plumbing repair.
What You’ll Need for a Quick Fix
Being prepared can make all the difference when you discover a leak. It’s a good idea to have a small “pipe leak emergency kit” on hand. This way, you won’t be scrambling to find what you need in a panic.
Your kit should include:
- Plumbing epoxy putty
- Pipe repair tape (self-fusing silicone tape)
- An adjustable pipe clamp
- Hose clamps
- A small piece of sheet rubber
- Rags for cleaning and drying
- A wire brush or sandpaper
- A screwdriver and an adjustable wrench
Having these items ready can help you apply a quick, effective patch and minimize water damage.
Can You Repair a Pipe Without Turning the Water Off?
It’s a question that often comes up in a moment of panic: can you patch a leak without shutting off the main water supply? While some products like pipe clamps and self-fusing silicone tape are designed to work under pressure, attempting a repair on a live pipe is risky. The water pressure can make it difficult to get a secure seal, and a failed attempt could turn a small drip into a forceful spray, causing far more damage in seconds. For your safety and to prevent a bigger mess, the best course of action is always to shut off the water first. This depressurizes the system, stops the immediate flow, and gives you a clean, dry surface to work with, which is essential for most temporary patches to even have a chance of holding.
Even though shutting off the water is the standard first step, it’s helpful to know that tools like pipe clamps can be applied to a leaking pipe in an absolute emergency. A clamp works by placing a rubber gasket over the hole and tightening a metal sleeve around it to stop the flow. Similarly, self-fusing silicone tape can be stretched tightly over a small crack to create a temporary seal. However, these are not permanent solutions. They are designed to be a short-term fix to control a leak until you can get a proper, lasting plumbing repair. Relying on a temporary patch for too long can lead to a sudden failure and significant water damage down the road.
When Should You Call a Plumber?
While a quick DIY patch can be a lifesaver, it’s important to recognize when a problem is bigger than a temporary fix. Knowing your limits is key to preventing a small leak from turning into a major disaster. Sometimes, the best and most cost-effective solution is to step back and let an expert take over. A professional plumber not only fixes the immediate issue but also diagnoses the underlying cause, ensuring your home is safe and your plumbing is sound.
Is Your DIY Repair Holding Up?
You’ve applied a patch, and the dripping has stopped—for now. But how do you know if that’s the end of it? A temporary fix is just that: temporary. It’s time to call a professional if the pipe itself looks compromised, with rust or multiple cracks. If the same spot keeps leaking after you’ve repaired it, that’s a clear sign of a deeper issue. High water pressure can also cause pipes to burst, which requires more than a simple patch. And if you can’t even find where the water is coming from, a plumber has the tools and experience to trace the leak to its source without tearing your walls apart. These are all signs that you need a permanent, professional repair.
Why Complex Plumbing Needs a Pro
Some plumbing situations are simply too big or too dangerous to handle on your own. If you’re dealing with a large leak, a burst pipe, or a significant amount of flowing water, your first step should be shutting off the water and calling for help immediately. These scenarios can cause extensive damage in minutes. This is especially true for issues like frozen pipes that have burst under pressure. A professional has the expertise to manage these high-stakes situations safely and efficiently, minimizing water damage and getting your system back in working order. Don’t hesitate to call for emergency plumbing services when you’re facing a major water crisis.
Don’t Forget Safety and Building Codes
It can be tempting to see a temporary patch holding strong and decide to leave it as a permanent solution. However, these fixes are not designed to last forever and often don’t meet local plumbing codes. An improper repair can fail unexpectedly, leading to flooding and costly water damage when you least expect it. A licensed plumber ensures that any repair or replacement is done correctly and complies with all safety standards. By contacting a professional, you’re not just fixing a leak; you’re investing in a safe, reliable, and long-lasting solution that gives you peace of mind.
Will Homeowners Insurance Cover Pipe Leak Damage?
After you’ve stopped the immediate water flow from a leak, your next thought is probably about the cost of the damage. It’s a valid concern, and many homeowners wonder if their insurance will step in to help. The answer, however, isn’t a simple yes or no. Homeowners insurance coverage for water damage is specific and depends entirely on the source of the problem. Generally, policies are designed to protect you from sudden and accidental events, not issues that develop over time due to neglect or wear and tear. Understanding this key difference is the first step in figuring out what your policy might cover and what you’ll be responsible for.
What Insurance Typically Covers
Your homeowners insurance policy is your financial safety net for unexpected disasters. When it comes to plumbing, it generally covers damage that happens suddenly and without warning. Think of a pipe that bursts during a Detroit cold snap or a washing machine supply hose that abruptly fails, flooding your laundry room. These are the kinds of accidental events that insurance is meant for. The key words to remember are “sudden and accidental.” If the damage was unforeseeable and happened quickly, there’s a good chance your policy will cover the cost of repairing the resulting water damage to your home and belongings.
What Insurance Usually Doesn’t Cover
On the other hand, insurance providers expect homeowners to maintain their property. That’s why they typically deny claims for damage that occurs gradually over time. This includes slow drips from old, corroded pipes, damage from persistent condensation, or problems caused by a lack of routine maintenance. If a pipe has been leaking under your sink for months, causing the cabinet floor to rot, your insurer will likely view it as a preventable issue. Similarly, damage resulting from faulty repairs or installations done by an unlicensed individual is almost always excluded. This is why relying on a professional for your plumbing needs is so important for protecting your home in the long run.
Understanding Liability and Mold Coverage
Here’s a detail that surprises many homeowners: even when a claim is approved, the policy usually only covers the *resulting damage*, not the source of the problem. For example, if a pipe bursts and ruins your drywall and hardwood floors, your insurance will likely pay to repair the walls and floors. However, the cost to hire a plumber to fix the actual broken pipe typically comes out of your own pocket. Coverage for mold can also be complicated. Most standard policies offer limited mold coverage, and only if the mold is a direct result of a covered event, like that sudden pipe burst. Slow, long-term leaks that lead to mold are rarely covered.
Optional Coverage for Extra Protection
If you’re concerned about the gaps in a standard policy, it’s worth looking into optional coverage. Many insurance companies offer add-ons, sometimes called endorsements or riders, that provide extra protection for specific plumbing-related risks. For instance, standard policies almost never cover water damage from a sewer or drain backup, but you can often purchase separate sewer backup coverage. Another common add-on is service line protection, which covers repairs to the main water and sewer lines that run from your house to the street. It’s always a good idea to review your policy with your insurance agent to understand exactly what’s covered and discuss which add-ons might be right for your home.
Why You Shouldn’t Ignore a “Small” Leak
It’s tempting to put a bucket under a tiny drip and add “fix pipe” to the bottom of your to-do list. But that “small” leak is often a sign of a bigger problem, and ignoring it can lead to some serious headaches down the road. What starts as a minor annoyance can quickly spiral into costly damage and even health concerns for your family. Addressing a leak as soon as you spot it is one of the smartest things you can do for your home and your wallet.
How Leaks Cause Serious Structural Damage
That consistent drip, drip, drip is doing more than just making a sound—it’s slowly causing damage. Over time, water can seep into drywall, warp floorboards, and compromise the wooden beams that support your home. A persistent leak can weaken your home’s structure, leading to sagging ceilings and walls. It can also create a serious hazard if water comes into contact with your electrical systems. What might have been a simple pipe repair can turn into a massive, expensive project involving multiple contractors. Promptly handling a leak is the best way to prevent extensive structural damage and protect your home’s integrity.
The Hidden Health Risks of Leaky Pipes
Where there’s consistent moisture, mold is sure to follow. A leaking pipe creates the perfect damp, dark environment for mold and mildew to thrive behind walls or under floors. Mold isn’t just an unsightly problem; it can release spores into the air that pose serious health risks. For anyone in your home with allergies, asthma, or a compromised immune system, this can lead to respiratory issues, allergic reactions, and other health problems. Dealing with a leak quickly is crucial to stop mold before it has a chance to grow and spread, keeping the air in your home clean and your family safe.
The Real Cost of a Dripping Pipe
A small leak might not seem like much, but the wasted water adds up surprisingly fast. Even a slow drip can waste hundreds or even thousands of gallons of water over the course of a year, leading to a noticeable spike in your water bill. That’s money literally going down the drain. By addressing a leak right away, you’re not just preventing property damage; you’re also conserving a valuable resource and keeping your utility costs under control. Fixing a leak is an investment that pays for itself by preventing future expenses. If you’ve noticed a jump in your bill, it’s time to contact a professional to investigate.
The Surprising Amount of Wasted Water
That tiny drip might not seem like a big deal, but the amount of wasted water can be staggering. A single leaky faucet or pipe can waste hundreds, or even thousands, of gallons of water over a year, causing a significant spike in your utility bill. It’s quite literally watching your money go down the drain. When you address a leak promptly, you’re not just protecting your home from water damage; you’re also conserving a precious resource and keeping your monthly expenses in check. Think of it as an investment in both your home’s health and your financial well-being.
Preventing Pipe Leaks Before They Start
The best way to deal with a pipe leak is to stop it from ever happening. While you can’t prevent every plumbing issue, a little proactive attention goes a long way in protecting your home from water damage. You don’t need to be a plumbing expert to be your home’s first line of defense. It’s all about developing a few simple habits and knowing what to look for. By shifting your mindset from reactive repair to proactive care, you can catch small issues before they escalate into costly disasters, saving yourself a lot of stress, time, and money in the long run.
Start by making a habit of regularly checking for visual signs of trouble, like new water stains on walls or ceilings. Listen for unusual dripping or hissing sounds when the house is quiet, and always review your water bill for any unexpected increases. These simple routines can alert you to a hidden problem. For more comprehensive care, consider scheduling a professional inspection. An expert can assess the health of your entire system, from identifying early signs of corrosion to testing your water pressure, ensuring everything is in top shape and giving you complete peace of mind about your plumbing solutions.
Smart Home Technology for Leak Detection
For an extra layer of security, consider using smart home technology. Water leak detectors are small, affordable devices that can save you from a major headache. You can place these sensors in high-risk areas like your basement, laundry room, or under sinks. If they detect moisture, they’ll send an alert straight to your phone, allowing you to act fast. Some advanced systems can even shut off your main water supply automatically. This technology is especially valuable for catching issues early, like a slow leak from an appliance or the initial signs of a frozen pipe, helping you stop the water flow and prevent catastrophic damage before it starts.
The Importance of Regular Maintenance and Insulation
Beyond high-tech gadgets, good old-fashioned maintenance is key. Take a few minutes every few months to visually inspect your plumbing. Look for signs of rust or corrosion on pipes, check for small drips under sinks, and make sure appliance hoses are in good condition. In a climate like ours in Metro Detroit, proper pipe insulation is one of the most effective preventative measures you can take, especially for pipes in unheated areas like crawl spaces or garages. This simple step helps prevent pipes from freezing and bursting during the winter. These small, consistent efforts can prevent big problems and even help when it comes to your homeowner’s insurance.
Frequently Asked Questions
My leak seems to be coming from inside a wall. Should I try to cut into the drywall to find it? It’s best to leave this to a professional. Plumbers have specialized tools that can pinpoint the source of a leak without causing unnecessary damage to your walls. Cutting into a wall on your own is risky—you could accidentally hit other pipes, electrical wiring, or even structural components. A professional can locate and access the leak safely and efficiently, saving you from a much bigger repair job.
How long can I really trust a temporary patch to hold? Think of a temporary patch as a bandage, not a cure. It’s designed to stop the immediate water flow for a few hours or maybe a day, giving you time to call for help without your home flooding. These fixes are not meant to last for weeks or months. Changes in water pressure or temperature can cause them to fail unexpectedly, so you should always follow up with a permanent, professional repair as soon as possible.
What are the best ways to prevent pipe leaks from happening in the first place? Being proactive is a great way to avoid a plumbing emergency. One of the most effective steps, especially here in Michigan, is to insulate your pipes to protect them from freezing and bursting in the winter. It’s also a good idea to know your home’s water pressure and ensure it isn’t too high, as that can strain your pipes. Finally, addressing any small drips or minor issues right away can prevent them from developing into major leaks over time.
My water bill suddenly went up, but I can’t find any visible signs of a leak. What should I do? An unexplained spike in your water bill is a classic sign of a hidden leak, often located underground, beneath your home’s foundation, or within a wall. A good first step is to make sure all faucets and water-using appliances are off, then check your water meter. If the dial is still moving, you likely have a leak somewhere. At that point, it’s time to call a plumber who can use professional equipment to find the hidden source without any guesswork.
I’ve shut off the main water supply. Is it safe to turn it back on after I’ve applied a temporary fix? It’s wise to be cautious. After applying a patch and letting it cure completely according to the product’s instructions, you can try turning the water back on very slowly. Stay and watch the patched area closely for at least 15-20 minutes to see if any drips appear. If it holds, you may be able to use your water sparingly, but remember this is not a permanent solution. The safest bet is to leave the water off until a professional has assessed and completed a proper repair.
Related Articles
- DIY Pipe Leak Repair: Your Step-by-Step Guide
- Repair a Copper Pipe Leak: A Step-by-Step Guide
- Need a 24 Hr Emergency Plumber? Read This First