You were looking forward to better, more efficient hot water, but instead, you got a disappointing trickle from the faucet. It’s a frustrating situation, and your first thought might be that your brand-new unit is a lemon. Before you get too worried, you should know that experiencing low water pressure after a new water heater is installed is one of the most common plumbing hiccups we see. The good news is that the problem rarely lies with the heater itself. More often, the installation process simply stirred up some trouble in your pipes, like dislodging sediment or trapping air. This guide will walk you through the likely culprits and show you how to fix them.
Key Takeaways
- Check for simple installation hiccups first: Before calling for help, inspect the easy-to-fix culprits like clogged faucet aerators, trapped air in the pipes, or a water valve that wasn’t fully reopened after the installation.
- Pinpoint the problem by comparing hot and cold water: If only your hot water pressure is low, the issue is directly related to your new water heater. This allows you to focus your troubleshooting on the unit’s connections and valves.
- Don’t hesitate to call a pro for complex issues: When your own troubleshooting efforts don’t solve the problem, it’s a sign of a deeper issue like an installation error or a faulty part. A professional can diagnose and fix it correctly, saving you time and preventing further damage.
Why Is My Water Pressure Low After Installing a New Water Heater?
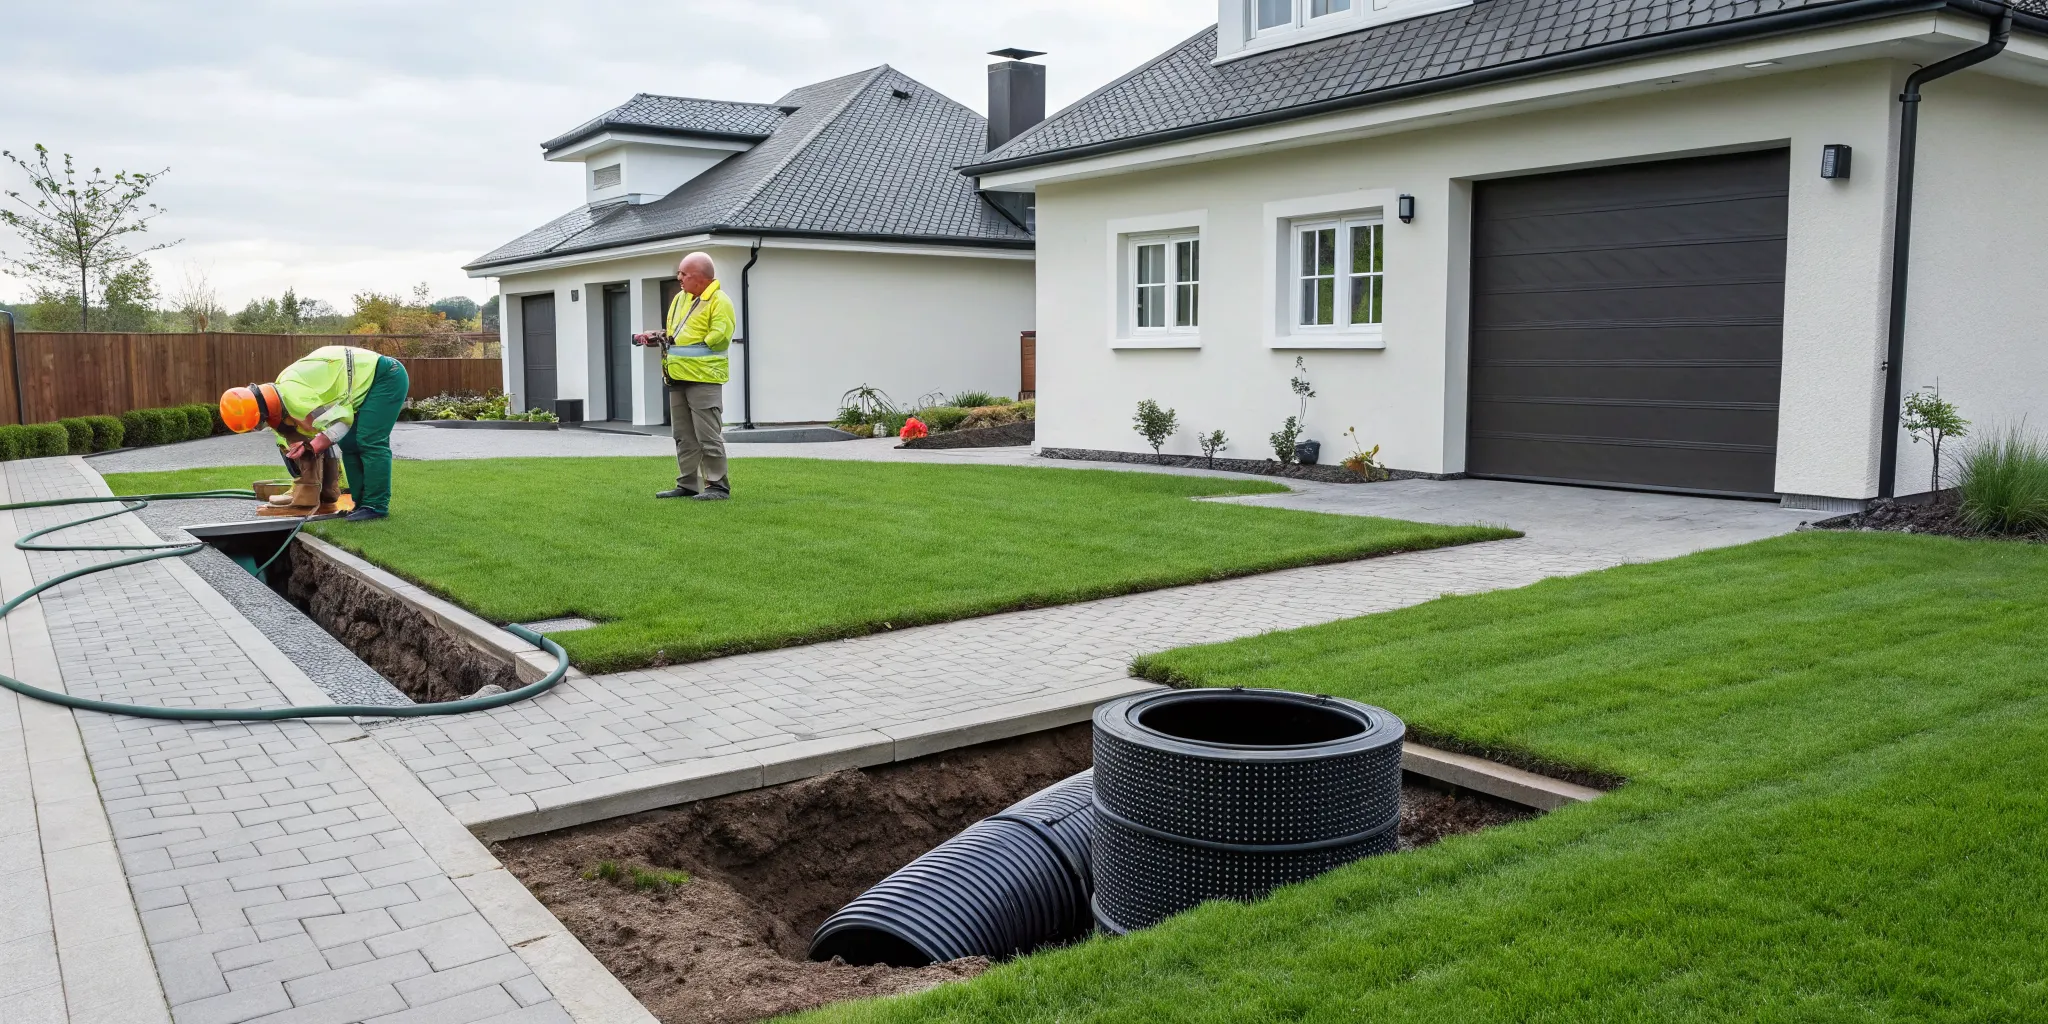
You’ve just upgraded your water heater, looking forward to long, hot showers, but when you turn on the tap, the water just trickles out. It’s frustrating, but don’t panic. Low water pressure right after a new installation is a surprisingly common issue, and it doesn’t necessarily mean your new unit is a dud. More often than not, the installation process itself is the culprit. The work can stir up debris, trap air, or leave a valve partially closed. Let’s walk through the most likely reasons for your sudden drop in water pressure.
Clogged Pipes from Loose Sediment
When your old water heater is disconnected and a new one is put in, it’s impossible not to jostle the existing pipes. This movement can shake loose years of accumulated sediment, mineral scale, and even tiny rust particles from inside your plumbing. Once dislodged, this debris gets carried along by the water flow. Its journey usually ends at the first bottleneck it finds: the fine mesh screen in your faucet aerators and showerheads. These screens are designed to catch debris, but a sudden influx can clog them almost instantly, severely restricting water flow and causing a noticeable drop in pressure.
Trapped Air in the Plumbing Lines
Anytime your home’s plumbing system is drained and refilled, air can get inside. When the water is turned back on, this air can become trapped, creating pockets or “airlocks” within the pipes. These air bubbles disrupt the smooth flow of water, which is why you might see sputtering faucets or experience a weak, inconsistent stream. It might sound alarming, but it’s a very common side effect of any major plumbing service that involves shutting off the water. In most cases, the air just needs to be purged from the system to get your pressure back to normal.
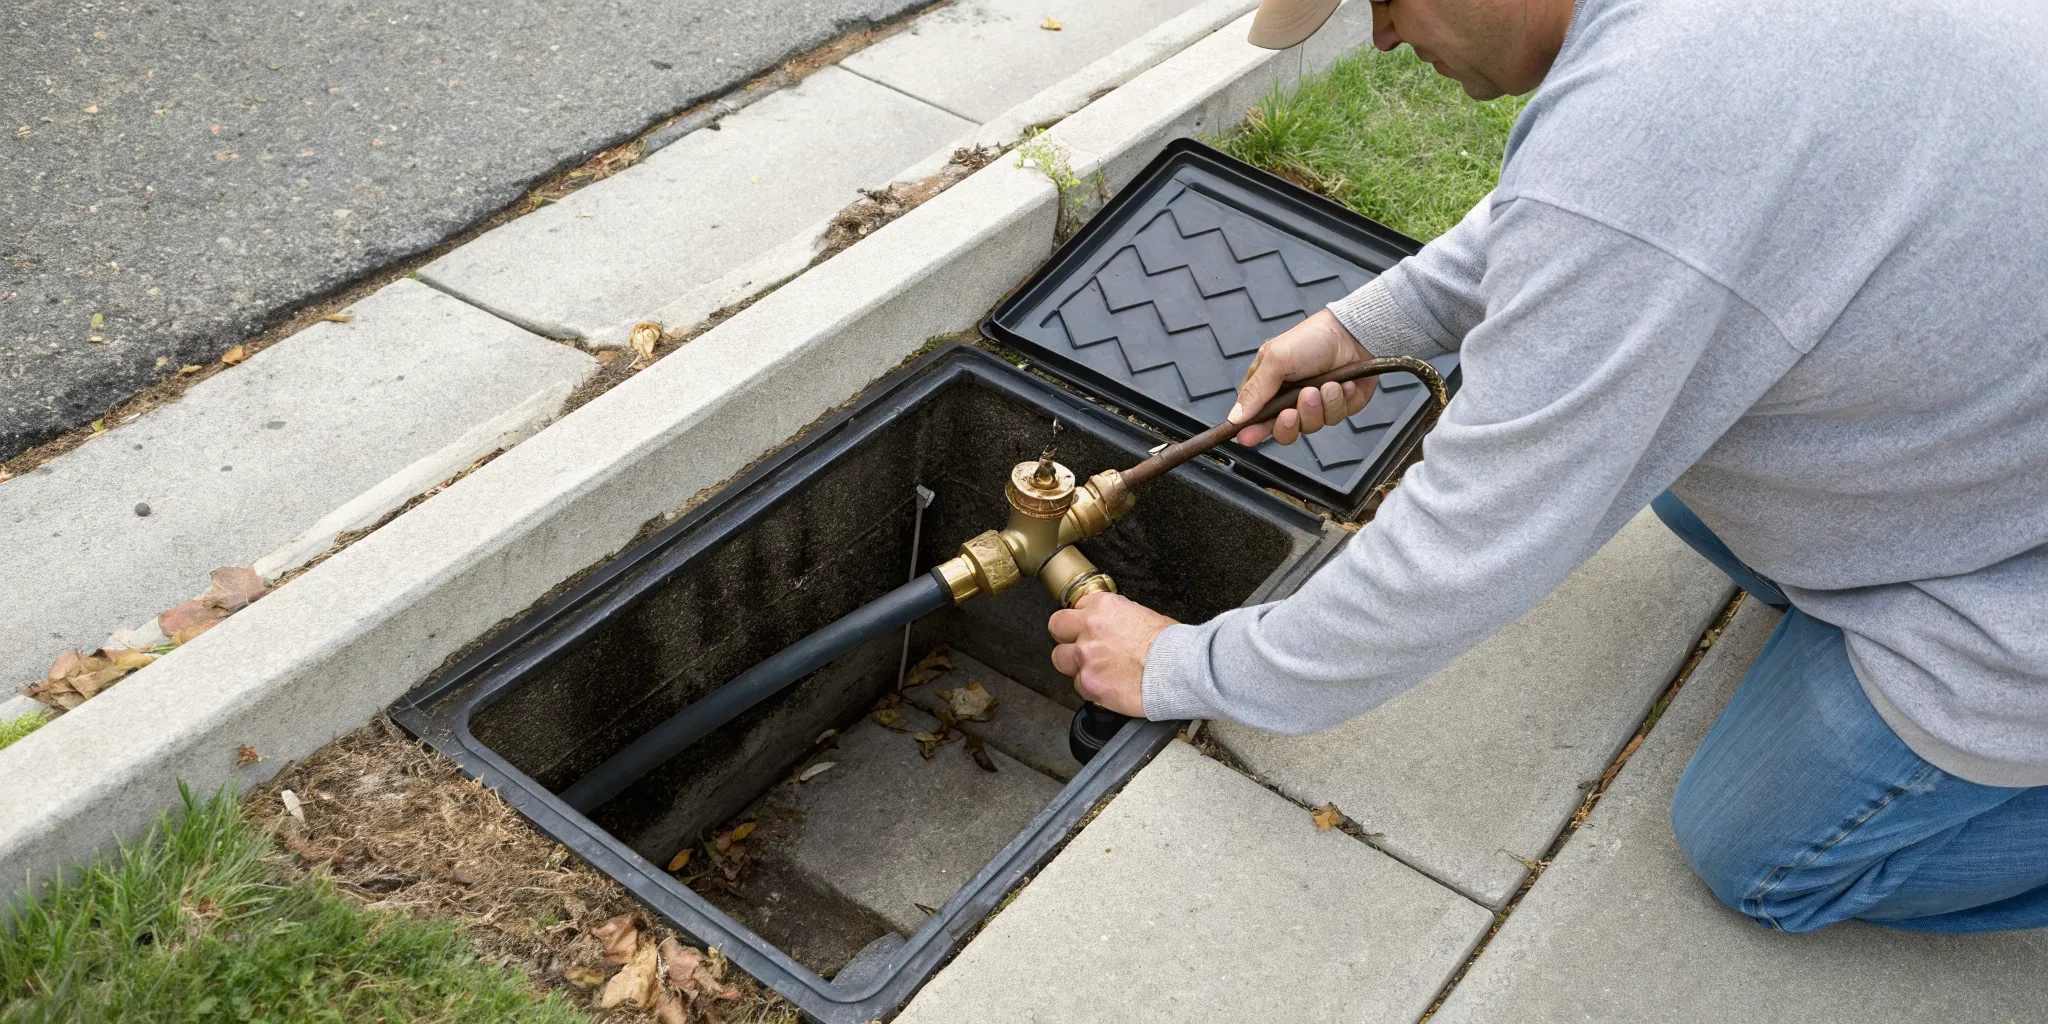
Shut-Off Valves Aren’t Fully Open
This is a simple oversight that happens more often than you’d think. To install the water heater, the plumber had to close a shut-off valve to stop the water supply. After the installation is complete, that valve needs to be fully reopened. If it’s only turned part of the way, it will act like a roadblock, limiting the amount of water that can pass through and reducing your pressure. Older gate valves can also be problematic. Sometimes, due to age or corrosion, the internal gate can break or get stuck, preventing it from opening all the way even when the handle is turned completely.
Kinked or Damaged Supply Lines
Your water heater connects to your home’s main water lines via flexible supply hoses, which are often made of braided steel or soft copper. During the installation, it’s possible for one of these lines to get bent, twisted, or kinked, especially if the unit was pushed too close to the wall. Just like a sharp bend in a garden hose, a kink in a supply line creates a major bottleneck that chokes the water flow right at the source. A quick visual inspection of the hot and cold lines at the top of your heater can often tell you if this is the issue. If you suspect a damaged line, it’s best to call for a professional emergency plumbing inspection.
How to Fix Low Water Pressure Yourself
Before you pick up the phone, there are a few simple troubleshooting steps you can take to resolve low water pressure. Often, the issue is caused by minor hiccups during the installation process, like trapped air or loose sediment. These are surprisingly easy to fix on your own. Walking through these steps can help you identify the source of the problem and, in many cases, get your water flowing freely again in just a few minutes. If you try these fixes and still have trouble, you’ll know it’s time to contact a professional for a closer look.
Step 1: Clean Your Faucet Aerators and Showerheads
When a new water heater is installed, it’s common for sediment and mineral deposits from the old tank and pipes to get knocked loose. This debris travels through your plumbing and can quickly clog the small screens in your faucet aerators and showerheads, restricting water flow. Luckily, this is an easy fix. Simply unscrew the tip of your faucets and the face of your showerheads. You’ll likely find a small mesh screen inside. Rinse it thoroughly under running water to clear out any gunk, then screw the parts back on. This simple cleaning can often restore your water pressure instantly.
Step 2: Fully Open All Water Shut-Off Valves
It might sound too simple, but sometimes the solution is just a quick turn of a handle. During installation, the plumber closes the shut-off valves connected to the water heater. It’s possible they weren’t opened completely when the job was finished. You should find two valves on the pipes leading into and out of the top of your water heater. One is the cold water inlet, and the other is the hot water outlet. Check to make sure both handles are turned all the way to the “on” position, which is typically counter-clockwise. A partially closed valve will definitely restrict water flow and reduce your pressure.
Step 3: Clear Trapped Air from the Lines
Air can easily get trapped in your pipes when a water heater is drained and replaced. These air pockets act like blockages, causing sputtering faucets and a frustrating drop in water pressure. Getting the air out is a straightforward process. Go through your house and turn on all the hot water faucets at the same time, including sinks, showers, and tubs. Let them run for a few minutes. You might hear some spitting and sputtering at first, which is the sound of the air being pushed out. Once the water is flowing in a steady, uninterrupted stream, you can turn them off.
Step 4: Flush Your System to Remove Debris
If cleaning your aerators helped but didn’t completely solve the problem, there might be more sediment lingering in your pipes. A system flush can help clear it out. First, go around and remove all the faucet aerators and showerheads again. With the ends of the faucets open, turn on all the hot water taps in your home and let them run for several minutes. This allows any remaining debris to be flushed out of the pipes without getting caught in the screens. If the problem persists after a thorough flush, it could indicate a more serious issue that requires emergency plumbing expertise.
What if Only the Hot Water Pressure Is Low?
If your cold water pressure is perfectly fine but your hot water is barely a trickle, you’ve successfully narrowed down the culprit. This specific issue points directly to your new water heater or the pipes immediately connected to it. The good news is that the problem is contained. Before you start worrying about a major plumbing overhaul, there are a couple of common, and often simple, things to check right at the source.
Check the Water Heater’s Connections
First, take a close look at the connections on your new water heater. The installation process involves connecting several pipes and valves, and even a slightly loose fitting can cause problems. Make sure all connections are tight and that you don’t see any leaks or drips around the inlet and outlet pipes. Also, find the shut-off valve on the cold water line that feeds into the heater; it should be turned all the way to the open position. If you spot a leak, it’s important to address it immediately to prevent water damage. A persistent leak is a clear sign you need emergency plumbing assistance.
Inspect the Heat Trap Nipples for Clogs
Another common issue involves the heat trap nipples. These are small fittings on the hot and cold water ports of your heater designed to prevent heat from escaping. During installation, sediment or even pieces of plastic or solder can get lodged inside them, creating a blockage. This clog acts like a bottleneck, stopping hot water from flowing out of the tank at full pressure. Checking them involves disconnecting the water lines, which can be tricky. If you’re not comfortable with that step, it’s a good idea to have a professional take a look. Our team can quickly diagnose and resolve these kinds of blockages and other plumbing issues.
Could a Faulty Installation Be the Problem?
If you’ve tried all the DIY fixes and your water pressure is still just a trickle, it’s time to consider a different source: the installation itself. Even brand-new water heaters can cause problems if they aren’t installed perfectly. An improper setup can create bottlenecks in your plumbing system, restricting water flow from the very start. This isn’t something you can typically fix by cleaning a faucet or flushing the lines; it requires a professional eye to spot and correct.
From using the wrong size pipes to connecting fittings incorrectly, a number of installation errors can lead to frustratingly low water pressure. These issues are often hidden from view, making them difficult for homeowners to diagnose on their own. While it’s disappointing to think your new appliance was set up incorrectly, identifying an installation flaw is the first step toward a real solution. A professional plumber can assess your setup, pinpoint the exact cause, and make the necessary adjustments to get your water flowing freely again. If you suspect the installation is the culprit, it’s best to call for an expert diagnosis to avoid causing further damage.
Incorrect Pipe Connections or Sizing
One of the most common installation-related issues is the use of incorrect pipe connections or sizes. Your home’s plumbing is a network, and every part needs to work together. If the pipes connecting to your new water heater are too narrow, they can’t handle the volume of water your system needs, creating a bottleneck that reduces pressure throughout your home. Similarly, poorly sealed or improperly joined pipes can leak or restrict flow. These kinds of mistakes aren’t always obvious, but they have a major impact. A professional can ensure your entire system is correctly configured, providing a clear path for water to travel from the heater to your faucets.
A Problem with the Dip Tube
If you’re only noticing low pressure when you turn on the hot water, the problem could be a small but crucial component inside the tank called the dip tube. The dip tube’s job is to direct cold water to the bottom of the tank to be heated. If this tube was broken during installation or put in incorrectly, it can disrupt the flow and significantly reduce your hot water pressure. This is a perfect example of a problem you’d never see from the outside. Fixing it involves opening up the water heater, a job best left to a professional who can safely handle the unit’s internal parts and get your hot water running properly again.
A Faulty Pressure Relief Valve
Every water heater has a temperature and pressure relief valve (T&P valve), which is a critical safety feature designed to release pressure if it gets too high inside the tank. If this valve is faulty or clogged from debris stirred up during installation, it can sometimes leak or fail to regulate pressure correctly, leading to a drop in flow. You can sometimes spot a problem by gently lifting the test lever on the valve; if it drips continuously or doesn’t release any water or air, it may need to be replaced. Because this valve is essential for your home’s safety, any issues with it should be addressed immediately by a licensed plumber.
When to Call a Professional for Low Water Pressure
Sometimes, even after you’ve tried every trick in the book, the water pressure just won’t cooperate. While tackling home repairs yourself can be rewarding, certain plumbing issues are best left to the experts. Knowing when to put down the wrench and pick up the phone can save you from a lot of frustration and prevent a small problem from turning into a major headache. If you find yourself stuck, calling a professional isn’t admitting defeat; it’s making a smart decision to protect your home and your new water heater investment. A licensed plumber has the tools and experience to diagnose the problem quickly and safely, getting your home back to normal.
If Your DIY Fixes Don’t Work
You’ve cleaned the aerators, checked the shut-off valves, and tried to bleed the air from your pipes, but the water pressure is still disappointingly low. When your best efforts don’t solve the problem, it’s a strong indicator that the issue is more complex than a simple DIY fix can handle. As plumbing experts note, if basic troubleshooting steps don’t work, it’s time to call a professional. A persistent problem could stem from a deeper clog, an issue inside the water heater itself, or another hidden complication. Instead of spending more time on fixes that aren’t working, let a licensed plumber take a look and get your water flowing properly again.
When You Suspect a Bigger Problem
Low water pressure can sometimes be a symptom of a more serious underlying issue. If you have a hunch that you’re dealing with something beyond a simple clog, it’s wise to trust your gut. Complex problems like hidden pipe leaks, a faulty pressure regulator for your whole house, or an incorrect installation of the water heater require specialized tools and expertise to diagnose and repair safely. Attempting to fix these issues yourself could lead to water damage or more expensive repairs down the road. A professional plumber can accurately identify these kinds of complex issues and provide a safe, effective solution.
For a Professional Diagnosis
When the cause of your low water pressure isn’t obvious, a professional diagnosis is your best path forward. A licensed plumber can conduct a thorough inspection of your entire plumbing system, from the water heater connections to the pipes hidden in your walls. They use their experience to pinpoint the exact source of the problem, which could be something you’d never think to check. This expert assessment saves you the guesswork and ensures the correct repair is made the first time. Getting a professional diagnosis provides peace of mind and a clear plan to restore your water pressure for good.
Related Articles
- Water Heater Installation: A Step-by-Step Guide
- How to Repair an Instant Water Heater: A DIY Guide
- How to DIY a Tankless Water Heater Installation
Frequently Asked Questions
Is it normal to have low water pressure right after a new water heater installation? Yes, it’s actually quite common. The installation process can stir up sediment in your pipes or trap air in the lines, both of which can temporarily reduce your water flow. In most cases, it’s not a sign that your new heater is faulty, but rather a side effect of the plumbing work. A few simple troubleshooting steps can often resolve it quickly.
My cold water pressure is fine, but the hot water is just a trickle. Does this mean my new heater is defective? Not necessarily. When only the hot water is affected, it helps pinpoint the problem to the water heater itself or its direct connections. The issue could be as simple as the shut-off valve on the heater not being fully opened, or a small clog in the heat trap nipples where the water exits the tank. It rarely means the entire unit is broken.
I tried cleaning my faucets and flushing the lines, but the pressure is still low. What should I do now? If you’ve already worked through the basic DIY fixes and haven’t seen an improvement, it’s a good sign that the problem is more complex. At this point, your best bet is to call a professional plumber. They have the tools and experience to find hidden issues, like a clog deep in a pipe or a problem inside the water heater, without causing any further complications.
How can I tell if a bad installation is the real problem? It can be difficult for a homeowner to spot an installation error, as the issues are often related to incorrect pipe sizing or internal components like the dip tube. The biggest clue is that none of the simple troubleshooting steps work. If you’ve cleared your aerators and purged the air from your lines with no success, it’s worth having a professional inspect the setup to ensure everything was connected correctly.
Could this low pressure issue cause any other damage to my home? While low pressure itself is mostly an annoyance, its underlying cause could potentially lead to damage. For instance, if the problem is due to an improperly installed pipe connection, it could eventually result in a leak. Likewise, a malfunctioning pressure relief valve is a safety concern that needs immediate attention. This is why it’s important to address persistent low pressure instead of just living with it.