That water in your crawl space? It’s more than just a nuisance. It’s a silent threat that can weaken your home’s foundation and ruin your indoor air quality. But you can stop it. A sump pump is a proactive investment in your property’s health and value, actively managing groundwater to prevent expensive water damage and mold. Taking this step is one of the smartest things you can do for your home. This guide will walk you through every detail of a proper sump pump installation, so you can get it done right.
Key Takeaways
- Address Crawl Space Moisture Before It Causes Damage: That musty smell or damp feeling under your house is a clear warning sign. A sump pump is the most effective way to prevent the mold, wood rot, and foundation cracks that excess groundwater can cause.
- A Successful Installation Depends on Three Key Details: For your pump to work correctly, it must be placed at the lowest point of the crawl space, powered by a dedicated GFCI outlet, and connected to a discharge pipe that drains water far away from your home.
- Your Pump Needs a Backup and Regular Maintenance: A sump pump is useless in a power outage without a battery backup system. Test your pump twice a year and ensure the discharge line is clear before winter to guarantee it works when you need it most.
What’s a Sump Pump? (And Why Your Crawl Space Needs One)
If you’ve ever opened your crawl space door to a damp, musty smell, you know that feeling of dread. That moisture isn’t just an inconvenience; it’s a sign of potential trouble brewing beneath your floors. So, what’s the solution? Often, it’s a sump pump. Think of it as your home’s personal bodyguard against water damage. It’s a small but mighty pump designed to remove accumulated water from the lowest points of your house, like crawl spaces and basements.
Here in Metro Detroit, our weather can be unpredictable. Heavy spring rains and rapid snow melts can saturate the ground, pushing water against your foundation. Without a way to escape, that water will find its way into your crawl space. A sump pump actively works to keep groundwater levels below your home’s floor, pumping out any water that gathers before it can cause problems. This isn’t just about preventing puddles; it’s about protecting your home’s structural integrity, preventing wood rot, stopping mold growth, and keeping your indoor air healthy. Installing one is a proactive step toward a dry, stable, and safe home. If you’re dealing with persistent moisture issues, professional sump pump services can be a game-changer for your property.
How Does a Sump Pump Keep Your Crawl Space Dry?
The way a sump pump operates is actually quite simple. It’s installed in a specially dug pit, called a sump pit or basin, at the lowest point of your crawl space where water naturally collects. Since water flows downhill, any excess groundwater or seepage will gather in this pit.
Inside the pump, there’s a float switch or a pressure sensor. When the water in the pit rises to a certain level, it lifts the float switch (much like the one in your toilet tank), which activates the pump. The pump then kicks into gear, pushing the water out of the pit and through a discharge pipe. This pipe runs up and out of your house, safely directing the water away from your foundation. It’s an automated, effective system that stands guard 24/7.
Why You’ll Love Having a Sump Pump
Installing a sump pump is one of the best things you can do for a wet crawl space. Its primary job is to prevent flooding, protecting your belongings and the structure of your home from costly water damage. By keeping the area dry, a sump pump also safeguards your home’s foundation from the pressures of water-saturated soil, which can cause cracks and shifting over time.
Beyond preventing major water disasters, a dry crawl space is a healthier one. Moisture is a breeding ground for mold and mildew, which can ruin your air quality and lead to health issues. A sump pump helps control humidity levels, making the environment less inviting for pests like termites and rodents that thrive in damp conditions. It’s a key part of a complete home maintenance strategy, offering peace of mind with all our plumbing solutions.
Protecting Appliances and Preventing Costly Damage
Think about the expensive appliances often tucked away in your basement or crawl space—your furnace, water heater, and maybe even your washer and dryer. These machines are the unsung heroes of your home, but they aren’t designed to operate in a damp, humid environment. Constant moisture is a silent threat, leading to rust and corrosion that can eat away at metal components and compromise their integrity. Even worse, high humidity can cause electrical shorts and system failures, turning a reliable appliance into an unexpected and expensive problem. Protecting these crucial systems starts with controlling the environment around them, and that means getting rid of excess water for good.
This is where a sump pump becomes an essential investment in your home’s overall health. By actively removing groundwater, it does more than just prevent puddles; it lowers the ambient humidity that causes so much damage. A dry crawl space means your appliances are shielded from the corrosive effects of moisture, which can significantly extend their operational lifespan and help them run more efficiently. Investing in professional sump pump services isn’t just about flood prevention—it’s a proactive step to safeguard thousands of dollars worth of equipment, ensuring you avoid premature replacements and costly repair bills down the road.
Does Your Crawl Space Need a Sump Pump?
Noticing the signs that your crawl space needs a sump pump isn’t always as dramatic as walking into a foot of water. Often, the clues are much more subtle and can build up over time. Excess moisture underneath your home is a serious issue that can affect your home’s structural integrity and your family’s health. Here in Metro Detroit, with our heavy rains and melting snow, being proactive about water management is key. If you spot any of these red flags, it’s a strong signal that your crawl space is calling for help. Paying attention to these warnings can save you from dealing with much bigger, more expensive problems down the road. Let’s walk through the most common signs that it’s time to consider a sump pump.
That Musty Smell: Dampness and Mold Growth
If you open your crawl space access and are hit with a wave of musty, earthy smells, don’t just ignore it. That odor is a classic sign of mold and mildew, which thrive in damp, dark environments. Persistent dampness on the walls, floor, or wooden supports is another major indicator that you have a moisture problem. While a sump pump is designed to remove standing water, it plays a vital role in creating a drier environment that discourages mold growth. A dry crawl space is essential for a healthy home, and our sump pump services are designed to be the first line of defense against the moisture that invites these unwanted guests.
Water Damage You Can See: Cracks and Stains
Take a close look at your foundation walls. Do you see any new or expanding cracks? Water is one of the most powerful forces of nature, and when it collects in the soil around your foundation, it creates immense pressure. This hydrostatic pressure can lead to cracks, bowing walls, and other serious structural damage. A sump pump is a critical tool for managing the water around your home’s foundation, relieving that pressure before it can cause harm. Think of it as a protective measure for your entire home. Spotting these issues early and addressing the root water problem can help you prevent a plumbing emergency and protect your property value.
Finding Puddles or Standing Water
This is the most obvious sign of them all. If you see standing water or puddles in your crawl space after a storm or during the spring thaw, you have a clear water intrusion problem. Because a crawl space floor is often lower than the surrounding groundwater level, it’s a natural collection point for water. For homes in areas with a high water table or poor drainage, a sump pump isn’t just a good idea—it’s essential. It actively works to collect that water and pump it safely away from your home, keeping your crawl space dry no matter the weather. This is a core part of our comprehensive plumbing solutions for protecting your home.
A Sump Pump Is Just One Piece of the Puzzle
While a sump pump is an excellent line of defense, it’s important to see it as part of a larger water management strategy. A sump pump is a reactive solution—it deals with water that has already found its way into your crawl space. A truly comprehensive approach aims to stop water from ever reaching your foundation in the first place. Think of your sump pump as the goalie; it’s there to stop the shots that get through, but the best defense works to keep the puck out of your zone entirely. By addressing the root causes of water intrusion, you reduce the strain on your pump, extend its lifespan, and create a more robust system for keeping your home dry and protected for the long haul.
Considering Interior French Drains
If you’re dealing with water seeping in from multiple points along your crawl space walls, an interior French drain can be a powerful ally for your sump pump. This system involves creating a small trench around the interior perimeter of your crawl space. A perforated pipe is laid in the trench, covered with gravel, and then concealed with a new layer of concrete. This drain system intercepts any water that leaks through the foundation walls and channels it directly to the sump pit. Instead of letting water spread across the floor, the French drain collects it and delivers it right to the pump for removal. It’s an effective way to manage persistent seepage and ensure your sump pump can handle the water efficiently.
Fixing Exterior Drainage First
The most effective long-term solution is often found outside your home, not under it. Before investing in complex interior systems, take a hard look at your property’s exterior drainage. Simple issues are often the biggest culprits. Are your gutters clogged with leaves, causing water to spill over the sides and pool against your foundation? Are your downspouts dumping water right next to the house instead of extending several feet away? Does the ground around your home slope toward the foundation instead of away from it? Correcting these problems can dramatically reduce the amount of water pressing against your crawl space walls. Addressing your home’s exterior drainage is the most proactive step you can take and is a key part of our comprehensive plumbing solutions.
Your DIY Sump Pump Installation Checklist
Before you get your hands dirty, let’s get everything you need in one place. A successful DIY project is all about preparation, and having the right tools and materials ready will make the installation process much smoother. Think of it as your pre-game huddle—it sets you up for a win and saves you from making multiple trips to the hardware store mid-project.
The Essential Tool List
Having all your tools laid out and ready to go is the first step to a frustration-free installation. Here’s a checklist of what you’ll need to get the job done:
- Submersible Sump Pump: This is the heart of the system. It’s the device that will live in the sump pit and actively pump water out of your crawl space.
- Sump Basin: A large, perforated container that houses the pump and collects water before it’s pumped out.
- Basin Cover: An essential lid that keeps debris out and prevents moisture from evaporating back into the crawl space.
- Check Valve: This small but mighty piece prevents water from flowing back into the basin after it’s been pumped out.
- PVC Pipe and Cement: For creating the discharge line that carries water safely away from your home.
- Digging Tools: A shovel and a hoe will be your best friends for digging the sump pit.
- Drill and Hole Saw Kit: You’ll need these to cut openings for the piping.
- Wrenches and a PVC Pipe Saw: For tightening fittings and cutting your pipes to the perfect length.
Specialty Tools for Concrete Floors
If your crawl space has a concrete floor, the installation process requires a bit more muscle and some specialized equipment. This isn’t your average weekend project, as you’ll be cutting through solid concrete to create the sump pit. Having the right tools is non-negotiable for getting this done safely and correctly. Here’s what you’ll need to tackle the job:
- Hammer Drill: To start, you’ll need a hammer drill fitted with a masonry bit. This powerful tool is perfect for drilling a series of holes to create a clean outline for your sump pit, making the next step much easier.
- Demolition Hammer or Jackhammer: Once you have your outline, it’s time to break up the concrete. A demolition hammer or a small jackhammer will make short work of the slab inside your marked circle. This is heavy-duty work, so be sure you’re comfortable handling this type of equipment.
- Power Drill with a Hole Saw: After the pit is dug, you’ll need to run the discharge pipe outside. A power drill equipped with a hole saw kit allows you to cut a neat, precise opening through the rim joist or foundation wall for the pipe.
Breaking up concrete is a demanding task. If handling a jackhammer in a tight crawl space sounds like more than you bargained for, don’t hesitate to call in the pros. Our expert team has the right tools and experience for a fast, clean sump pump installation, no matter what kind of floor you have.
Safety First: What to Wear
Working in a crawl space comes with its own set of challenges, so putting safety first is non-negotiable. Make sure you have the basics: gloves, safety glasses, and a dust mask. Beyond that, the biggest rule is to be mindful of your home’s foundation. When you dig the pit, stay a safe distance away from the foundation walls and footings. Digging too close can compromise your home’s structural integrity. If you’re at all unsure about a safe distance, it’s always best to consult a plumbing professional.
Choosing the Right Sump Pump for Your Home
Not all sump pumps are created equal, and picking the right one is key to keeping your crawl space dry for good. You’ll want a reliable model that can handle the amount of water your home deals with, especially during those heavy Metro Detroit rains. A great sump pump is the foundation of effective water management for your home. For most houses, a 1/3 horsepower pump is a solid and dependable choice—it’s powerful enough for typical residential needs without being overkill. Making the right choice here ensures your system works efficiently for years to come.
Submersible vs. Pedestal Pumps
When you start shopping, you’ll find two main types of sump pumps: submersible and pedestal. A submersible pump is designed to sit directly inside the sump basin, fully submerged in the water it will pump out. Because it’s underwater and enclosed, it’s much quieter and stays out of sight. A pedestal pump, on the other hand, keeps its motor on a column above the basin, out of the water. This design often makes it less expensive and easier to service, but it’s also louder and takes up more vertical space. The best choice really depends on your crawl space and what you value most—quiet operation or easier access for maintenance.
Recommended Materials for a Lasting System
To build a sump pump system that you can rely on for years, you need to start with the right parts. Using quality materials from the get-go prevents frustrating leaks and premature failures down the line. Gathering everything before you start also means you won’t have to stop halfway through the project for a hardware store run. Here’s a complete list of the essential components you’ll need to assemble a durable and effective system for your crawl space.
- Submersible Sump Pump: The core of your system, responsible for pumping water out of the crawl space.
- Sump Basin: A large, perforated container that houses the pump and collects water before it’s pumped out.
- Basin Cover: Essential for keeping debris out and preventing moisture from evaporating back into the crawl space.
- Check Valve: Prevents water from flowing back into the basin after it’s been pumped out.
- PVC Pipe and Cement: Used to create the discharge line that carries water safely away from your home.
- Digging Tools: A shovel and hoe for digging the sump pit.
- Drill and Hole Saw Kit: Necessary for cutting openings for the piping.
- Wrenches and a PVC Pipe Saw: For tightening fittings and cutting pipes to the correct length.
Getting Your Crawl Space Ready
Before you even think about digging, a little prep work will save you a ton of headaches. Properly preparing your crawl space is the most important step to ensure your sump pump installation goes smoothly and the system works effectively for years to come. Think of it as creating a clean, safe, and well-planned workspace. Taking the time to map out your system, find the perfect spot, and clear the area of any hazards will make the actual installation process much more straightforward. This phase is all about setting yourself up for success, so don’t rush it. A well-prepared space not only simplifies the job but also helps prevent costly mistakes or damage to your home’s plumbing and electrical systems.
Sketching Out the Layout
First things first, grab a notepad and sketch out a simple map of your crawl space. You’ll want to plan the entire pump flow system before you start. Decide where the sump pit will go, how the discharge pipe will run, and where it will exit your house. Visualizing the complete setup helps you spot potential problems ahead of time. This simple planning step ensures everything will fit and function correctly, preventing any mid-installation surprises. It’s much easier to erase a line on a piece of paper than it is to re-dig a hole or reroute a pipe.
Preparing the Area for a Messy Job
With your layout planned, it’s time to get the physical space ready. Let’s be honest: digging a hole in your crawl space is going to be a messy job. Taking a few minutes to prep the area beforehand will make the entire process cleaner, safer, and much less stressful. Think of it as setting up your workshop—a little organization now saves you a major cleanup headache later and protects the rest of your home from being covered in a layer of dust. This is a step that professionals never skip, and you shouldn’t either.
Here’s how to get the area ready for action:
- Clear the Space: Remove any stored items, tools, or general debris from the immediate work area. You need a clear, open space to move around safely and have easy access to the spot where you’ll be digging the sump pit.
- Contain the Mess: Lay down heavy-duty plastic sheeting on the floor around your work zone. This simple step is a lifesaver for catching dirt and dust, making cleanup as easy as rolling up the plastic when you’re done.
- Be Ready for Water: Keep a shop vacuum and some buckets handy. If you hit groundwater while digging, you’ll want to be able to manage it immediately. This preparation is a key part of any professional sump pump service because it keeps the workspace manageable.
Picking the Perfect Spot for Your Pump
Choosing the right location for your sump pump is critical for it to do its job. You need to place it at the lowest point of your crawl space, since that’s where water will naturally collect. Take a look around for any areas where you’ve noticed dampness or puddles in the past—that’s usually your sweet spot. You’ll also want to pick a location near an exterior wall. This makes it much easier to run the discharge pipe outside without a lot of extra twists and turns. If you’re having trouble identifying the lowest point, our team can help with professional sump pump services to ensure optimal placement.
Considering Soil Type and Foundation Distance
Once you’ve pinpointed the lowest spot, there are a couple more things to think about: the soil under your house and its distance from your foundation. The type of soil you have plays a big role in how water moves. Here in Michigan, we often deal with heavy clay soil, which holds water for a long time, making it a prime candidate for pooling. Sandy soil, on the other hand, drains much faster. Knowing your soil type helps confirm that you’ve chosen the most effective spot for water to collect. Just as critical is keeping a safe distance from your foundation. When you start digging the pit, make sure you’re not too close to the foundation walls or footings. Digging too near can weaken your home’s structural support, creating a much bigger problem than the one you’re trying to solve. If you have any doubts about placement, getting professional advice on sump pump services is a wise step to ensure your home stays safe and secure.
Before You Dig: A Quick Safety Check
Safety should always be your top priority. Before you begin, thoroughly inspect the area where you plan to install the pump. Look for any potential hazards like hidden electrical wiring, plumbing lines, or gas pipes that could be in your way. Clear out any debris, rocks, or stored items to give yourself a clean and safe workspace. While you’re down there, give the area a quick structural check for any large cracks in the foundation or other issues that might need attention. If you uncover a surprise plumbing problem, it’s best to get it fixed before proceeding with the installation.
Your Step-by-Step Sump Pump Installation Guide
Alright, you’ve done your prep work, and now it’s time for the main event. Installing a sump pump can be a very rewarding DIY project, but it requires precision and a bit of muscle. Remember to take your time with each step and always prioritize safety. If you start to feel like you’re in over your head, don’t hesitate to pause and call in a professional. Our team at Mr. Pipey is always ready to help with expert sump pump services to ensure the job is done right. Ready to get started? Let’s walk through the installation process together.
Step 1: Dig the Sump Pit
First, you’ll need to create a home for your sump pump. Find the lowest point in your crawl space, as this is where water will naturally collect. This is the ideal spot for your sump pit. Once you’ve marked your location, start digging a hole that is wide and deep enough to comfortably fit the sump basin. A good rule of thumb is to make the hole about 6 inches wider and deeper than the basin itself. This extra space isn’t just for wiggle room; you’ll fill the bottom with a layer of gravel to create a stable, level base and then add more gravel around the sides to help with water filtration.
Getting the Pit Dimensions Right
When it comes to digging the sump pit, precision matters. You’ll want to aim for a hole that’s roughly 2 feet deep and 18 inches wide, which gives you enough room for the sump basin and ensures effective water collection. A great rule of thumb is to dig the hole about 6 inches wider and deeper than the basin itself. This extra space is crucial; you’ll fill the bottom with a layer of gravel to create a level base for the pump and add more gravel around the sides. This surrounding gravel acts as a natural filter, helping groundwater flow easily into the pit.
As you dig, always be mindful of your home’s foundation. It’s critical to keep a safe distance from the foundation walls and footings to avoid compromising your home’s structural integrity, which can lead to incredibly expensive repairs. If you’re not sure how close is too close, it’s always better to be safe than sorry. This isn’t a step where you want to guess. Getting professional advice on placement can give you peace of mind and ensure your installation is both safe and effective. Our team is always here to help with expert sump pump services to get the job done right.
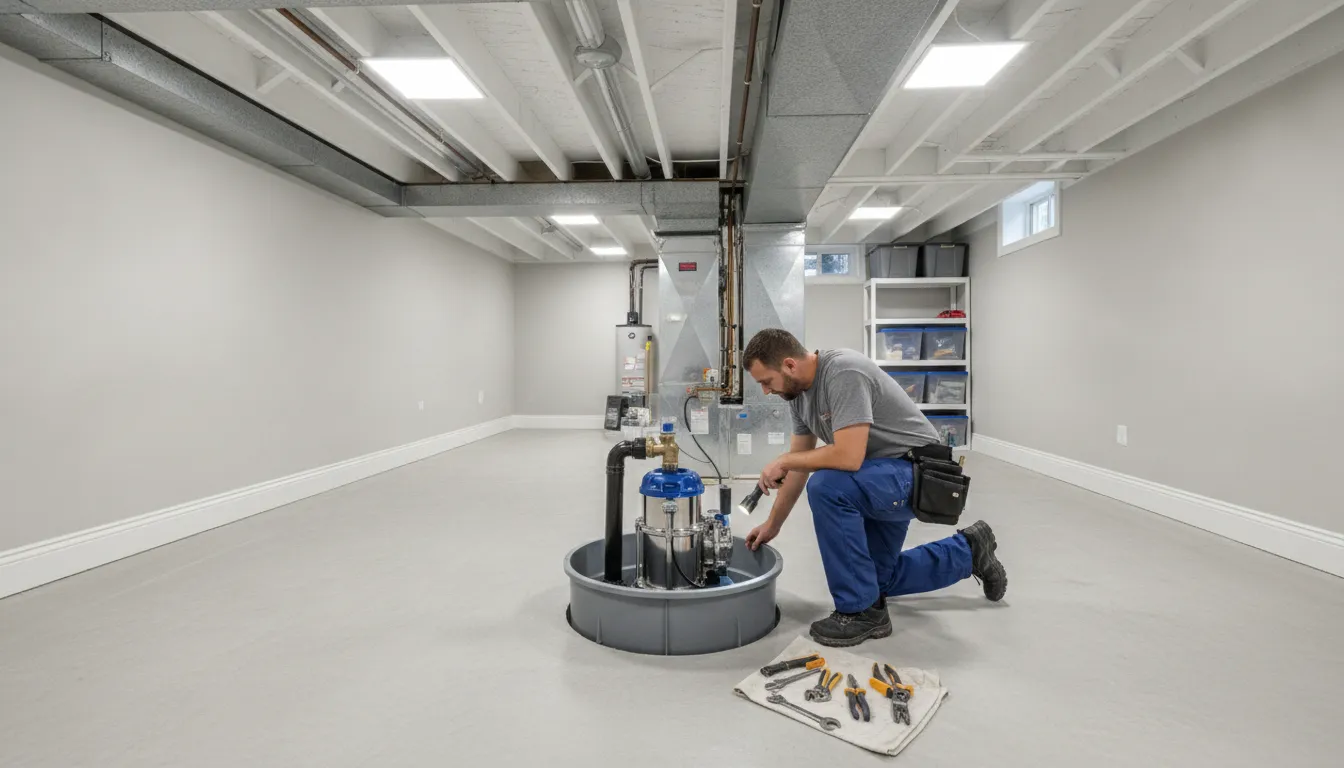
Step 2: Install the Basin and Pump
With your pit prepared, carefully lower the sump basin onto the gravel bed, making sure it’s level. Add more gravel around the outside of the basin to hold it securely in place, filling the gap between the dirt walls. Now, place the sump pump inside the basin. It should sit flat on the bottom, centered, and not touching any of the sides. This is important because the pump’s float switch needs to move freely to work correctly. If the float gets stuck on the side of the basin, it won’t be able to signal the pump to turn on when the water rises.
Pro Tips for Pump Placement
When it comes to your sump pump, location is everything. Getting the placement right is the single most important factor in making sure it works effectively when you need it most. Here are a few expert tips to help you find the perfect spot for your new system.
- Find the Lowest Point: Your sump pump needs to be installed at the absolute lowest point of your crawl space. This is where water will naturally pool, making it the most effective spot for the pump to collect and remove water before it spreads.
- Look for Moisture Clues: Before you start digging, inspect the crawl space for signs of dampness or standing water. These visual cues are your best guide to identifying the ideal location for the sump pit.
- Position it Near an Outside Wall: Placing your sump pump near an exterior wall makes installing the discharge pipe much simpler. A shorter, straighter pipe route is more efficient and less prone to clogs.
- Keep it Accessible: Don’t tuck the pump away in a hard-to-reach corner. You’ll need to access it for regular maintenance and testing, so make sure you can get to it easily.
- When in Doubt, Ask an Expert: If you’re not 100% confident about finding the best location, it’s always smart to consult a professional. Our team can provide expert sump pump services to ensure your system is installed in the most effective position for your home.
Step 3: Connect the Float Switch and Power
This step is all about safety. Your sump pump must be plugged into a dedicated GFCI (Ground Fault Circuit Interrupter) outlet. This type of outlet is designed to shut off automatically if it detects an electrical fault, which is a critical safety feature in a damp environment like a crawl space. If you don’t have a GFCI outlet nearby, you’ll need one installed. Unless you have extensive electrical experience, we strongly recommend calling a professional for this part. Once connected, test the pump by lifting the float switch or pouring a bucket of water into the basin to ensure it kicks on properly.
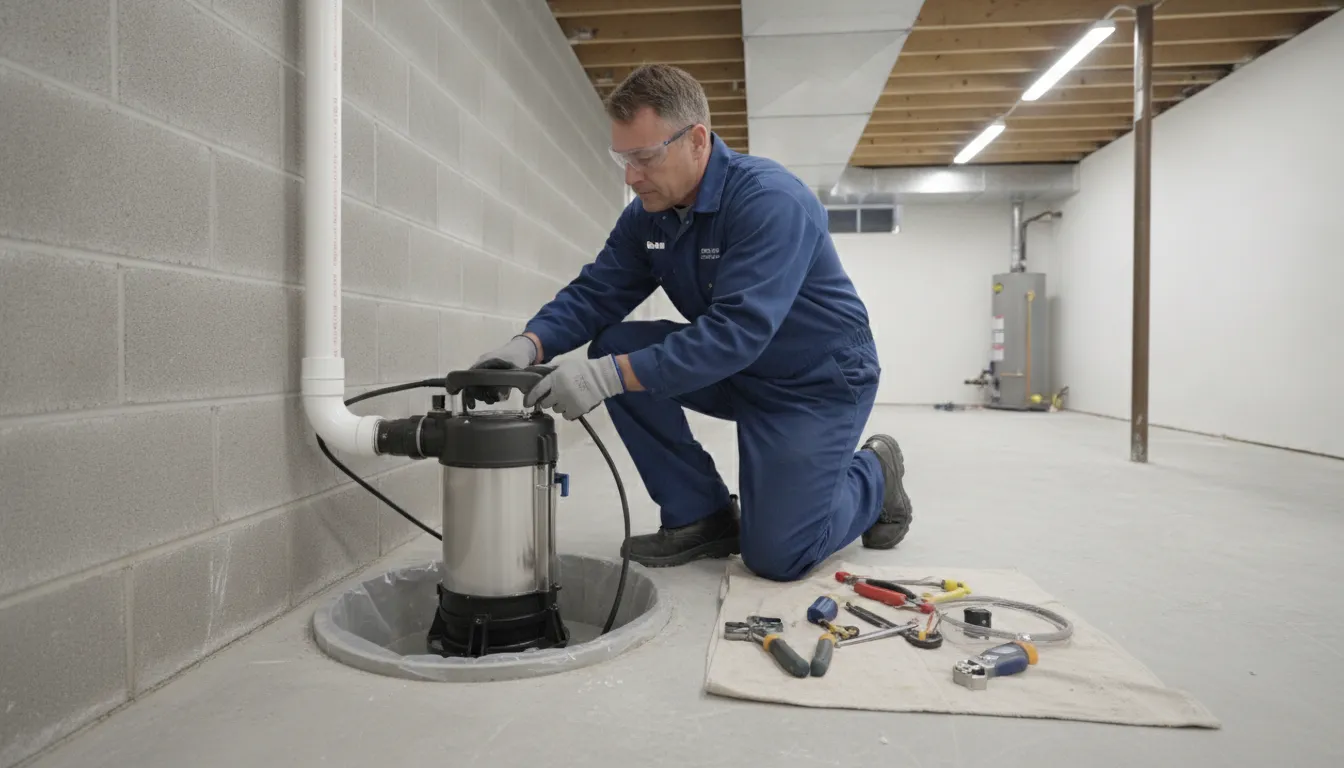
Step 4: Attach and Secure the Discharge Pipe
The final step is to give the water an escape route. You’ll run a PVC pipe from the pump’s discharge port up and out of the crawl space. A crucial component here is the check valve, which you’ll install on the pipe just above the pump. This one-way valve prevents water from flowing back into the pit after the pump shuts off. Drill a hole through your home’s rim joist or foundation wall to run the pipe outside. Ensure the exterior pipe is sloped downward, away from your foundation, to carry water a safe distance from your home. An improperly routed pipe can cause issues, especially in winter when you might need frozen pipe repair.
Avoid These Common DIY Installation Pitfalls
Installing a sump pump might seem straightforward, but a few common missteps can lead to a system that doesn’t protect your home when you need it most. Getting the details right from the start saves you from costly headaches, potential water damage, and the stress of a flooded crawl space. By steering clear of these frequent errors, you can ensure your sump pump operates efficiently and reliably for years to come. It’s all about setting yourself up for success and giving your home the protection it deserves.
Why Pump Size and Placement Matter
The placement of your sump pump is critical. Because water naturally flows to the lowest point, your sump pit must be dug in that exact spot in your crawl space. If it’s even a few inches too high, water will pool elsewhere, defeating the pump’s purpose. Sizing is just as important. A pump that’s too small won’t be able to keep up with heavy water flow, while one that’s too powerful will cycle on and off too frequently, burning out the motor prematurely. Taking the time to correctly assess your crawl space and choose the right equipment is the first step toward effective water management.
Don’t Skip Electrical Safety Steps
Water and electricity are a dangerous combination, and your crawl space is no place to cut corners on electrical safety. Your sump pump system requires dedicated power. The main pump and its battery backup charger should each have their own separate GFCI outlet. Never, under any circumstances, use an extension cord to power your sump pump. This creates a serious fire hazard and can cause the pump to fail when you need it most. If you’re not confident in the electrical setup, it’s always best to consult a professional to handle the wiring and ensure everything is up to code and safe for your home.
Common Discharge Pipe Mistakes
Your sump pump’s job is to collect water, but the discharge pipe’s job is to get that water far away from your house. A common mistake is installing a discharge line that doesn’t slope downward away from the foundation or one that terminates too close to the home, allowing water to seep right back in. It’s also crucial to protect the pipe from freezing during Michigan’s harsh winters. A frozen discharge line will block water from exiting, causing it to back up and flood your crawl space. Proper installation and insulation are key to avoiding this kind of frozen pipe disaster.
What Happens When the Power Goes Out?
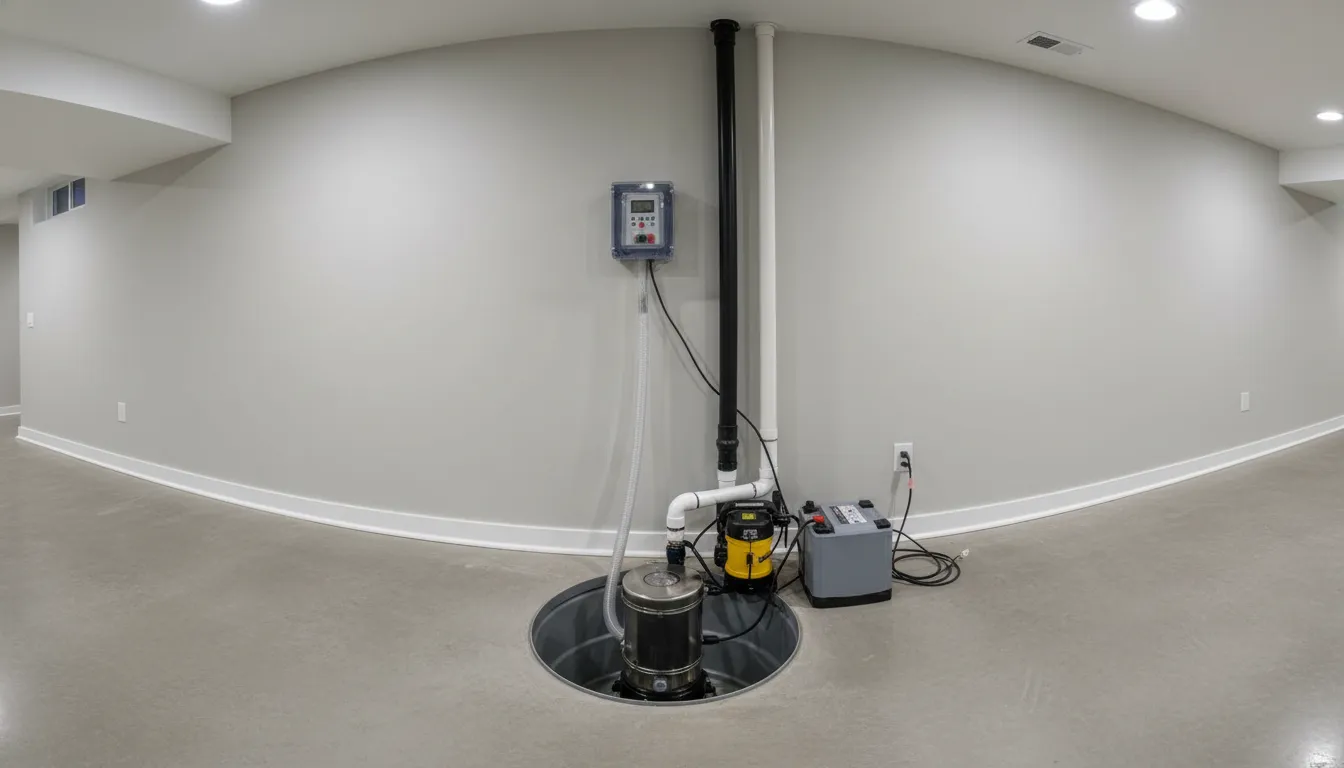
The worst time for your sump pump to fail is during a severe storm—which is often when the power goes out. Without electricity, your primary pump is useless. This is why a battery backup system isn’t a luxury; it’s a necessity. A backup pump will automatically kick in when the power fails, ensuring your crawl space stays dry and protected. Investing in a reliable backup provides invaluable peace of mind, safeguarding your home from water damage when it’s most vulnerable. Professional sump pump services almost always include the installation of a trusted backup system.
Planning for a Complete Backup System
A complete backup system is your ultimate insurance policy against a flooded crawl space. It’s more than just a battery; it’s a secondary, fully independent pump that sits right next to your primary one. This backup pump has its own float switch and runs on a deep-cycle marine battery, so it’s ready to take over the second your main pump fails, whether from a power outage or a mechanical issue. This setup ensures continuous protection, giving you true peace of mind during the worst storms. When planning your installation, think of the backup not as an add-on, but as an essential component of your home’s defense. Proper sump pump services will always include a robust backup plan to keep your home safe and dry, no matter what.
How to Stay Safe in Your Crawl Space
Working in a crawl space isn’t exactly a walk in the park. It’s a tight, often damp, and dark environment, which means safety has to be your top priority. Before you even think about digging a sump pit, taking a few key precautions can make the difference between a successful DIY project and a call for emergency plumbing services. From handling electricity correctly to protecting yourself from what’s in the air and checking the ground beneath you, these steps are non-negotiable. Let’s walk through what you need to do to stay safe while you work.
Always Put Electrical Safety First
Water and electricity are a dangerous combination, so getting the wiring right is critical. Your sump pump system needs two separate outlets: one for the main pump and another for its battery charger. It might be tempting to grab an extension cord to make things easier, but please don’t. Using an extension cord creates a serious fire hazard and isn’t a safe, long-term solution. If you’re not completely confident in your electrical skills, this is one area where calling a professional is the smartest move. Faulty wiring can lead to pump failure or worse, making it a risk not worth taking.
Wear the Right Gear and Get Some Air
Your crawl space can be full of dust, mold spores, and other unpleasant surprises. Always protect yourself by wearing the right safety gear. A good pair of gloves will shield your hands from sharp objects and debris, while a mask is essential for preventing you from inhaling anything harmful. Just as important is ensuring the space has adequate ventilation. Open any vents or use a fan to keep fresh air circulating. This helps clear out any stagnant air or potentially harmful gases that can accumulate in confined areas, making your work environment much safer and more pleasant.
Keep an Eye Out for Structural Problems
Before you start digging, take a good look around the crawl space. You’re looking for any red flags that could signal bigger problems, like cracks in the foundation walls or signs of existing water damage. These issues can complicate your sump pump installation and may need to be addressed first. For example, a significant crack could be the real source of your water problem, and simply installing a pump won’t fix the underlying structural issue. Identifying these problems early saves you from major headaches down the road and ensures your new pump can do its job effectively.
Keeping Your Sump Pump in Top Shape
You’ve done the hard work of installing your sump pump, and your crawl space is already better for it. But the job isn’t quite finished. Just like any other important appliance in your home, your sump pump needs a little attention to ensure it’s ready to work when you need it most. A few simple tests and a consistent maintenance routine can mean the difference between a dry crawl space and a water-logged disaster.
Think of it as a small investment of your time to protect your much larger investment: your home. Regular checks help you catch potential issues, like a clogged line or a faulty switch, before the next big Detroit downpour. By testing your pump right after installation and keeping up with seasonal maintenance, you can feel confident that your system is prepared to handle whatever Mother Nature throws its way. These next steps are simple, straightforward, and absolutely essential for keeping your crawl space dry and your home protected for years to come.
How to Run Your First Test
Before you pack up your tools, it’s crucial to run one final check to make sure everything is working perfectly. This initial test confirms that the pump, switch, and discharge line are all connected and operating as a team. The easiest way to do this is by slowly pouring a few gallons of water into the sump pit. Watch to see if the float switch rises with the water level and activates the pump. The pump should turn on, drain the water, and shut off automatically. This simple step gives you immediate peace of mind that your installation was a success.
Create a Simple Maintenance Routine
Your sump pump is your first line of defense against water damage, so you can’t just set it and forget it. We recommend testing your pump at least twice a year—once in early spring before the heavy rains begin and again in the fall before winter sets in. Just repeat the initial test by pouring water into the basin to ensure the pump kicks on. This quick checkup helps prevent unexpected failures during a storm. If you ever feel unsure or notice something isn’t right, our team is always here to help with professional sump pump services.
Simple Seasonal Sump Pump Prep
Living in Michigan means we have to think about freezing temperatures. A frozen discharge line can block water from exiting, causing it to back up into your crawl space and potentially burn out your pump’s motor. Before winter arrives, make sure your discharge pipe is sloped downward away from your foundation to allow gravity to drain any remaining water. It’s also a good idea to clear any snow, ice, or debris that could block the end of the pipe. Taking steps to prevent the discharge line from freezing is a critical part of seasonal maintenance that protects your pump and your home.
When to Skip the DIY and Call Mr. Pipey
While tackling a sump pump installation yourself can feel empowering, some jobs are simply better left to the experts. Knowing when to step back and call a professional isn’t admitting defeat—it’s making a smart, strategic decision to protect your home and your investment. A professional installation ensures every component works together flawlessly, saving you from costly mistakes and future headaches.
At Mr. Pipey, we’ve seen it all. From tricky crawl spaces to complex electrical needs, our team has the experience to handle the toughest installations. We provide expert sump pump services that give you confidence your home is protected from water damage. If you run into any of the situations below, it’s a good sign to put down the tools and give us a call.
For Tricky or Complex Crawl Spaces
Crawl spaces can be deceptive. What looks like a straightforward area might have uneven flooring, tight corners, or existing moisture problems that complicate the installation. A sump pump placed in the wrong spot or a basin that’s improperly installed can fail to remove water effectively, leading to the very flooding you’re trying to prevent. Our team knows how to assess these unique challenges and find the optimal location for your pump. We ensure your system is set up to protect your home from moisture, pests, and potential structural damage for years to come.
When Permits or Electrical Work Are Involved
Any time you mix water and electricity, safety has to be your top priority. Sump pumps require a dedicated power source, and using extension cords is a serious fire hazard. A professional plumber understands the specific electrical requirements, including the need for separate, properly installed outlets for the pump and its battery backup. We also handle all the necessary permits to ensure your installation is fully compliant with Metro Detroit’s local codes. Don’t risk your safety—let a licensed professional manage the electrical work and give you a secure, reliable setup.
Why a Professional Install Is Worth It
Ultimately, hiring a professional is about buying peace of mind. A proper sump pump installation is a critical defense against water damage, and you want to be certain it’s done right. When you work with Mr. Pipey, you can rest easy knowing that the right pump was selected for your home, the sump pit was dug correctly, the electrical connections are safe, and the discharge pipe is routed to effectively carry water away from your foundation. As a family-owned business, we treat your home like our own and stand by our work with a 100% satisfaction guarantee.
Comparing DIY vs. Professional Costs
When you’re weighing your options, the cost is always a major factor. A DIY installation can seem like the more budget-friendly route, with total expenses for materials and tools typically landing between $300 and $600. This covers the pump, basin, piping, and any tools you might need to buy or rent. On the other hand, a professional installation will have a higher upfront cost because you’re paying for labor and expertise. However, it’s important to think about the long-term value. A professional install from a team like Mr. Pipey ensures the job is done correctly the first time, preventing costly water damage from a failed DIY attempt. It’s an investment in peace of mind and the guaranteed protection of your home.
How Long Does Installation Take?
Time is another critical resource to consider. If you’re tackling this project for the first time, be prepared to set aside a full day. A new sump pump installation can take a DIYer anywhere from four to eight hours, not including trips to the hardware store for forgotten parts. A professional, however, can typically complete a replacement in two to four hours. That efficiency comes from experience, having every necessary tool on hand, and knowing how to handle unexpected challenges. If your goal is to get your crawl space protected as quickly and effectively as possible, hiring an expert for sump pump services is often the fastest path to a job well done.
Checking for Financial Assistance and Credits
Here’s a tip that could save you some money: your local government might be willing to help. Before you begin your project, it’s worth checking with your local wastewater management office to see if they offer any rebates or financial assistance for sump pump installations. Because effective groundwater management by homeowners can reduce the strain on municipal systems, some areas provide incentives to encourage it. They may ask for a couple of quotes from licensed plumbers, but a quick phone call could lead to significant savings. It’s a simple step that many people overlook, but it can make the decision to protect your home even more affordable.
Frequently Asked Questions
Is a sump pump really necessary if my crawl space is just a little damp? Think of a sump pump as a preventative measure, not just a flood-response tool. That persistent dampness is a sign that groundwater is already making its way in. Over time, that moisture can lead to mold, wood rot, and an inviting environment for pests. A sump pump works to keep the entire area consistently dry, protecting your home’s structural health and air quality before a small issue becomes a major problem.
How long can I expect my new sump pump to last? A quality sump pump that is properly maintained can typically last for about 10 years. The actual lifespan depends on how often it runs, the quality of the pump, and whether you keep up with regular maintenance. That’s why we recommend testing it a couple of times a year—it ensures the pump is ready to work when needed and helps you catch any signs of wear and tear early on.
My crawl space doesn’t have an electrical outlet. What should I do? This is a common situation, but it’s one that requires a professional solution. Your sump pump must be plugged into a dedicated GFCI outlet for safety. Running an extension cord into a damp crawl space is a serious fire and safety hazard. The best and safest course of action is to have a licensed electrician install a proper outlet near your chosen sump pit location.
Where exactly should the discharge pipe drain the water to? The goal is to get the water as far away from your foundation as possible. The discharge pipe should run outside and terminate at least 10 feet from your house, preferably on a downward slope that allows the water to drain away naturally. You should never drain it into your septic system or public sewer lines. It’s always a good idea to check local building codes to ensure your setup is compliant.
What’s the point of a battery backup if I already have a main pump? A battery backup is your home’s insurance policy. The most intense rainstorms, the ones that put your sump pump to the test, are often the same storms that cause power outages. Without electricity, your main pump is useless. A battery backup system automatically kicks in the moment the power goes out, ensuring your crawl space stays dry when it’s most vulnerable.